

Bambu Lab 3D Printer
$459.00 – $5999.00 SGD
excl. GST · 9% added at checkout
Made to order
The easiest way into the range: compact, quiet and beginner-friendly, with full-auto calibration and 4-colour printing once you add the AMS lite. Under 48 dB in silent mode, so it's at home on any desk.
- Full-auto calibration
- 4-colour printing with AMS lite
- Under 48 dB low noise in silent mode
- Full-metal linear rails and bearings
- Vibration and flow-rate compensation
Pre-order lead time is about 10 days.
- Build volume 256 × 256 × 256 mm³
- Full-auto calibration
- Multi-colour printing with the AMS lite
- Active flow-rate compensation
- 1-click quick-swap nozzle
- Active motor noise cancelling
Ships with the upgraded heatbed cable: Kevlar reinforcement, thicker insulation, softer copper and extended strain relief. Pre-order lead time is about 10 days.
- Build volume 330 × 320 × 325 mm³
- Full-auto calibration
- 4-colour printing with the AMS lite
- 300°C nozzle, 80°C heatbed
- Servo extruder with a built-in filament cutter
- Optional blade cutting and pen drawing module
- Filament run-out, tangle and clumping detection
The heatbed tops out at 80°C, so ABS, ASA, PC and the nylons are out on this machine. Singapore units ship in the 200–240V configuration. Pre-order lead time is about 10 days.
- Enclosed body for high-temperature filament
- Set up in about 15 minutes
- Up to 16-colour printing with AMS
- Up to 20,000 mm/s² acceleration: a Benchy in 18 minutes
- Built-in camera for remote monitoring and timelapse
Pre-order lead time is about 10 days.
- Enclosed body for high-temperature filament
- Up to 16-colour printing with AMS 2 Pro
- Built-in camera for remote monitoring and timelapse
Pre-order lead time is about 10 days.
- Build volume 256 × 256 × 260 mm³
- Dual-nozzle printing
- Faster multi-colour work with cleaner support removal
- 300°C nozzle with 65°C active chamber heating
- Closed-loop servo motor extruder
- Full filament-path AI detection
Singapore units ship in the 200–240V configuration. Connecting more than two AMS units needs the 4-in-1 PTFE Adapter (FAZ013-N). Pre-order lead time is about 10 days.
- Build volume 340 × 320 × 340 mm³
- Multi-colour printing with AMS
- Nozzle up to 350°C with 65°C active chamber heating
- Closed-loop servo motor extruder
- 5 µm-resolution optical motion calibration
- Full filament-path AI detection
- Optional 10W laser and cutting module
Pre-order: Singapore units ship in the 200–240V configuration, lead time about 10 days. Connecting more than one AMS (including AMS 2 Pro and AMS HT) needs the 4-in-1 PTFE Adapter (FAZ013-N).
- Build volume 350 × 320 × 320 mm³
- Dual-nozzle multi-material printing
- Optional 10W / 40W laser and cutting module
- 5 µm-resolution optical motion calibration
- Closed-loop servo extruder
- Nozzle up to 350°C with 65°C active chamber heating
Message us and we'll confirm the laser configuration and the current lead time.
- Build volume 330 × 320 × 320 mm³
- Vortek hotend-change system up to 7 materials in one print
- Minimal purge waste on multi-colour jobs
- Up to 24-filament support with AMS units
- Nozzles up to 350°C with 65°C active chamber heating
- Closed-loop servo extruder with real-time clog detection
- 50 µm motion accuracy via the Vision Encoder
- Three-stage air filtration for engineering filaments
- Optional 10W / 40W laser and cutting module
Singapore units ship in the 200–240V configuration. Connecting more than two AMS units needs the 4-in-1 PTFE Adapter (FAZ013-N). Pre-order lead time is about 10 days.
The machine on its own. You can add four-colour printing later with a separate AMS lite.
Made to order, ships in about 7 days.
SKU · SQ0742616
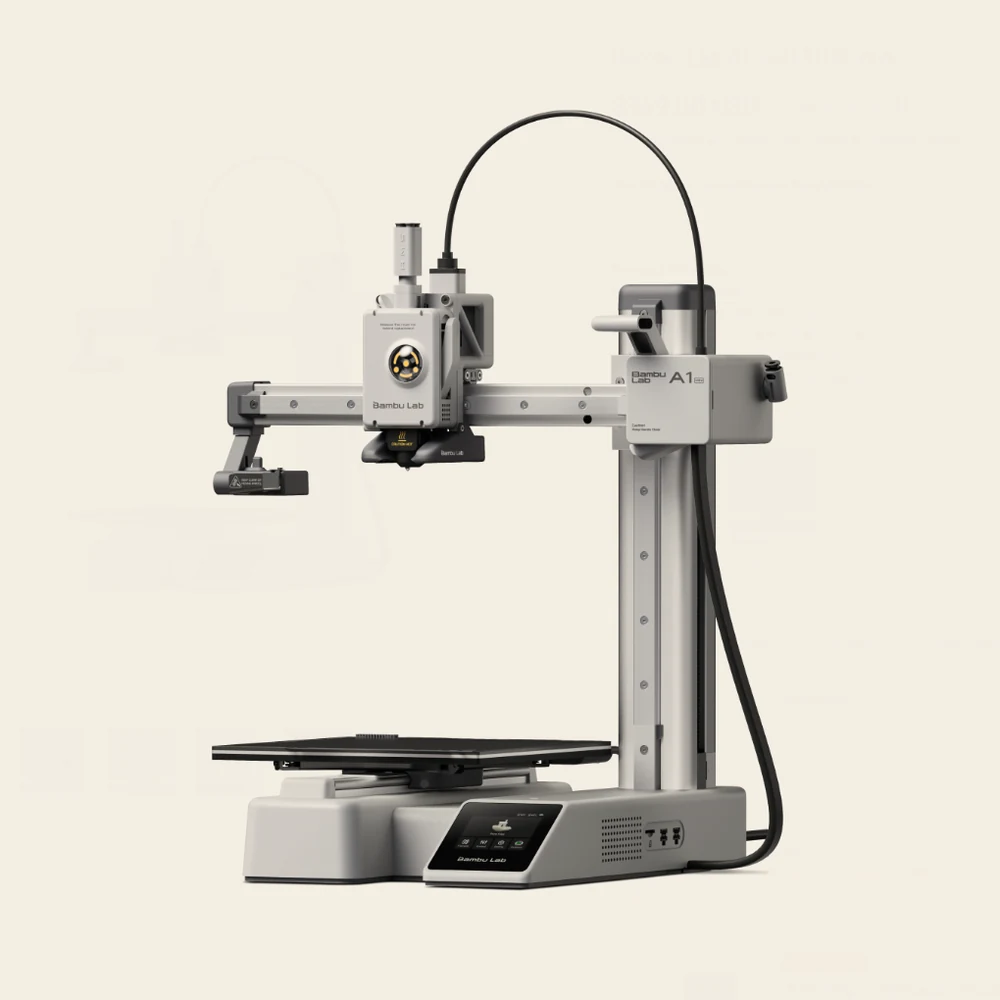
Bambu Lab A series
A1 mini
The smallest machine we sell, and the one most people should start on. It arrives assembled, it uses its own nozzle as the bed probe, and there is no levelling screw on it for you to get wrong. At 180 mm it covers miniatures, toys, small brackets and phone stands, and it doesn't cover helmets, large vases or anything you'd call a panel.
- 180 × 180 × 180mm build volume
- 300
°C max nozzle - under 48 dBSilent Mode at 1 m
- 36bed probe points, 6 × 6
- 5.5 kgnet weight
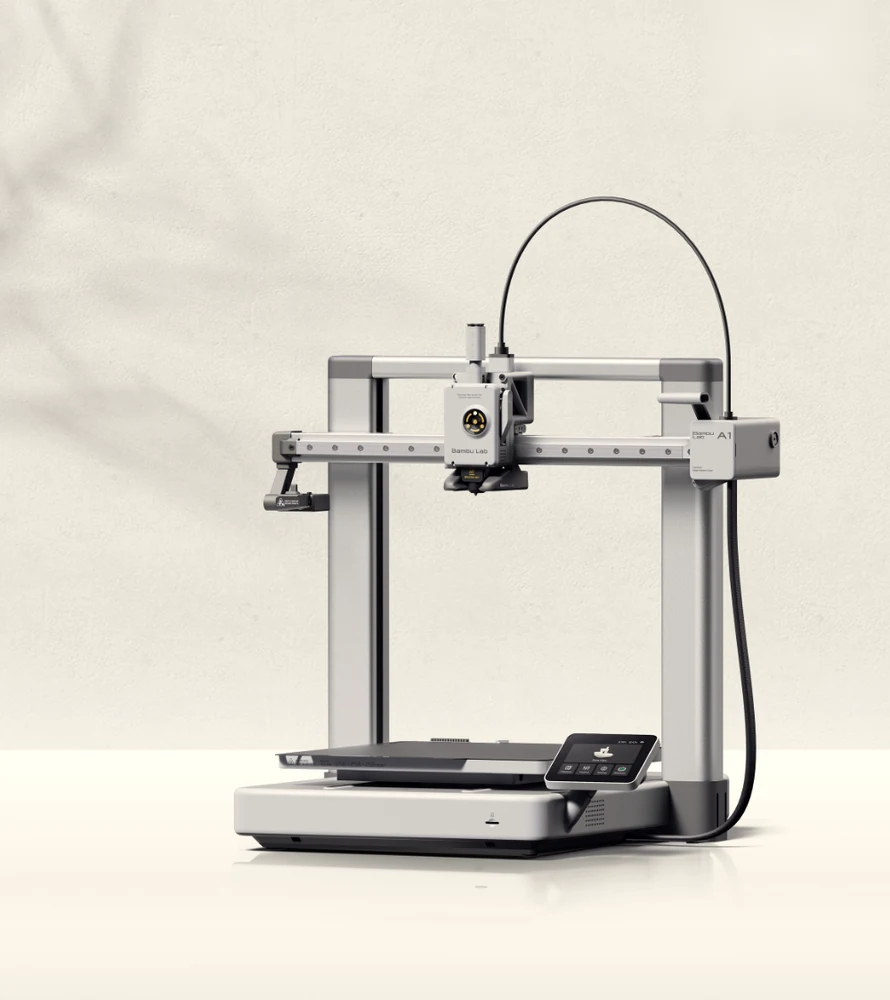
Bambu Lab A series
A1
The full-size open frame, and the machine on this page that is easiest to understand. Nothing sits behind glass, so the filament path from spool to nozzle is one line of sight and every part of it is reachable. It suits homes, classrooms and studios printing PLA, PETG and TPU all day.
- 256 × 256 × 256mm build volume
- 10,000 mm/s²max acceleration
- 49bed probe points, 7 × 7
- under 48 dBSilent Mode at 1 m
- 8.3 kgnet weight
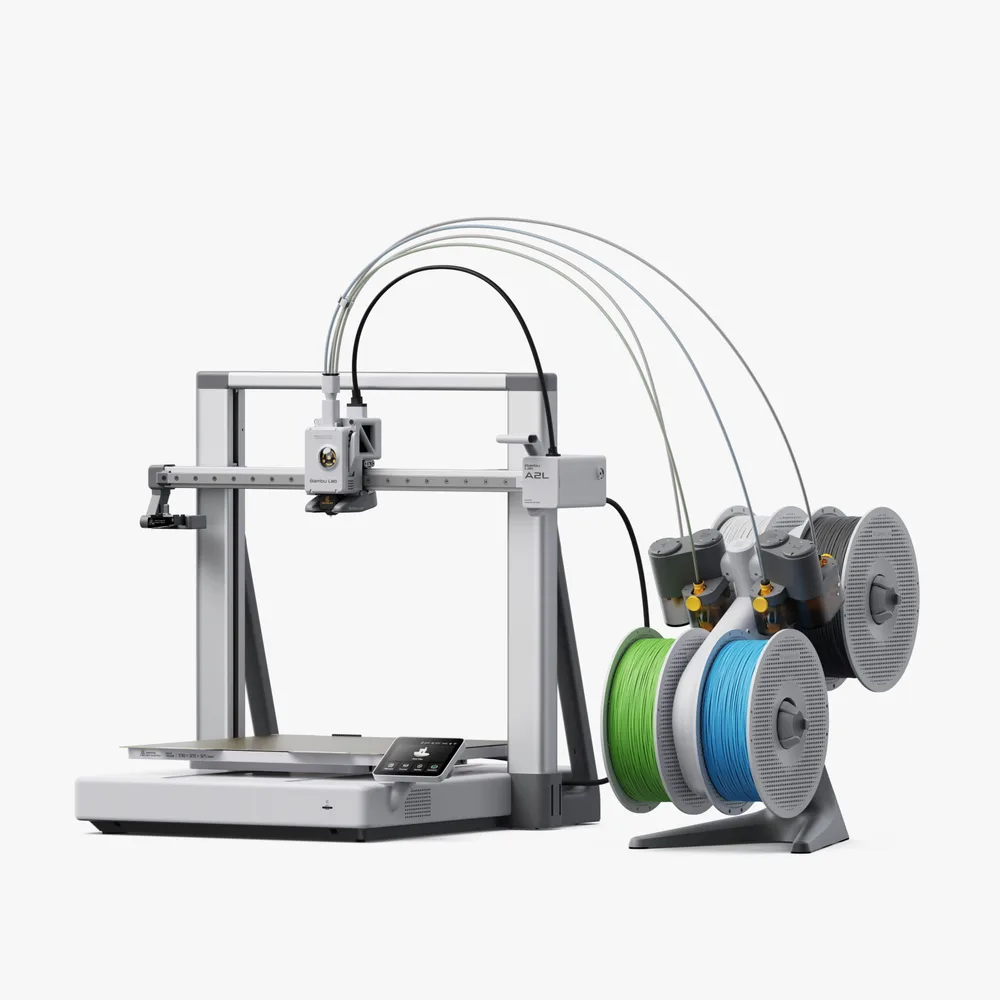
Bambu Lab A series
A2L
The biggest plate on this page with no box around it, for when your problem is size rather than materials: helmets, cosplay parts, large planters, tall vases and full-size props that won't fit an A1. Bambu caps the bed at 80°C on purpose, because holding more than that over an area this size is a heavy load on a domestic socket, so this is a PLA and PETG machine, and Bambu says as much.
- 330 × 320 × 325mm build volume
- 500 mm/smax toolhead speed
- under 49 dBSilent Mode at 1 m
- 2granular dampers
- 12.8 kgnet weight
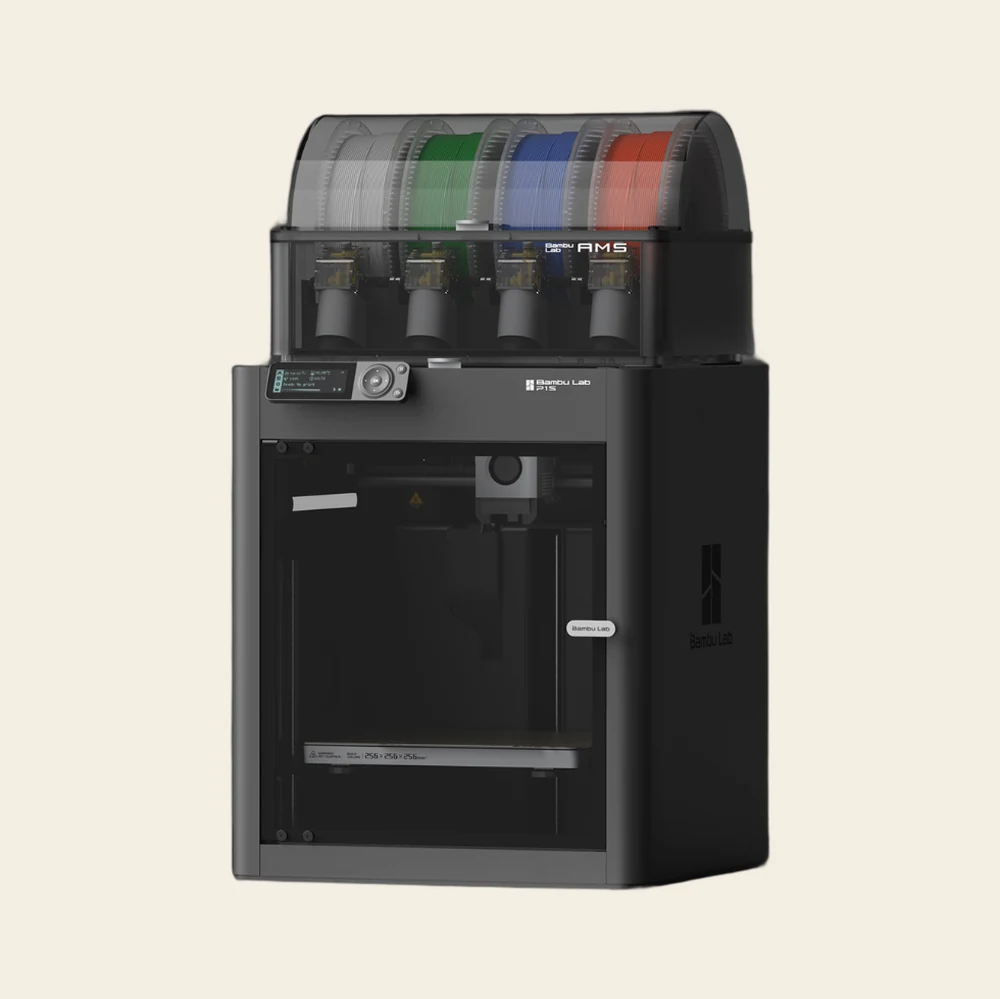
Bambu Lab P series
P1S
The value workhorse, and the plainest machine on this page. No touchscreen, just a dial and two buttons, and a hotend you change with a hex key rather than a clip. What you're paying for is the box around the part, not the fittings: it roughly doubles the material list against an A1, and it's the cheapest reliable route into high-temperature filament we sell.
- 256 × 256 × 256mm build volume
- 20,000 mm/s²max acceleration
- 18m 24sBambu's published Benchy
- 100
°C max bed - 12.95 kgnet weight
Bambu Lab P series
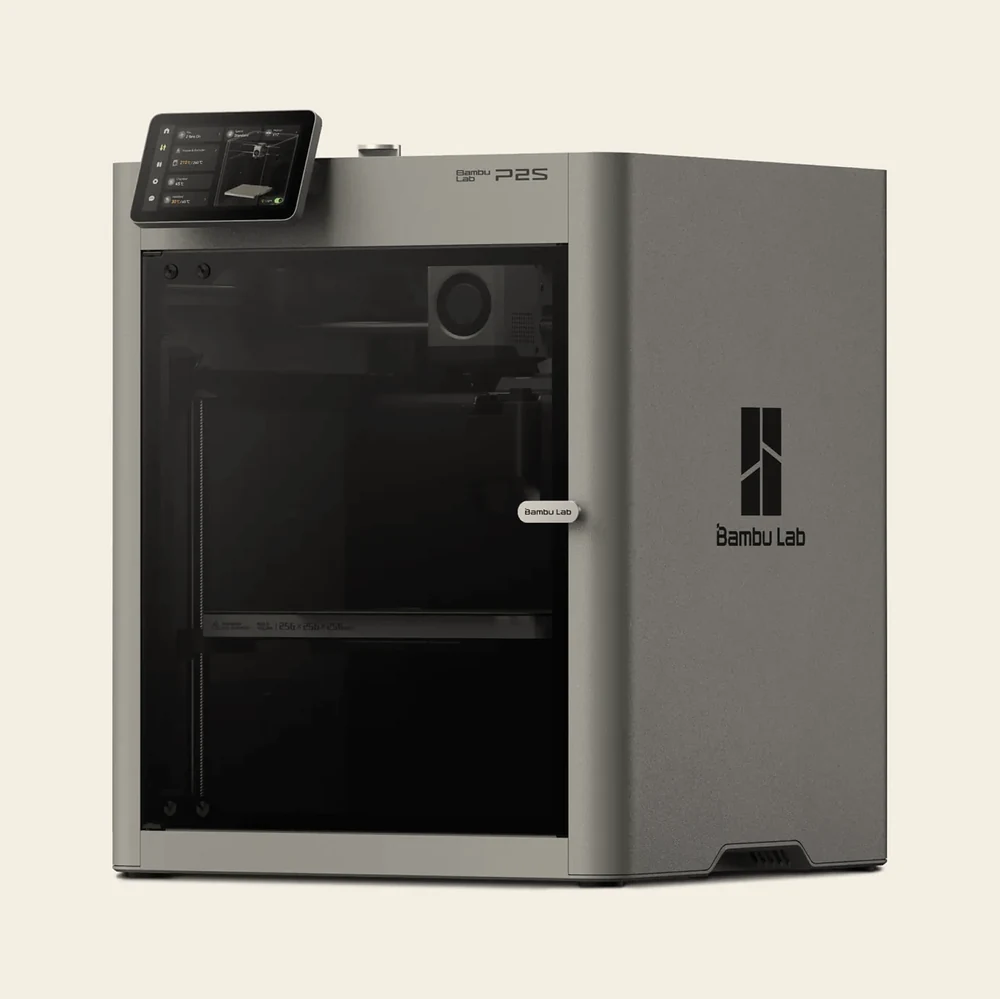
P2S
Hardened steel in the nozzle and in the extruder gears from the factory, so carbon-filled filament is in scope the day it lands. Glow, sparkle, marble, wood and the carbon-fibre PLAs are all on the list from day one, with nothing extra to buy.
- 600 mm/smax toolhead speed
- 40 mm³/smax flow, ABS at 280°C
- 8.5 kgextruder pushing force
- 20 kHzextruder sampling rate
- below 50 dBSilent Mode at 1 m
Bambu Lab X series
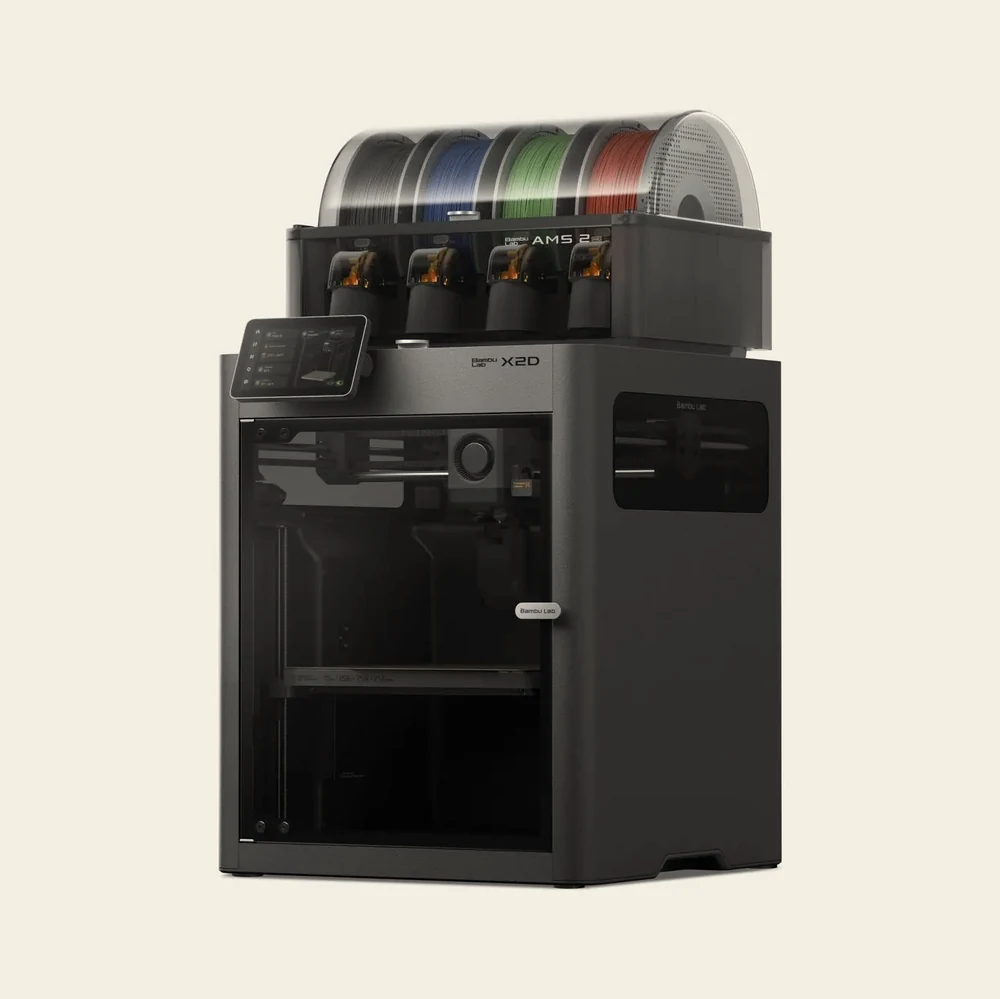
X2D
The dual-nozzle machine at the value end. The second extruder does not ride on the toolhead: it sits on the back panel and feeds through a tube, which is how you get two nozzles without a heavier head.
- 2nozzles, one at a time
- 65
°C actively heated chamber - 1,000 mm/smax toolhead speed
- 1,000,000switch cycles tested
- 120
°C max bed
Bambu Lab H series
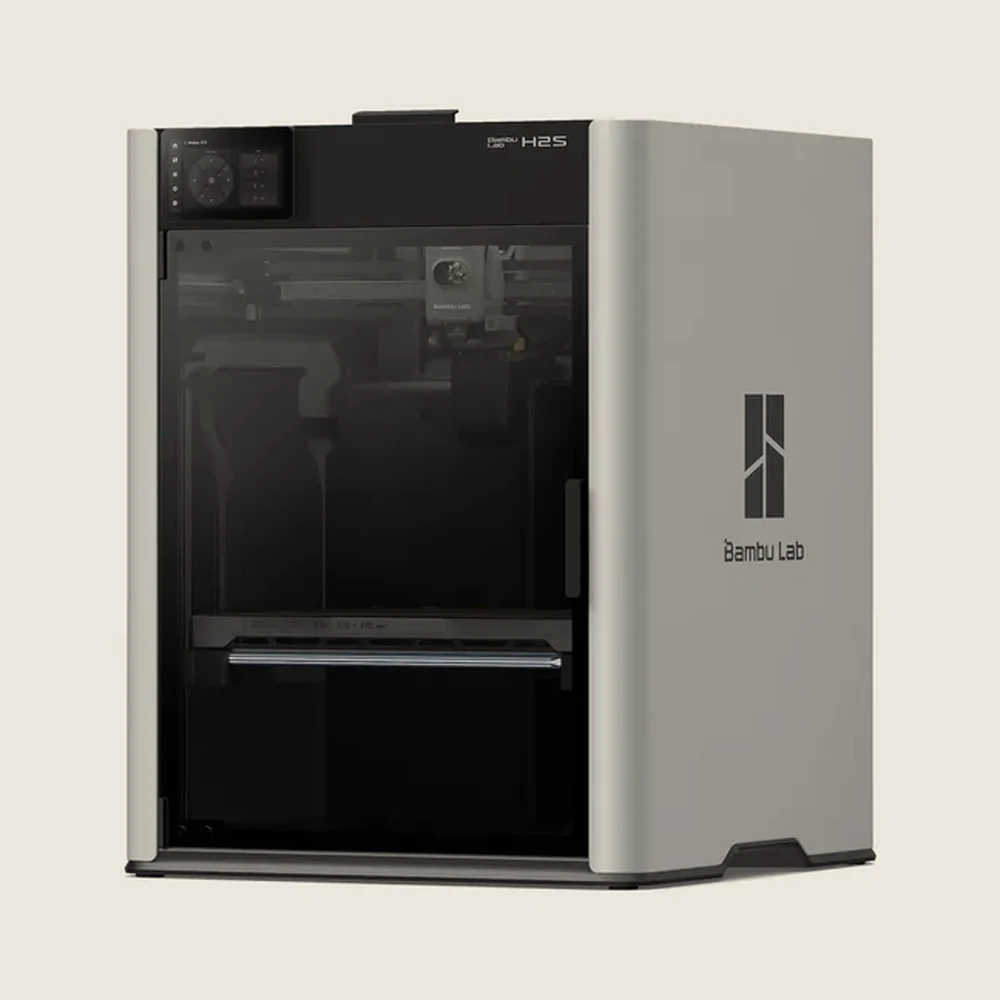
H2S
The biggest build volume on this page, with one nozzle behind it. This is what people buy when the part is simply too big for a 256 mm plate: helmets, panels, large enclosures and full-size functional parts. With an AMS it still does multi-colour work, just with a purge tower instead of a second nozzle.
- 340 × 320 × 340mm build volume
- 350
°C max nozzle - 65
°C actively heated chamber - 10 kgextruder pushing force
- 50 dBaverage, 55.6 dB peak
Bambu Lab H series
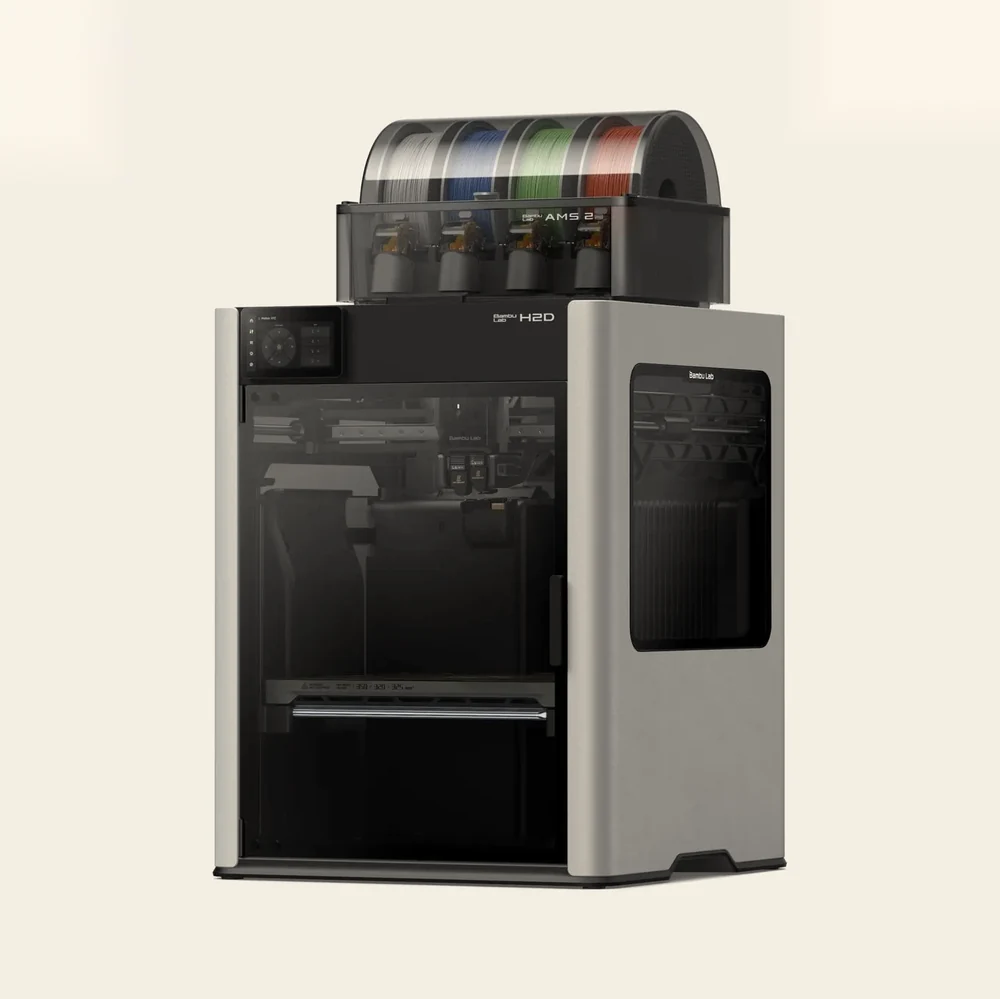
H2D
The flagship, and the machine that does most of the work in our own shop. Two nozzles that never share a melt zone, and a chamber that is heated rather than merely closed. Multi-material engineering parts, soluble supports on complex geometry, large one-piece prints and fast colour work, all on one bed.
- 350 × 320 × 320mm across both nozzles
- 350
°C max nozzle - under 25 µmdual-nozzle offset
- 36sensors, 4 cameras
- 20,000 mm/s²max acceleration
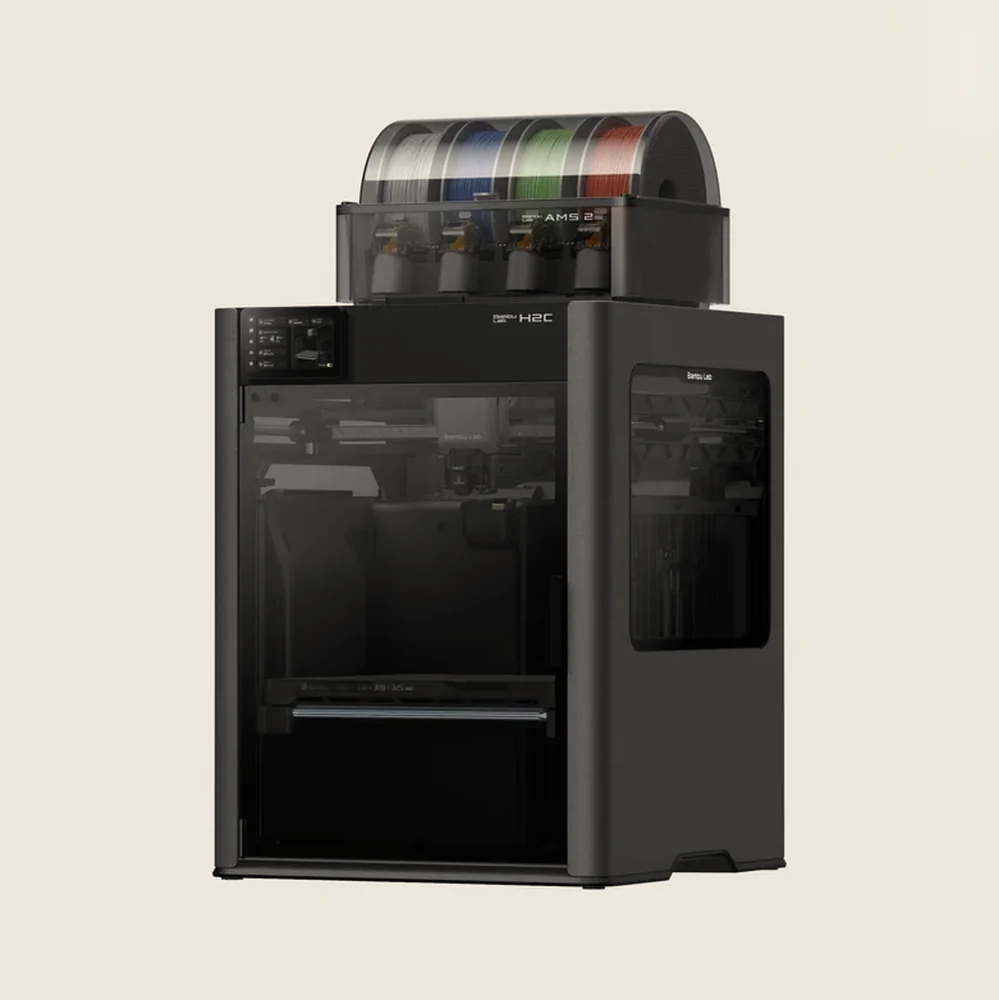
Bambu Lab H series
H2C
Six hotends the machine swaps by itself mid-print, and a seventh on the left you fit by hand. Almost nothing gets flushed clean, because almost nothing ever mixes.
- 7hotends in the system
- 8 sroom temperature to 220°C
- 330 × 320 × 320mm build volume
- 65
°C actively heated chamber - 50 dBaverage, 61 dB peak
Anatomy
Every part of an A1 mini, named
Open frame, nothing in the way. The whole filament path is in one photograph, from the spool rod on the right to the nozzle in the middle.
Toolhead
Extruder, filament hub, cutter and the part cooling fan in one white box. The round port on the front cover is a clear window, and the extruder sits right behind it, hardened steel gears and all. The part cooling fan on this machine is a blower deeper inside the head rather than the thing you're looking at, and the cutter beside the gears snips the filament for every colour change.
Hotend and nozzle
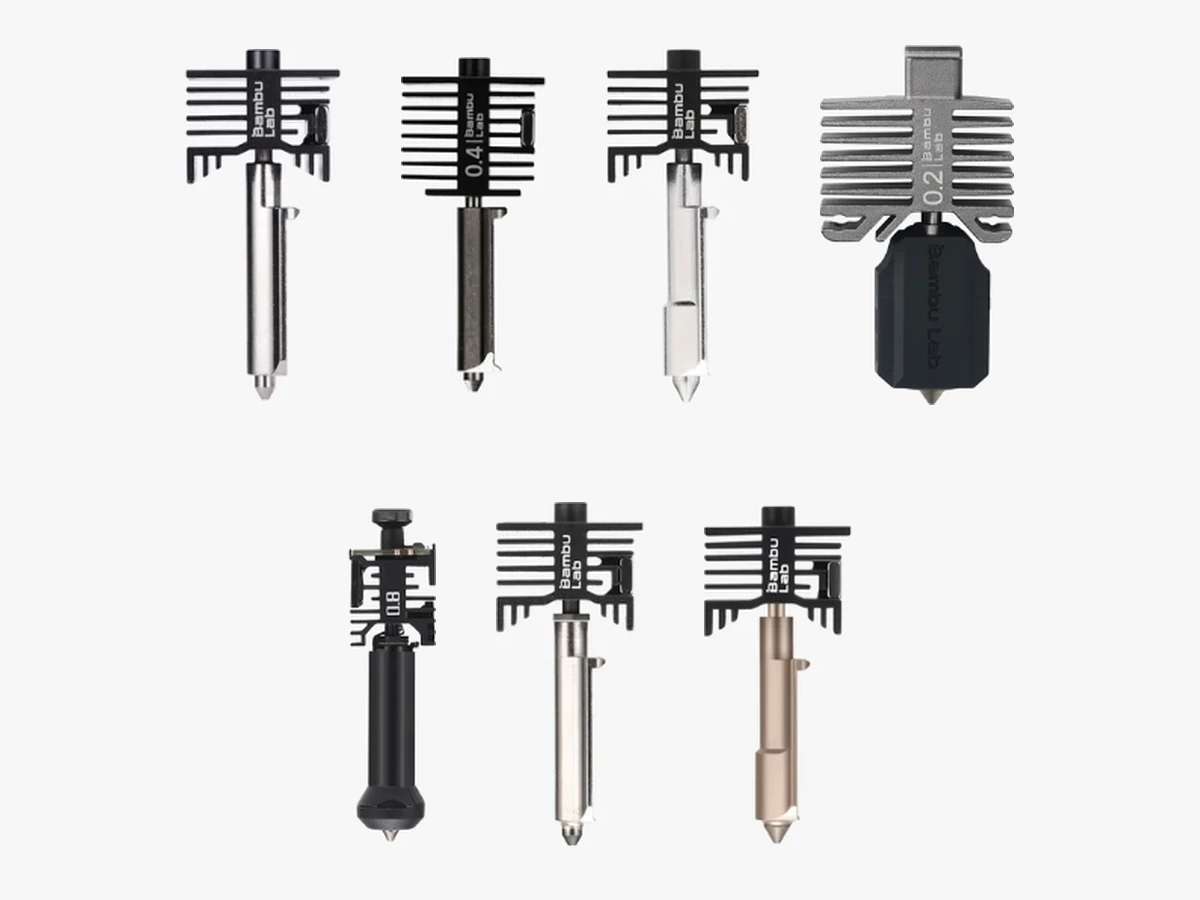
Nozzle, heat break and heat sink are one part that comes off on a clip, cold, with nothing to unplug. It runs to 300°C, and 0.2, 0.6 and 0.8 mm are available if you want finer detail or fatter walls.
X-axis rail
One linear rail with the toolhead on a slider. The whole beam climbs the tower for Z, so left to right is the only thing moving up here.
Heated bed and plate
A magnetic bed that doubles as the Y axis, sliding front to back on its own rail, with a textured PEI plate that lifts straight off. It stops at 80°C, and that is the number that keeps ABS and ASA off this machine's list.
Touchscreen
2.4 in, 320 × 240, set into the front of the base and angled up at you. Filament, prepare, control and calibration all live here, so you can run the machine without a computer at all.
Spool holder
A plain rod off the tower for a standard spool. The frame is open, so this is where Singapore humidity gets you: a spool left up here for a week prints worse than one out of a dry box.
Filament path
The black loop over the top is the PTFE tube and the toolhead loom running together, and this is where they land on the head. An AMS lite talks to the machine the same way, four tubes into the filament hub instead of one.
Z tower
One aluminium post carrying the beam off a single side, with the lead screw running up inside it. The whole machine is 347 × 315 × 365 mm, which is what one upright instead of two buys you.
Anatomy
Every part of an A1, named
Open frame, nothing in the way. The whole filament path sits in one photograph, from the spool at the top right down to the nozzle in the middle.
Toolhead
Extruder motor, filament hub, cutter and the part cooling fan, all in one white box. The fan is a 5015 centrifugal unit with two opposing outlets, so cooling air reaches the nozzle from both sides instead of one.
Hotend and nozzle
Nozzle, heat break and heat sink are a single part that comes off on a clip, cold, with nothing to unplug. It runs to 300°C, and 0.2, 0.6 and 0.8 mm are available if you want finer detail or fatter walls.
X-axis rail
One high-precision linear rail with the toolhead on a slider. The whole beam climbs the towers for Z, so left to right is the only thing moving up here.
Heated bed and plate
A magnetic bed to 100°C that doubles as the Y axis, sliding front to back on its own rail. The textured PEI plate on top lifts straight off, and the same plate fits the next A1 you buy.
Nozzle wiper
The little comb of silicone fingers on the back edge of the bed. Every job starts with a coarse wipe across it and then a fine wipe where the nozzle drops 1 to 2 mm onto the plate, which is why there is a worn patch there and why it is nothing to worry about.
Touchscreen
3.5 in, 320 × 240, angled up at you on the front right corner. Filament, prepare, control and calibration all live here, so you can run the machine without a computer at all.
Spool holder
A plain rod at the top of the frame for a standard spool. Because the frame is open, this is where Singapore humidity gets you: a spool left up here for a week prints worse than one out of a dry box.
Filament path
The black loop over the top is the PTFE tube and the toolhead loom running together from spool to head, and this is the guide they land on. An AMS lite talks to the machine the same way, four tubes into the filament hub instead of one.
Z tower
Two aluminium posts, two lead screws, two linear rods and one stepper, with a belt tying the screws together so both sides climb at the same rate. The belt has a quick tensioner and the printer watches its tension in software.
Anatomy
Every part of an A2L, named
The same open frame as the A1, scaled up and braced. Nothing is behind glass, which is the point of a machine built to print things bigger than itself.
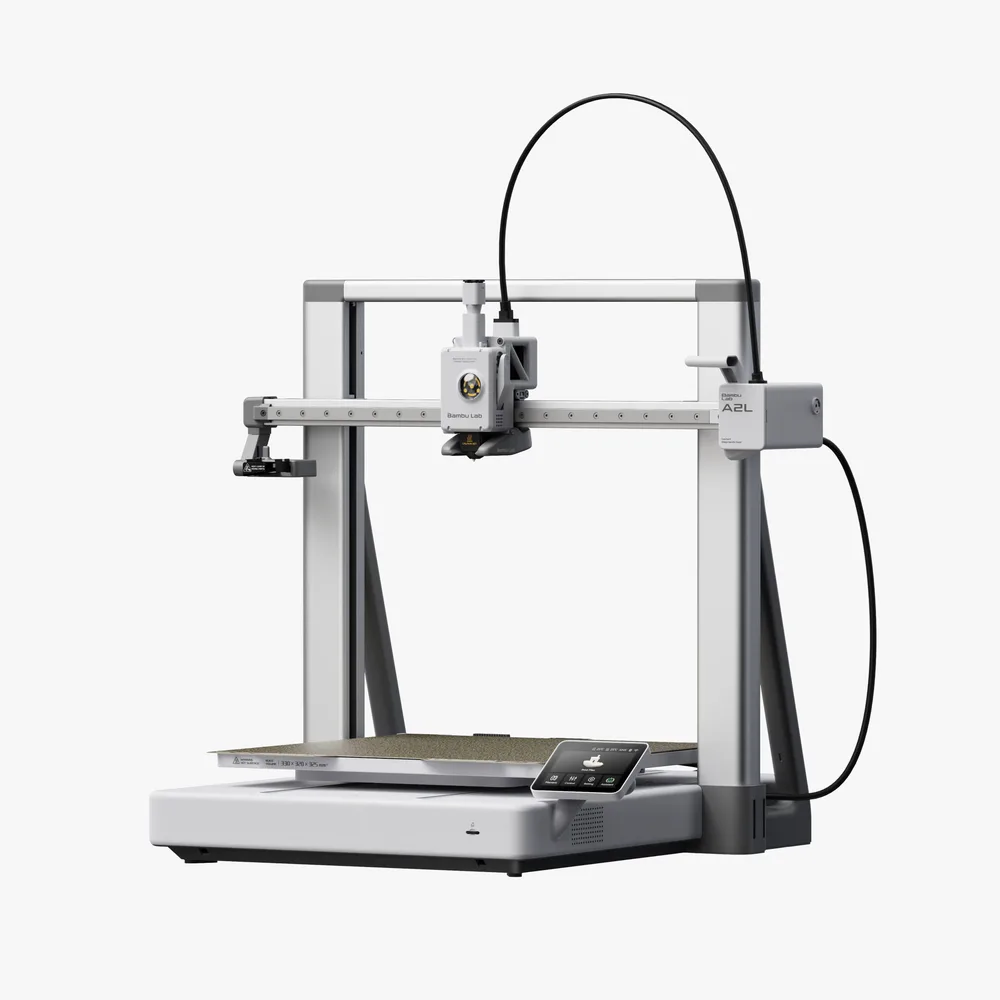
Toolhead
Extruder, filament hub, cutter and the part cooling fan in one box, riding a slider on the beam. Before every job the machine measures how this filament actually flows through this nozzle today and builds a model of the whole extrusion path from it.
Hotend and nozzle
The same clip-in hotend as the rest of the A series: one part, off cold, nothing to unplug. 0.4 mm stainless steel is fitted, and 0.2, 0.6 and 0.8 mm are available.
X-axis rail
A linear rail carrying the toolhead left to right, with the whole beam climbing the frame for Z. Belts are 1.5GT on X and Y and 2GT on Z, which is Bambu's own answer for a gantry this wide.
Gantry and granular dampers
Two sealed chambers packed with fine particles sit inside the gantry and turn frame resonance into countless tiny collisions. Shake it by hand and you will hear them rustle. That is normal and nothing is loose.
Heated bed and plate
A textured PEI plate on a bed that doubles as the Y axis. It stops at 80°C, which is why Bambu points ABS and ASA at the enclosed machines instead.
Touchscreen
3.5 in, 240 × 320, angled up at you at the front right where the moving bed clears it. There is no built-in storage on this machine at all, so the micro SD card stays in to send or start a job.
Spool holder
A rod at the top right for a single standard spool, fed to the head through a 975 mm PTFE tube. Add an AMS lite on its own stand and you can chain up to four AMS units behind it for 19 colours.
Frame and braces
The uprights and the diagonal braces behind them. Bambu is blunt about this machine: the bed is heavy and it moves constantly at speed, so keeping that out of the part is most of what the frame is for.
Anatomy
Every part of a P1S, named
A black machine behind smoked glass, so the chamber does not give itself up at a glance. Most of this machine's story is on the outside anyway: the closed box is the product.
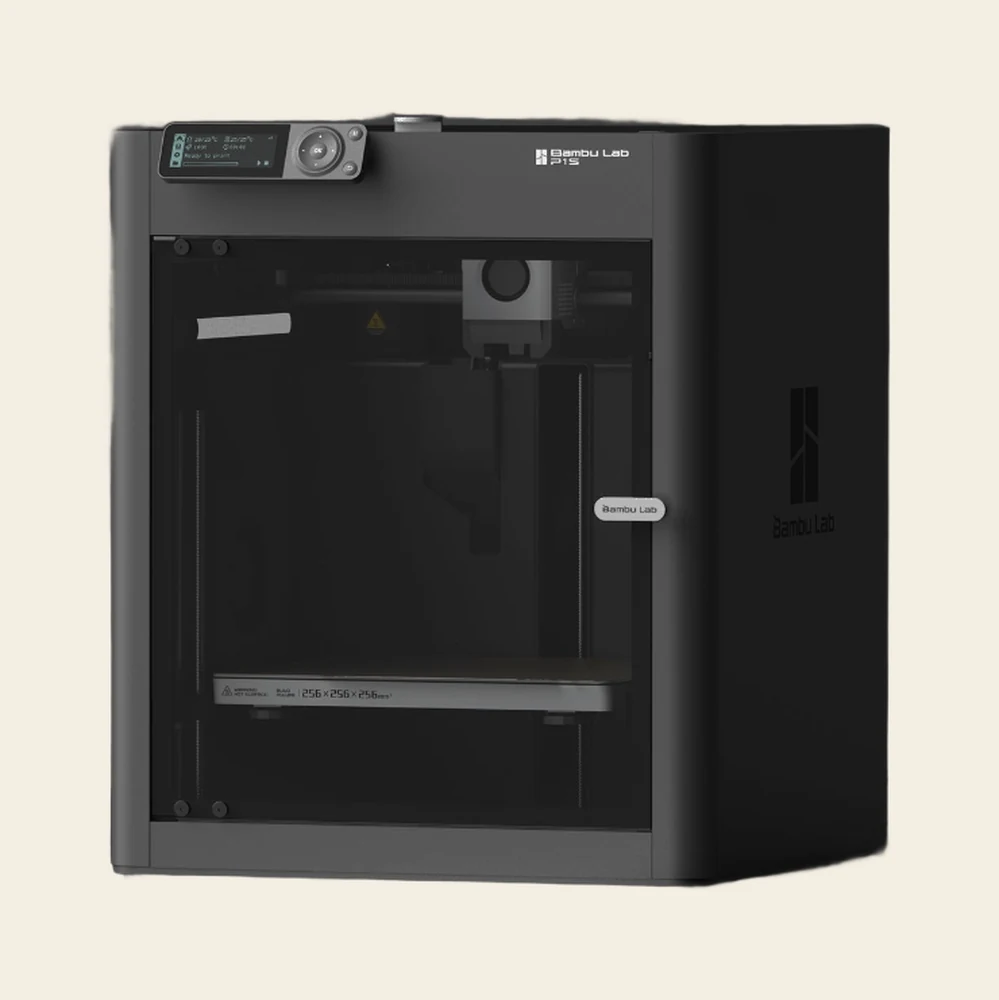
Screen
2.7 in, 192 × 64, and the only machine on this page without a touchscreen. Nozzle and bed temperature, the job state and a progress bar, and everything else happens on the dial beside it.
Control dial
A five-way jog ring with an OK in the middle and two buttons. Load and unload, speed mode and starting a job off the card all live here, and it does not care whether your hands are clean.
Toolhead
The block on the beam carries the extruder, and the part cooling fan sits on the inside of the front cover, so that round opening looks straight at the blower. This is CoreXY, so both motors stay bolted to the frame and the only mass moving in X and Y is the head.
Hotend and nozzle
0.4 mm stainless steel from the factory, with 0.2, 0.6 and 0.8 mm available, and a spare hotend already in the carton. Worth knowing before you buy: this is the one machine here where changing it is a hex key job rather than a clip.
Z lead screws
The thin vertical threads at each side of the chamber. Three of them off one stepper through a belt carry the whole gantry up, so the bed never moves in Z and a tall part stays where you put it.
Heated bed
The bright strip is the front edge, marked 256 × 256 × 256 mm with a hot surface warning beside it. Bambu Studio caps the printable height at 250 mm by default to keep the toolhead off the bed.
Front door
Tempered glass on a handle, and a fully closed chamber behind it. That closed box is the whole difference between this and an open frame: warm still air, which is what stops ABS and ASA peeling off the plate at the corners.
Enclosure
Closed sides, a closed top and an activated carbon filter in the back for the smell you get off ABS. There is a chamber regulator fan and an auxiliary part cooling fan in here too, neither of which an open-frame machine has.
Anatomy
Every part of an X2D, named
Two nozzles on one head, and a chamber the machine heats rather than merely closes. Both sit behind tinted glass, so look for the parts rather than expecting them to jump out at you.
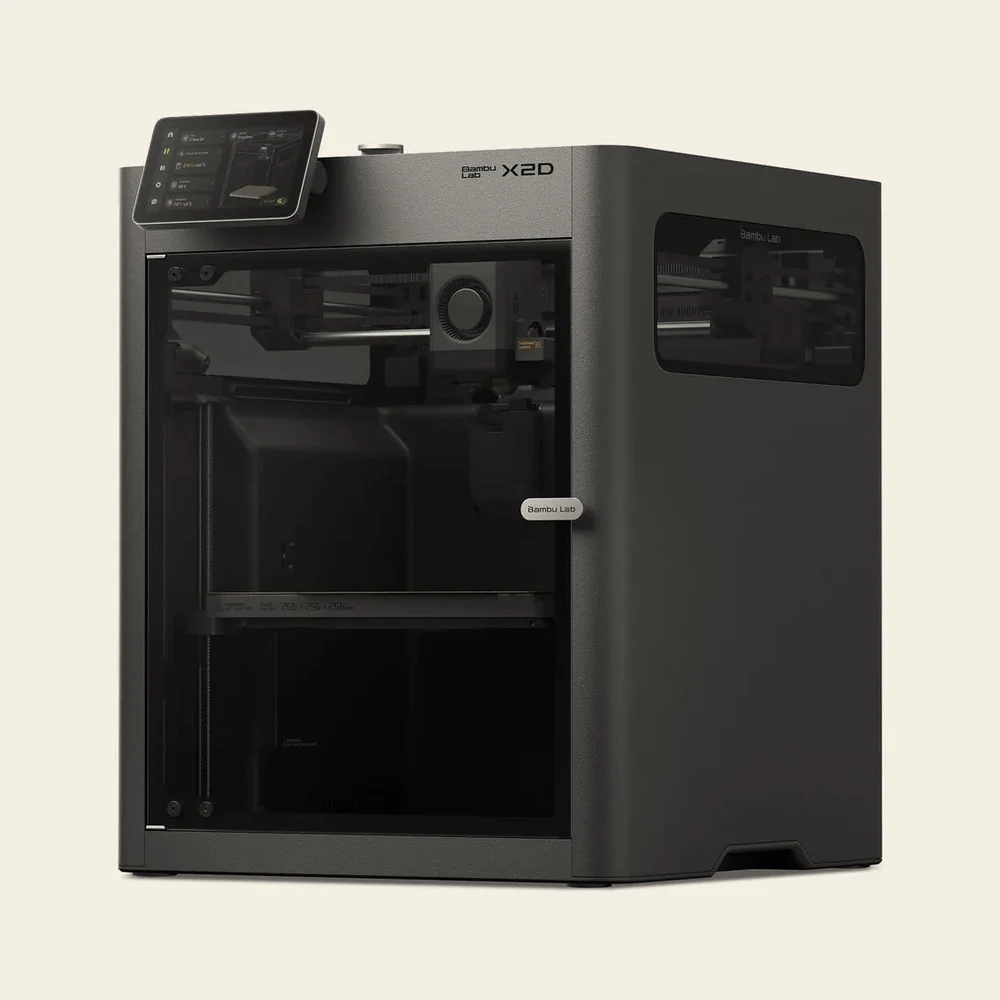
Touchscreen
5 in, 1280 × 720, on a panel angled up at you from the front left corner. Jog the axes, set the chamber, start a job off the USB port, no computer involved.
X-axis rail
The polished bar crossing the chamber. Both motors stay on the frame and each pulls its own belt, so the only mass moving in X and Y is the head, and that is what buys 1,000 mm/s and 20,000 mm/s².
Dual-nozzle toolhead
The pale block with the round fan in it. Both nozzles ride here, but the second extruder does not: it sits on the back panel and feeds this head through a PTFE tube, which is how the head stays light enough to keep the full 256 mm of plate.
Z lead screw
The thin thread standing at the side of the chamber. The gantry climbs it, so the bed never moves in Z and the part stays flat on the plate for the whole job.
Heated bed
256 × 256 mm of printable area, marked along the front edge, and the bed goes to 120°C. That last figure is what puts PC and the nylons in scope on a machine this size.
Front door
Tempered glass on a handle, and a door sensor on the spec sheet, so the machine knows when you have opened it. There is a Purify Air At Print End option that clears the chamber before you do.
Side window
A tinted window in the right side panel, looking straight in at the gantry. Useful on a machine whose chamber is actively held at 65°C, because you can watch a job without letting the heat out.
Anatomy
Every part of an H2D, named
The chamber sits behind tinted glass, so look for the parts rather than expecting them to jump out. The bright bar crossing the middle is the X rail, and everything interesting happens under it.
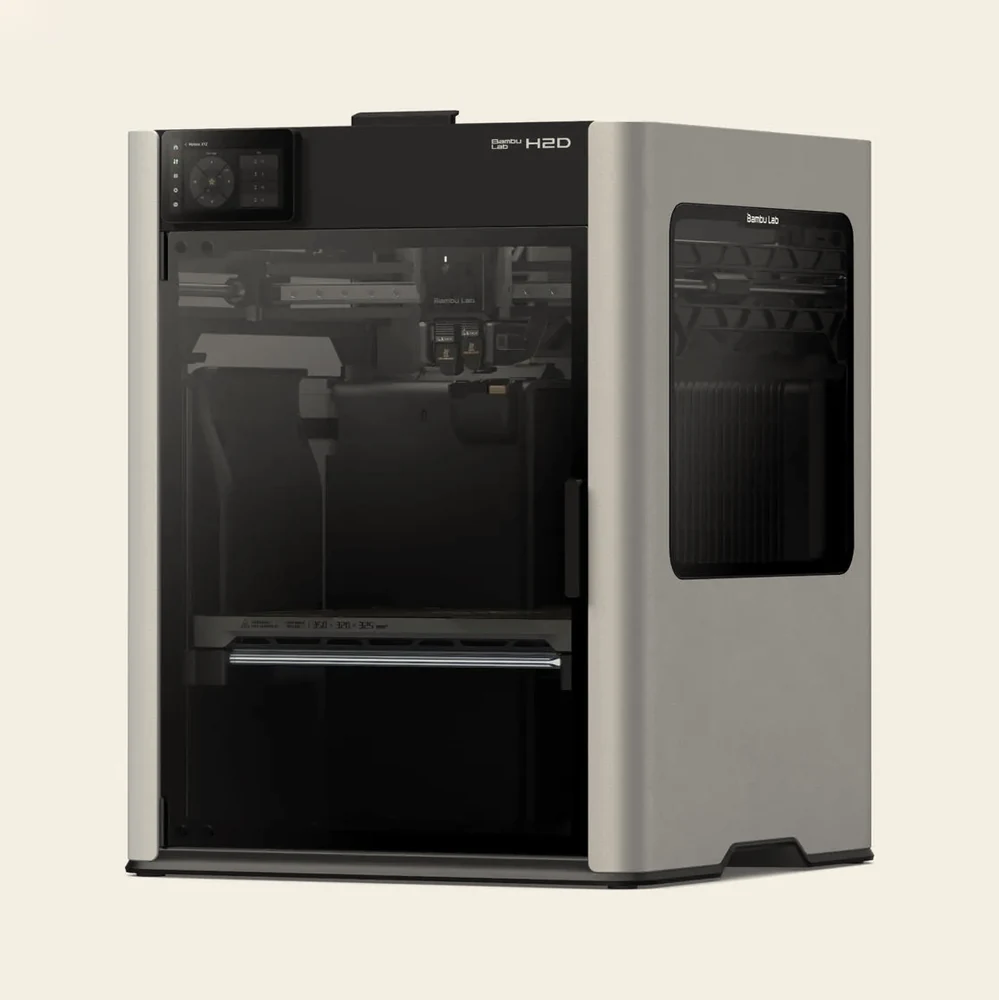
Touchscreen
5 in, 720 × 1280, with a rail of shortcut icons down its left edge. Jog the axes, set the chamber temperature, start a job off a USB stick, no computer involved.
Top cover
Lift it off at the lip you can see along the front edge. Behind it is the automatic top vent, which opens as an air inlet whenever the chamber exhaust fan runs and shuts the moment the chamber starts heating.
X-axis rail
This is CoreXY. Both motors sit on the frame and each pulls its own belt, so the only mass moving in XY is the toolhead itself. That is what buys 1,000 mm/s and 20,000 mm/s².
Dual-nozzle toolhead
One extruder motor feeds both sides. A cam swings a pair of driven wheels so the nozzle that is printing gets its filament pinched against the drive wheel, and a cutter snips the filament between extruder and hotend on every swap.
The two hotends
Side by side, each rated to 350°C, on a zirconia ceramic insulating base and a copper conducting base. The left one rides up and down, and as it moves it swings a flow blocker across to cap the idle nozzle.
Heated bed
The pale bar with the warning triangle is the front edge, and the build volume is laser-marked along it. 350 × 320 mm of surface to 120°C, with the steel wiper sheet built in that the nozzle rubs down on before every job.
Front door
Tempered glass as standard, with a laser-safety version if a laser module ever goes in. Open it mid-print and you get a warning but the job carries on. Open it mid-laser and the machine stops dead.
Side window
A tinted window set into the right side panel, on the same open-door detection as the front and the top. It is also one of the three panels you swap for green PC when you fit the laser upgrade kit.
Detail
The part rides the Y axis
On a CoreXY the part stands still and the nozzle moves. On these machines it is the other way round: the heatbed is the Y axis, sliding front to back on its own rail.
It is a lighter, simpler way to build a printer and it prints beautifully. What it cannot do is stand still. Bambu is blunt about the A2L in particular: the bed is heavy, it moves constantly at speed, and that vibration goes into whatever the machine is standing on.
So the desk matters more than it does with an enclosed machine. Put one on something solid or on the floor. The A2L goes further still: it packs both foam and silicone footpads in its accessory box, and Bambu's own fix for one that starts to walk is to swap the two front foam ones for the silicone hard pads. As a model grows the moving mass grows with it, which is a limit on confidence at height rather than a limit on height.
Detail
An open frame sets the material list
The A series prints beautifully and calibrates itself, and for PLA, PETG, TPU and PVA there is no reason to spend more. What it can't do is hold heat around the part, and that one fact decides the list.
ABS, ASA, PC and the nylons shrink as they cool. With nothing holding heat around them they lift off the plate and split between layers, so Bambu lists them as not recommended and we'd say the same. The A1 mini and the A2L also stop at an 80°C bed, below the 90 to 120°C those materials want.
So pick the other one instead when you know you'll need them. A P1S costs more but takes the material ceiling away entirely, and if the part is both large and made of ABS, that's an H series machine, not this one.
Multi-colour on this family means the AMS lite. It's A-series only, it sits on its own stand, and it doesn't dry. On an A1 mini it's the cheapest way into multi-colour we sell. If you want drying and sealed storage on an A1, an AMS 2 Pro works with the A1-series AMS Hub.
Detail
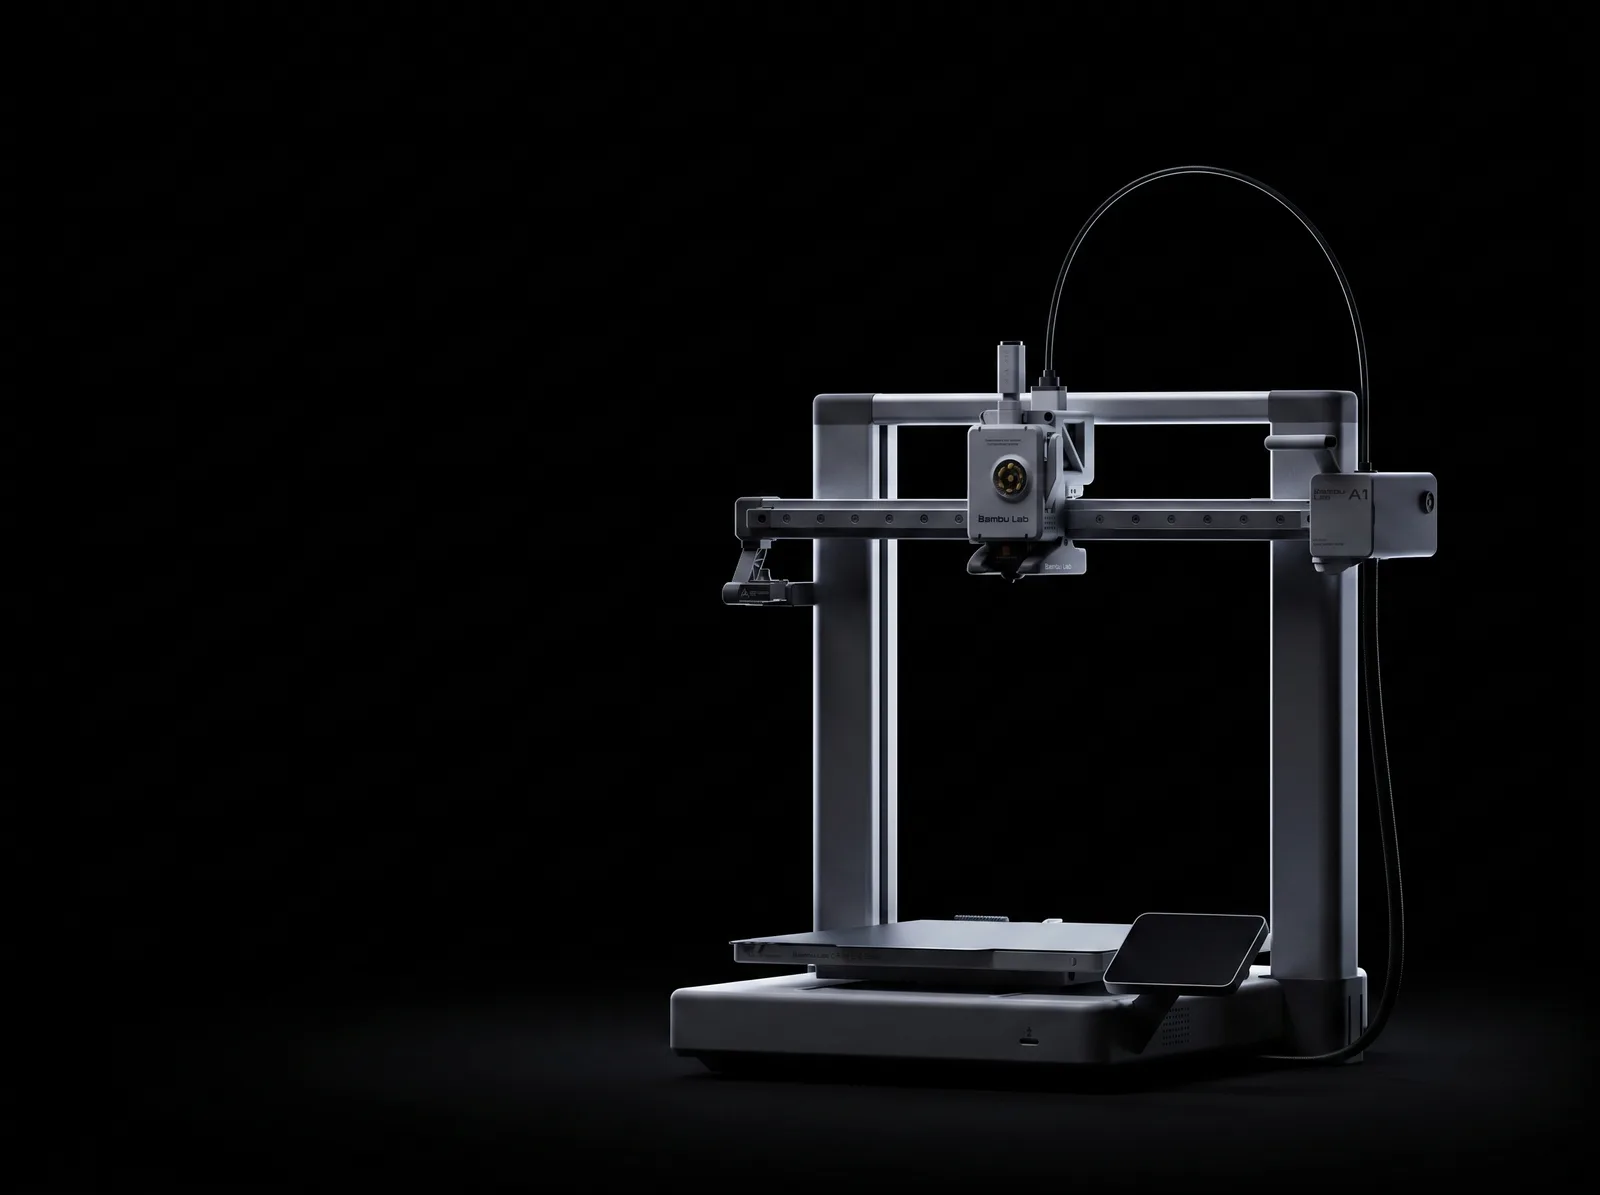
It retunes itself as the model grows
Most printers measure their own resonance once at startup and trust it for the rest of the job. A part four hundred layers tall is not the machine that was measured at layer one.
The A2L runs Adaptive Vibration Compensation, a calibration matrix that takes in both toolhead position and the shifting load on the bed and rebuilds the resonance model as the print gets taller. Bambu calls it the first multi-point calibration in the range, and it is aimed squarely at large and tall models.
Detail
0.5 mm
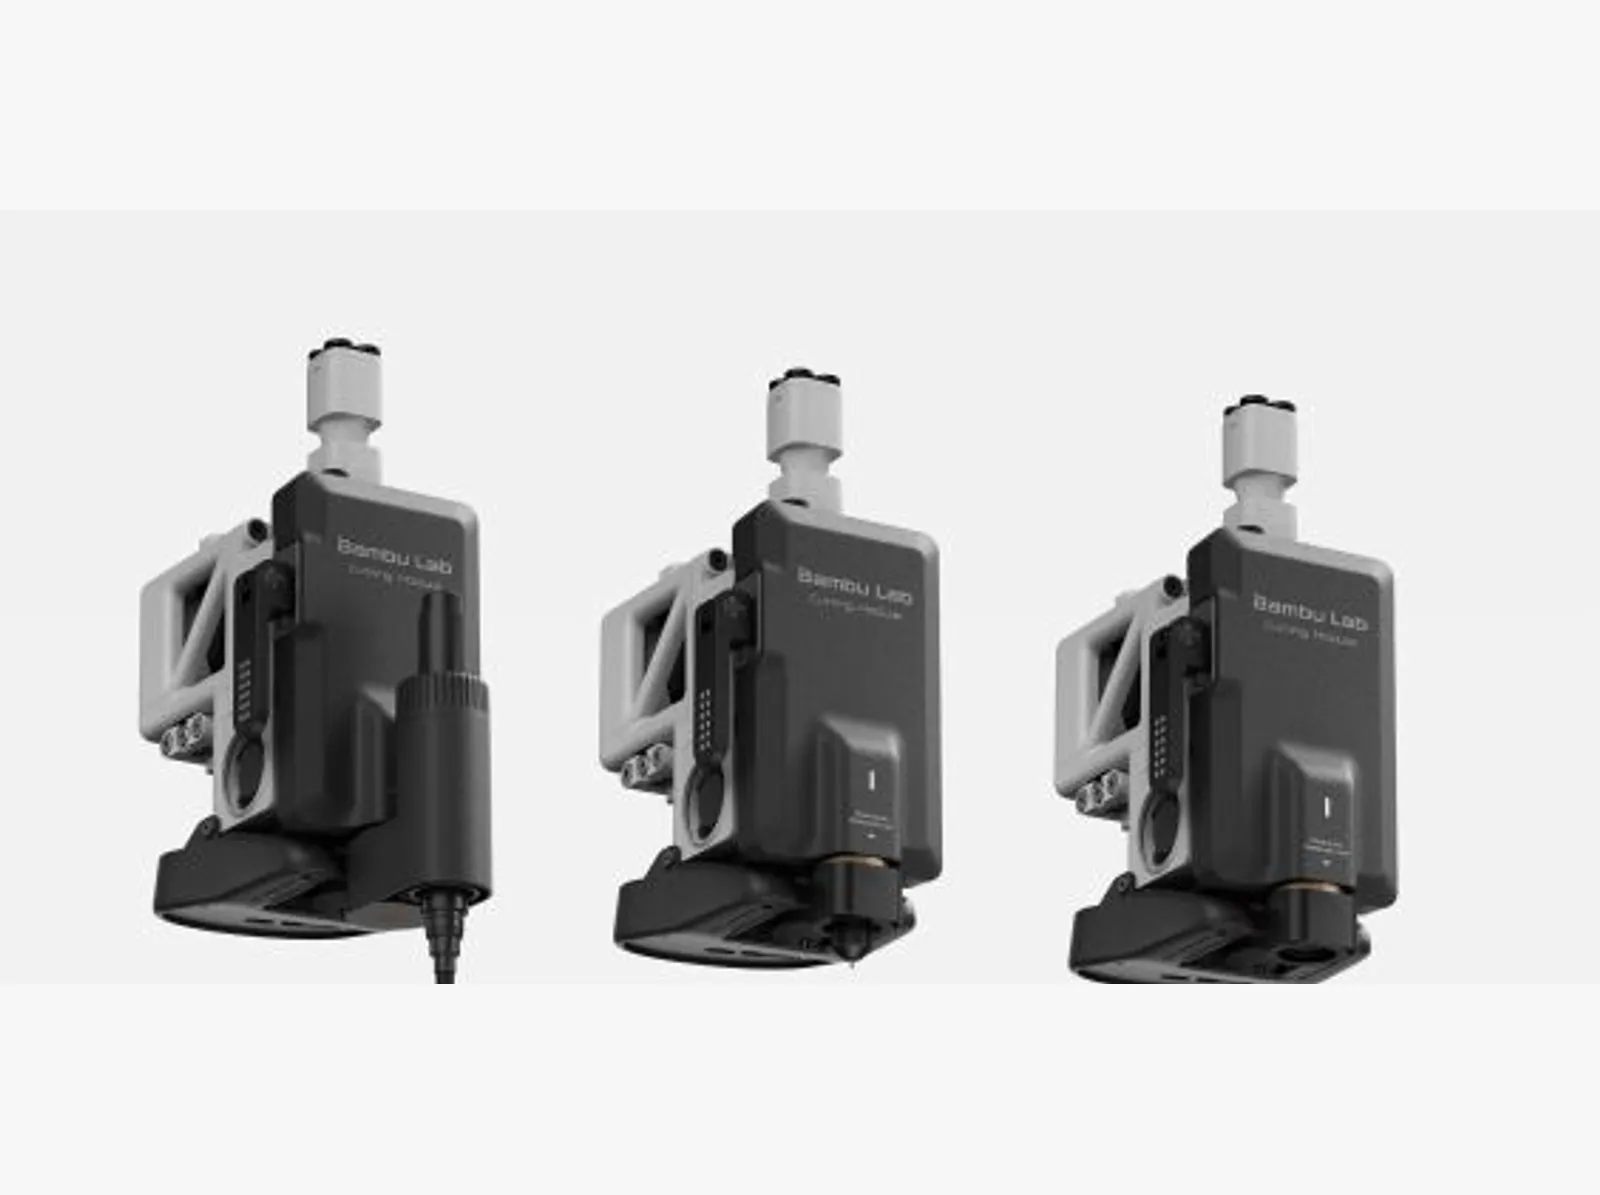
The toolhead also cuts and draws
Swap the toolhead cover for the cutting module and the A2L stops being only a printer. It cuts paper, PVC, vinyl and leather up to 0.5 mm thick over a 300 × 300 mm area.
Fit a pen instead of a blade and it plots over 300 × 255 mm, taking pens between 10.5 and 12.5 mm. It knows which blade or pen is fitted and which mat is on the bed, and it takes bitmap and vector artwork alike, so stickers, stencils and decals come off the same machine that printed the part they go on.
It's a genuinely different tool from the laser on the H series. A blade cuts thin flexible stock cleanly and quietly, with no fume extraction to plan for, and it won't cut plywood or engrave metal. The module is sold separately from both configurations on this page.
Detail
Warm, still air is the whole product
Warping is thermal shrinkage. The edges of a part cool faster than the middle, and the tension that creates pulls the corners off the plate.
Bambu ranks the materials by how badly it bites, worst first: PC, PA-CF, PA, ABS, ASA, PETG, PLA. Below about 20°C in the room it will happen to PLA and PETG too, and an aircon vent or a desk fan cooling one side of a print warps it unevenly.
A closed box keeps the whole part near the temperature where its layers are still mobile, so it shrinks as one piece instead of in fighting layers. Neither machine has a chamber heater. The P1S simply holds the heat the bed gives off; the P2S circulates that air and runs a flap-controlled switching unit that pulls cool outside air in for PLA or seals the loop for high-temperature material, which is where Bambu's 50°C chamber figure comes from. Either way it covers ABS and ASA. Nylon and the high-temperature fibre blends still want a chamber that is driven, and on this page that means an X2D or an H series.
Detail
60
More flow, if you want it
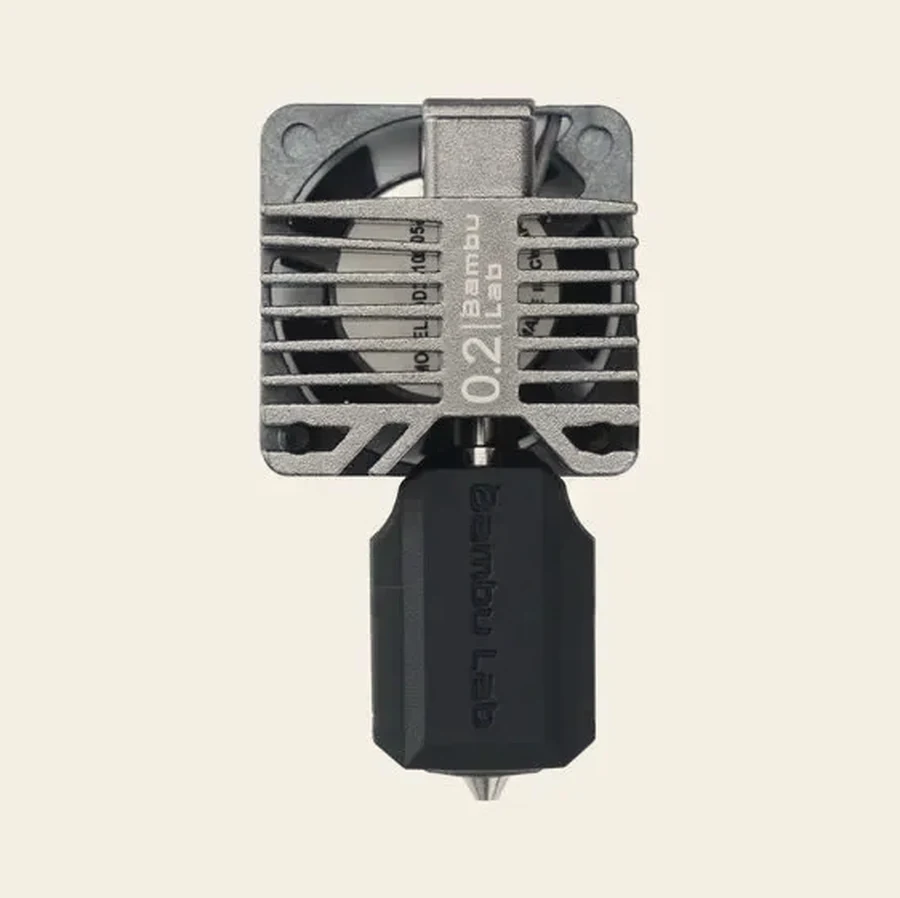
The P1 doesn't take the H2 high-flow hotend. Its upgrade is the E3D High Flow ObXidian, developed with Bambu and made for the X1C, P1P and P1S only.
About 60% more flow rate, a hardened ObXidian nozzle, and an E3DLC coating: a thin diamond-like layer applied by plasma that keeps sticky filament like PETG from balling up on the outside. 0.4 and 0.6 mm, 300°C.
As for buying one, every P1 hotend on our hotend page is the complete assembly, with the heater, thermistor, sock and fan already on the bracket, so a tired heat path comes out in one go. Bambu does make a bare metal version for people moving their own electronics across. We don't stock that one.
Detail
Sixty-five degrees, held on purpose
A PTC element and a circulation fan. The element runs at full power until the chamber reaches target, then backs off while the fan holds steady.
Look at where 65°C lands and the number stops being arbitrary. ABS softens at 94°C on the Vicat test, ASA at 106, PC at 119, PPA-CF at 232, and Bambu's recommended chamber for that group starts at 45°C and climbs from there. PLA softens at about 57, which is why a hot chamber is exactly the wrong thing for it.
So the machine switches the air between two states and the slicer picks from the filament. Cooling for PLA and TPU: chamber circulation off, auxiliary part cooling on, cool outside air pulled in whenever the exhaust runs. Heating for ABS, ASA, PC and nylon: circulation on, part cooling off, vents shut and the air going through the filter instead. Fit a laser to an H2 and a third state opens everything up again.
Detail
62.5
Two ways to upgrade the hotend
The high-flow version reshapes the melt zone so more filament touches hot metal. Bambu measures 62.5% more volumetric speed and up to 30% off a print, which is the 40 mm³/s standard figure on your spec sheet against 65 mm³/s high flow.
Tungsten carbide buys life instead of speed. It's much harder than hardened steel, so on fibre-reinforced filament it holds a round hole long after a softer nozzle has quietly opened up.
One warning from Bambu comes with the first of those: don't run carbon fibre through a 0.4 mm high-flow hotend, because a clog in one is very hard to clear. Sizes, metals and prices are on the hotend page.
Detail
10 g
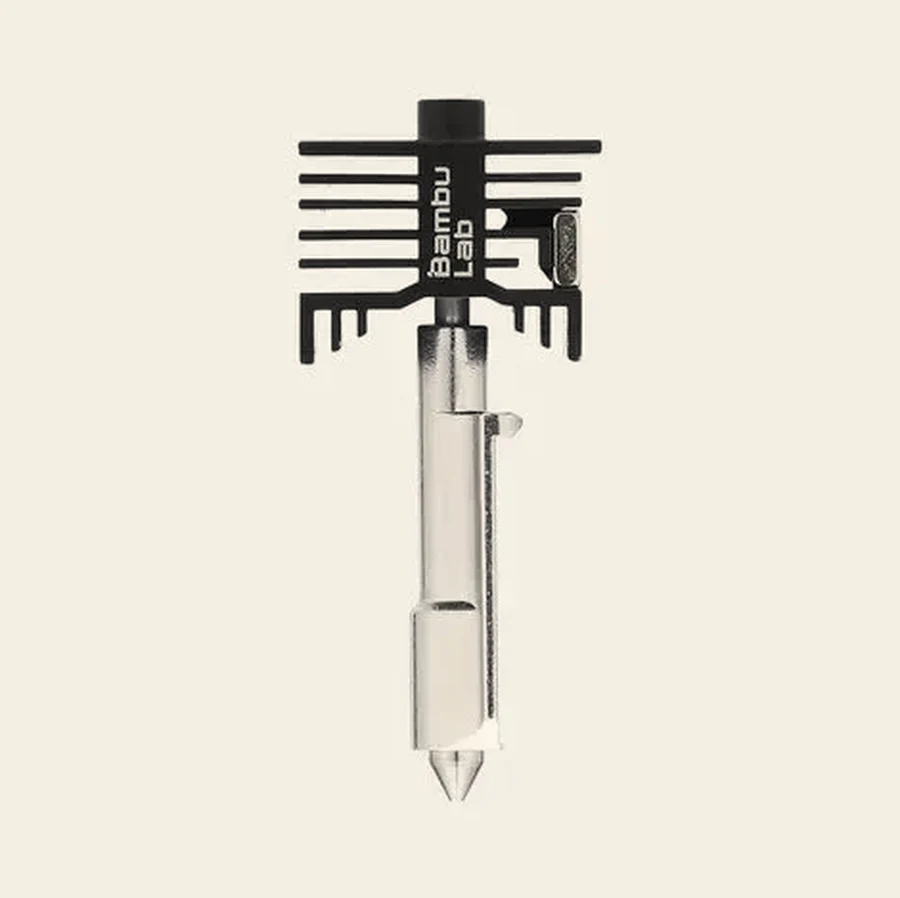
A hotend with no wires in it
The Vortek induction hotend is 20 × 15 × 56 mm and weighs 10 g, with nozzle, heat break, thermistor and a PCB in one body. There are no electrical pins on it at all.
A coil in the fixed heating assembly throws a high-frequency magnetic field at a steel sleeve inside the hotend, and the sleeve heats itself by eddy current. Temperature and filament data travel back the same contactless way, and a Hall sensor confirms the hotend is properly seated before it will heat.
Every hotend in the system runs to 350°C, in 0.2, 0.4, 0.6 and 0.8 mm, hardened or stainless, standard or high flow, and tungsten carbide fits the left hotend only.
Detail
0.025 s
Sixty millimetres is not far enough to get up to speed
Bambu's own arithmetic on the P series: 500 mm/s reached in 0.025 seconds. That works out at 20,000 mm/s², and acceleration is the number the machines are actually sold on.
A Benchy is roughly 60 mm long, and a real part is a few thousand moves that size or smaller. A toolhead crossing one spends nearly all of it speeding up and slowing down, and never touches its top speed at all.
So when you put two machines side by side, compare the acceleration. Double the top speed and that 60 mm move barely gets quicker; double the acceleration and it does. It is why the A1's speed banner quotes 10,000 mm/s² rather than a mm/s figure.
Detail
285 mm/s
The real ceiling is how fast plastic melts
Every filament carries a Max Volumetric Speed in mm³ per second, and the slicer holds the toolhead back to stay under it. Past that point the hotend simply cannot melt fast enough.
A 0.4 mm nozzle laying a 0.42 mm line at 0.2 mm layers moves about 0.084 mm³ of plastic per millimetre travelled. At 24 mm³/s, which is what a standard 0.4 mm hotend does in PLA Basic on the H2 and P2S family, that works out at roughly 285 mm/s of real printing. The arithmetic is ours, off Bambu's published flow figures.
Which makes the nozzle the lever, not the motors. A 0.2 mm nozzle manages about 2 mm³/s on anything, which is why miniatures take all night, and why multi-colour work on one is painful: purging runs at max volumetric speed too. Go the other way and a 0.6 mm nozzle buys back time on every layer of a big part.
Detail
One printer prints one colour
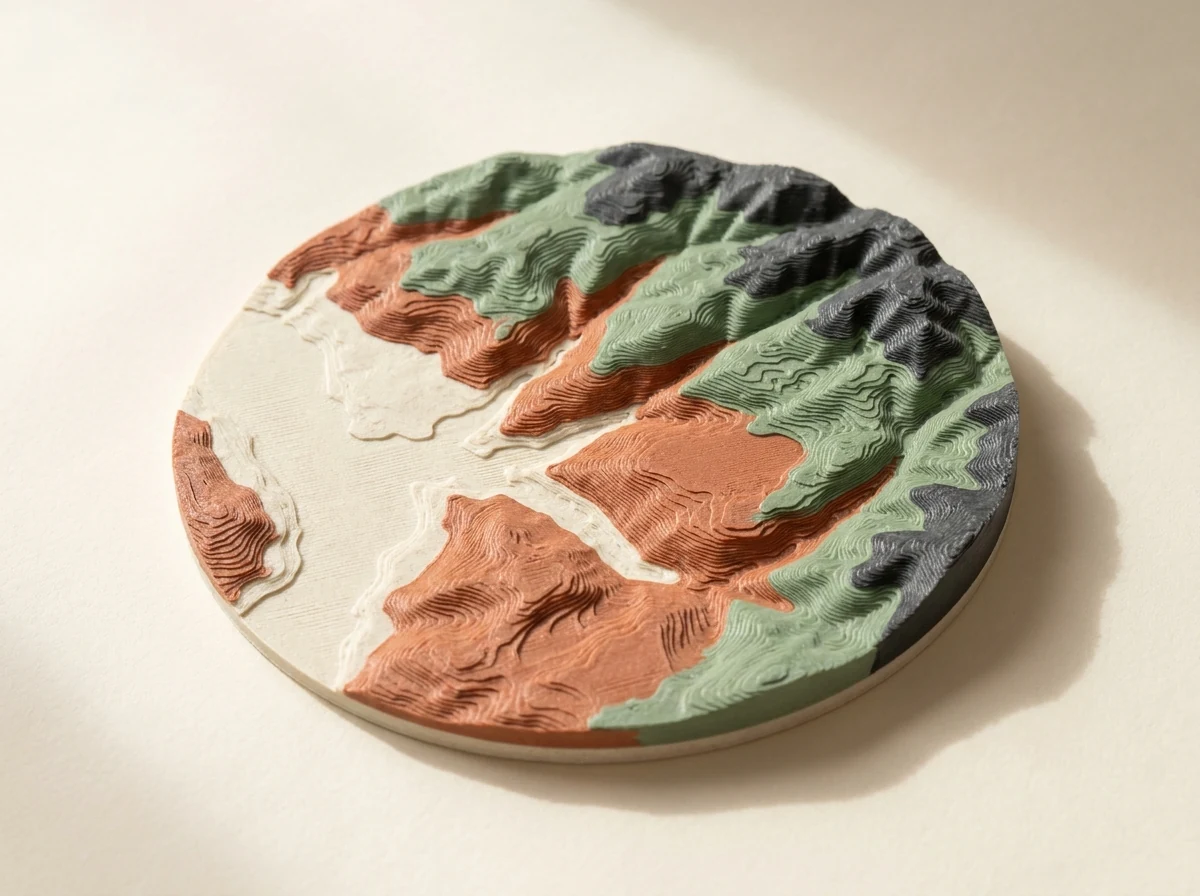
A printer on its own loads a single spool. To print more than one colour or material in the same part you need an AMS, which parks up to four spools and swaps between them mid-print.
The With AMS configurations on this page bundle the right unit with the machine, and that's cheaper than buying the two separately. If you already own the printer, the units are sold on their own on the AMS page.
Detail
83 g
Colour changes are paid for in plastic
Bambu's own worked example. A four-colour cube at 0.2 mm layers: 153 filament changes, 11 g of part, 83 g in the bin.
Every colour change does three things. It flushes the old filament out through the nozzle, wipes the tip, then primes into a sacrificial tower before the real line starts. Dark to light needs the most flushing, light to dark the least, and the prime tower has to be as tall as the highest layer that contains a change.
The levers are bigger than people expect. Moving that same cube from 0.2 mm to 0.28 mm layers cut it to 111 changes and 61 g. Laying a tall part on its side, where the colours allow it, saved almost 80% of the waste and 70% of the time on Bambu's example. Flush into infill or into supports instead of the chute and most of it stops being waste at all.
It's also the whole reason the H2C exists. Its Vortek changer swaps the hotend rather than flushing it clean, so the purge bill mostly goes away, and that's what you're paying the difference for when you put its price next to an H2D's.
Detail
The idle nozzle is capped, not just parked
Only one nozzle prints at a time, and the other sits there hot and full of molten plastic. A flow blocker slides across underneath and seals it.
The point of the whole arrangement is that two filaments never share a melt zone, so there is nothing to flush. Bambu's published X2D comparisons against a single-nozzle machine, with support material on the second nozzle: 45.76% less material and 34.34% faster on one model, 29.8% less and 64.04% faster on another. Those are Bambu Studio calculations, not weighed spools.
Soluble support is the other thing that second nozzle buys you. Load PVA on the idle side and the supports print in something that dissolves away in water, so a lattice, an internal cavity or a deep overhang comes out clean instead of being dug out with pliers. Nothing scars the surface, because the two materials never touch inside the hotend. In Singapore keep the PVA sealed and dried, because it soaks up more water than anything else we sell: 6.25% of its own weight against PLA Basic's 0.43%.
On the H2D and H2C the blocker rides a lifting rod linked to the left hotend, so pushing the rod one way lowers one nozzle and caps the other. You can read its position off the symptom: sitting slightly low it leaves a gap and the idle nozzle drools onto your print, sitting slightly high it fouls the nozzle and never gets into position at all. The X2D swaps with a gear-and-trigger mechanism inside the toolhead instead, so no extra motor rides along.
Detail
25 mm
The gap between the nozzles shapes the whole plate
The two nozzles sit 25 mm apart in X. Every number in the H2D's build volume falls out of that one fact.
The left nozzle reaches 0 to 325 mm, the right reaches 25 to 350, and the strip they share is 300 mm wide. Slice a two-colour job and Bambu Studio marks both exclusive strips on the plate preview for you.
Height is asymmetric too, and stranger. The left nozzle tops out at 320 mm and the right at 325, so a 324 mm model can only be printed by the right nozzle, wherever you put it on the bed.
Detail
532 g
The same job, three machines, three piles of waste
The same six-colour model, sliced three ways. An H2C spends 532 g on purge and prime tower. An H2D spends 3,032 g. A single-nozzle H2S spends 3,917 g.
That is the whole argument for a hotend changer, in one line. One nozzle has to flush the old colour out with the new. Two nozzles only flush within a group. Seven hotends barely flush at all, because each filament keeps its own melt zone.
Purge-Saving mode pins the prime tower at 15 mm³ a change, which takes about 30% off its weight on a four-colour Benchy and about 10% off the time on a boat with 332 colour changes. All of these are Bambu Studio estimates rather than weighed spools, and Bambu's own footnote applies: the full advantage assumes six induction hotends of the same diameter and the AMS units to feed them.
Which tells you who it's for. If you're printing to sell rather than to make, the filament this machine doesn't throw away is what pays for it. If you're not, an H2D does nearly everything it does for less.
Detail
8 g
Keep the back corner of the plate clear
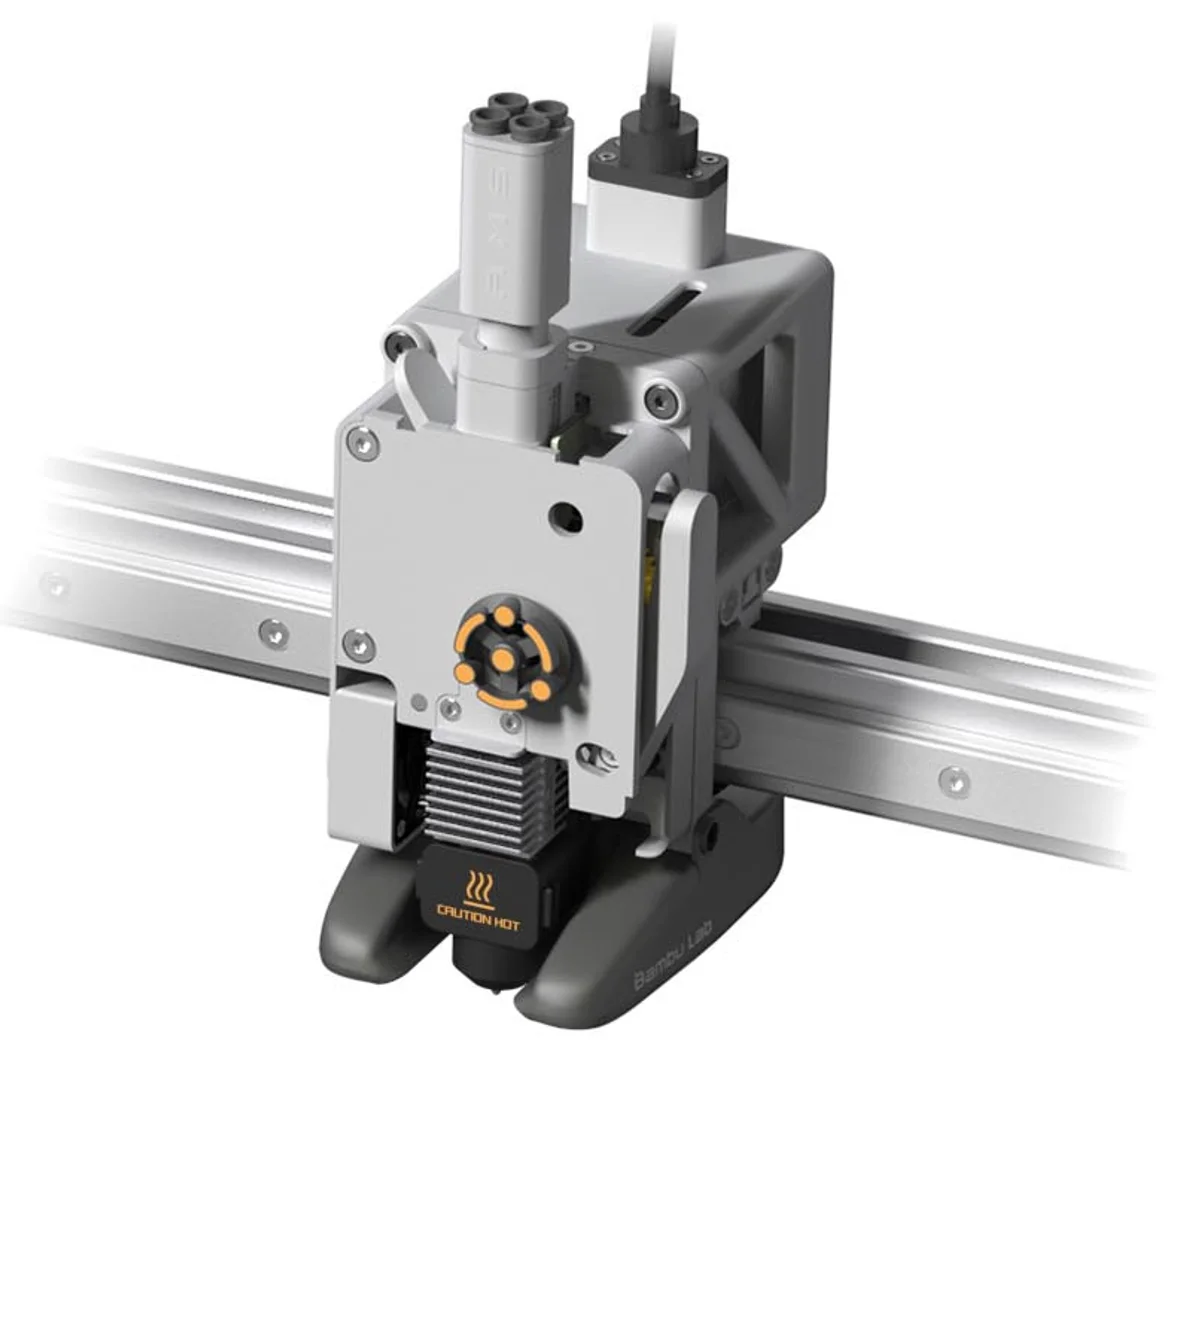
That is how often the machine checks its own nozzle for a blob. It taps the air at a fixed spot beside the bed and reads the force: clean nozzle, it touches nothing; blobbed nozzle, the lump hits the bed and the extrusion force sensor feels it.
It runs once after the walls of the first object on layer 3, then every 8 g of filament after that. The detection area runs 226,224 to 256,256 on an A1 and 156,152 to 180,180 on an A1 mini, so a part parked there means you get the layer 3 check and nothing else. Bambu is straight that it isn't 100% accurate, so the printer pauses and asks rather than deciding for you.
The trip out to the test point causes a little ooze, and it gets worse the taller the part. Bambu's advice above 70 mm is to add a prime tower, and on a single-colour job you can get one by setting timelapse to Smooth. The check does nothing at all in Print By Object or Spiral Vase mode.
Detail
1 sensor
What the P1S gives up, and what it hands back
The spec table lists one sensor on this machine: filament runout. No spaghetti detection, no clog detection, no nozzle camera, and Bambu publishes no noise figure for it either.
That is the deal, and it is why it costs what it does. If catching a failure while you are out matters to you, the honest answer is a P2S or an H2, not a P1S and crossed fingers.
What you get back is the fastest cheap machine on this page. The same CoreXY kinematics as the flagship, 20,000 mm/s², a published 18 minute 24 second Benchy, running in about 15 minutes, and a spare hotend already in the carton. It is still the machine we recommend most often.
Detail
85
Where the nozzle camera stops watching
The camera on the toolhead watches the tip itself for nozzle spaghetti, clumping and air printing. Two honest limits come with it.
Flow detection suspends itself when the temperature near the camera goes above 85°C, which is most of a high-temperature print. And it doesn't work at all if you slice in third-party software, or send G-code that was sliced for a different model.
The rest of the suite keeps going either way, so losing flow detection on a hot print doesn't leave the machine blind.
Detail
2 min
Where the live camera stops watching
There's no nozzle camera on an H2S. The clog watch is done by the live camera in the corner of the chamber, and Bambu is unusually straight about what that buys you.
It grabs a sequence of frames every 60 to 120 seconds and runs them on the NPU inside the machine. Two detections in a row and it pauses the print and tells you, usually within two minutes of material starting to wrap the toolhead.
What it's for is saving the toolhead, not the model. Bambu says so plainly: the response can lag, and it generally can't protect the part being printed. You get one alert per job, so waving it away means it won't ask twice. Keep the camera cover open and the lens clean, leave the chamber light on, and expect it to do less well in Ludicrous Mode or on black filament.
Detail
Laser and cutting, on the same machine
The Laser combo configurations add a laser and a cutting module, so one machine engraves, cuts and prints.
The 10W module suits engraving and thin stock. The 40W, on the H2D and the H2C, cuts up to 15 mm of basswood plywood. Both are Class 4 modules inside a Class 1 machine, and both arrive with a safety key, an emergency stop button and a 100 mm ventilation adapter.
The overhead BirdsEye camera is what makes print-then-cut work: it lines engraving and cutting up with a part that is already sitting on the plate. It's a genuine second tool rather than a novelty, but it needs venting and a bit of bench discipline, so talk to us about the room before you order the 40W.

Detail
90 days
Where your files actually go
In the default mode your sliced file goes up to Bambu's cloud and the printer pulls it down from there. Bambu deletes it automatically 90 days after the first print, and keeps print history for three months.
Where a machine has failure detection, that is not in the cloud either. On the P2S, X2D and the H2 machines the camera frames go to an NPU inside the printer, and Bambu says so plainly: non-cloud, on device. Pulling the network out does not turn it off.
LAN mode is the switch if you want the guarantee rather than the assurance, and it has a price. No Bambu Handy on your phone, no starting a job from outside the house, no print history. Live view over LAN is a separate toggle on the printer itself, not something that comes along for free.
The range
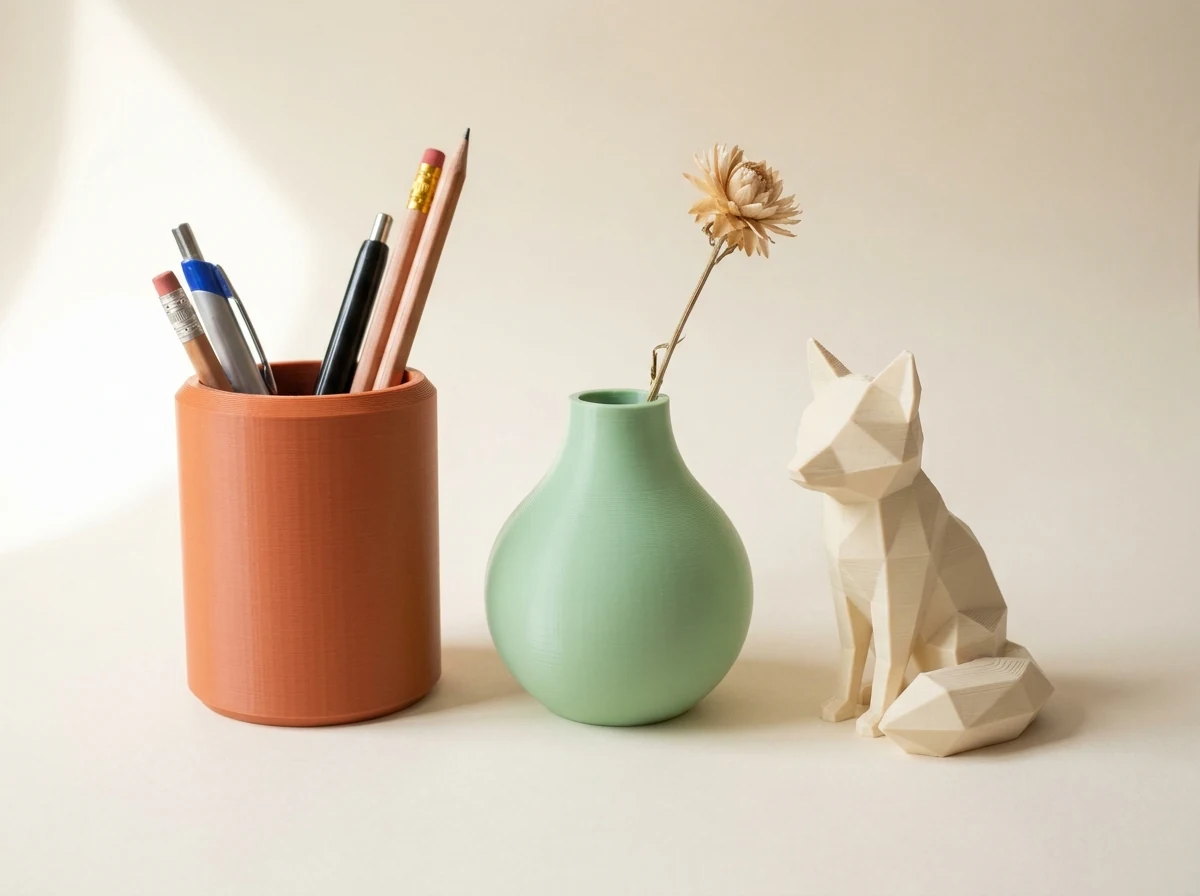
What comes off a machine like this
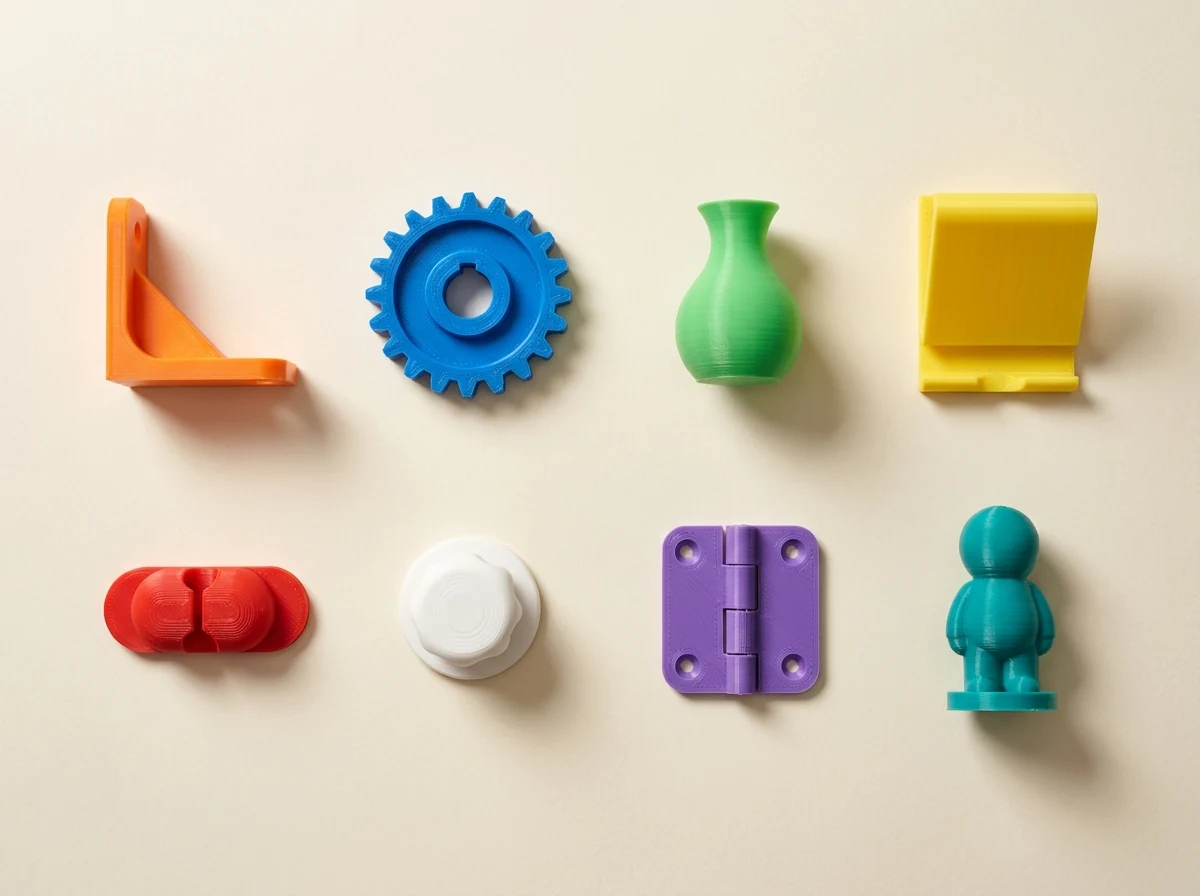
Our own work, printed in filament, in our own shop in Singapore.
One machine. Nothing here looks alike.
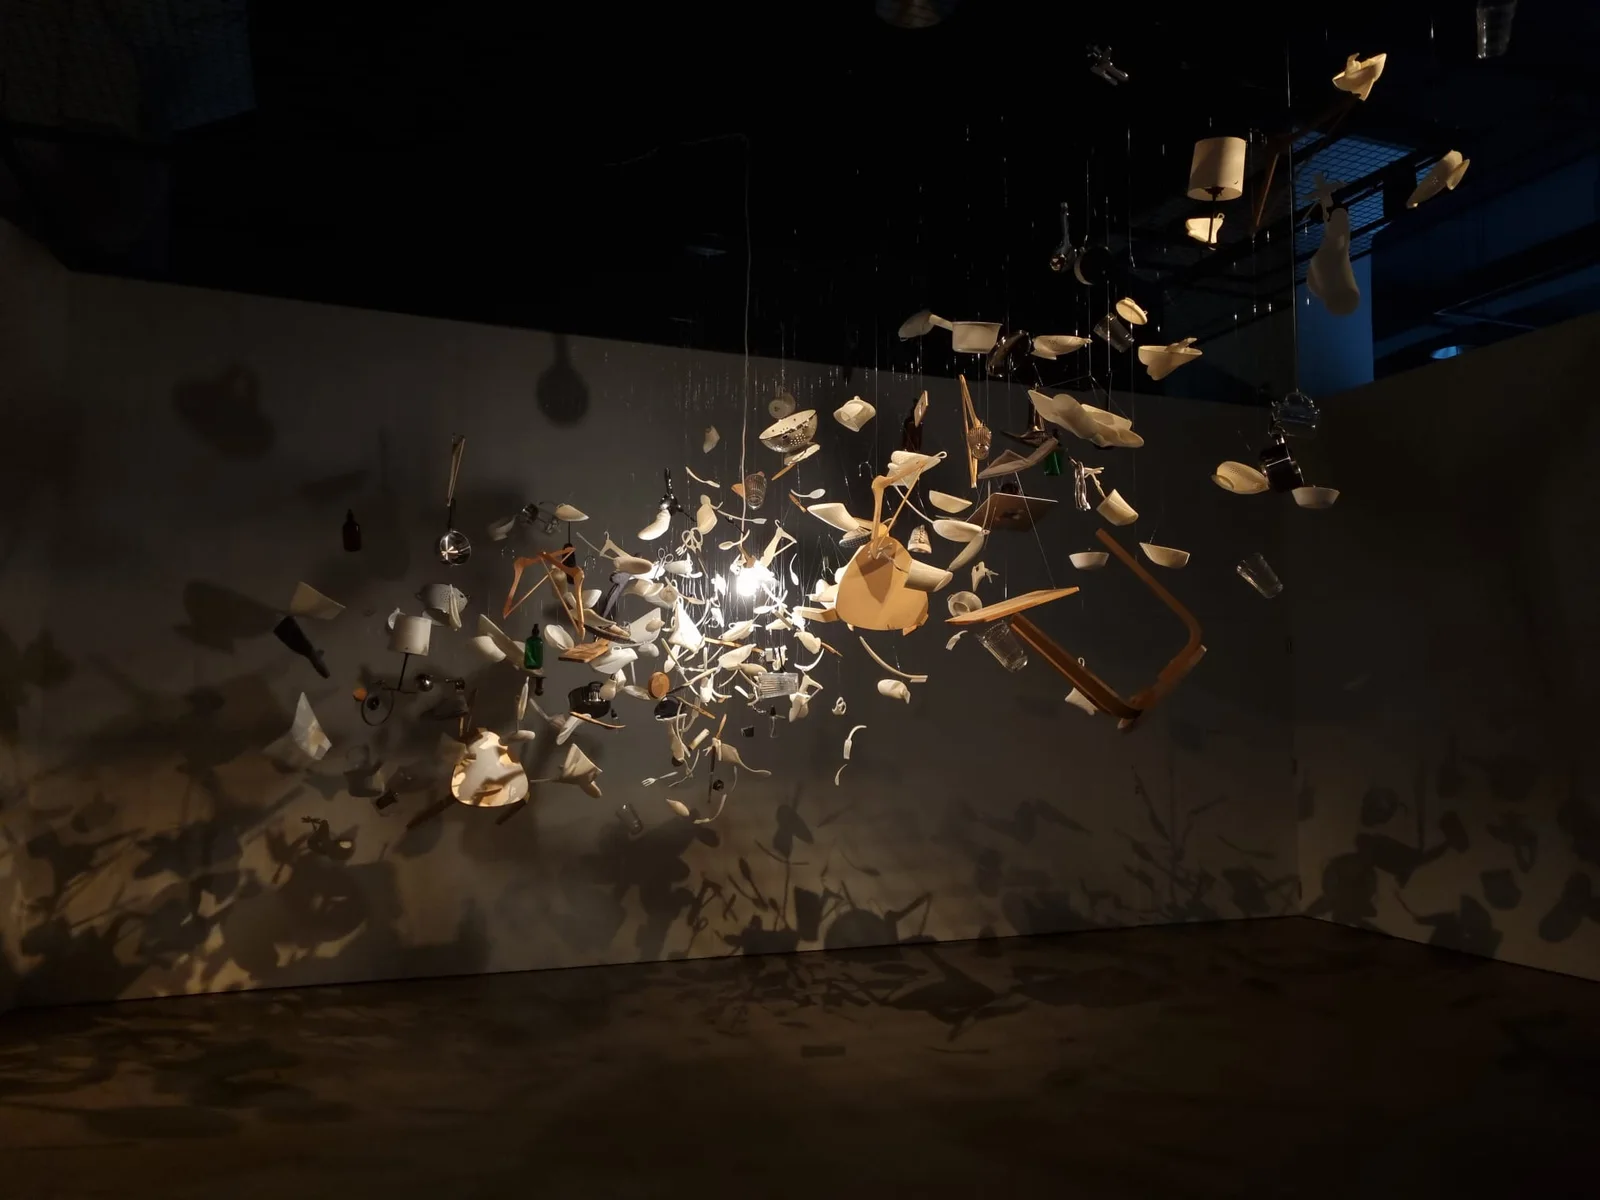
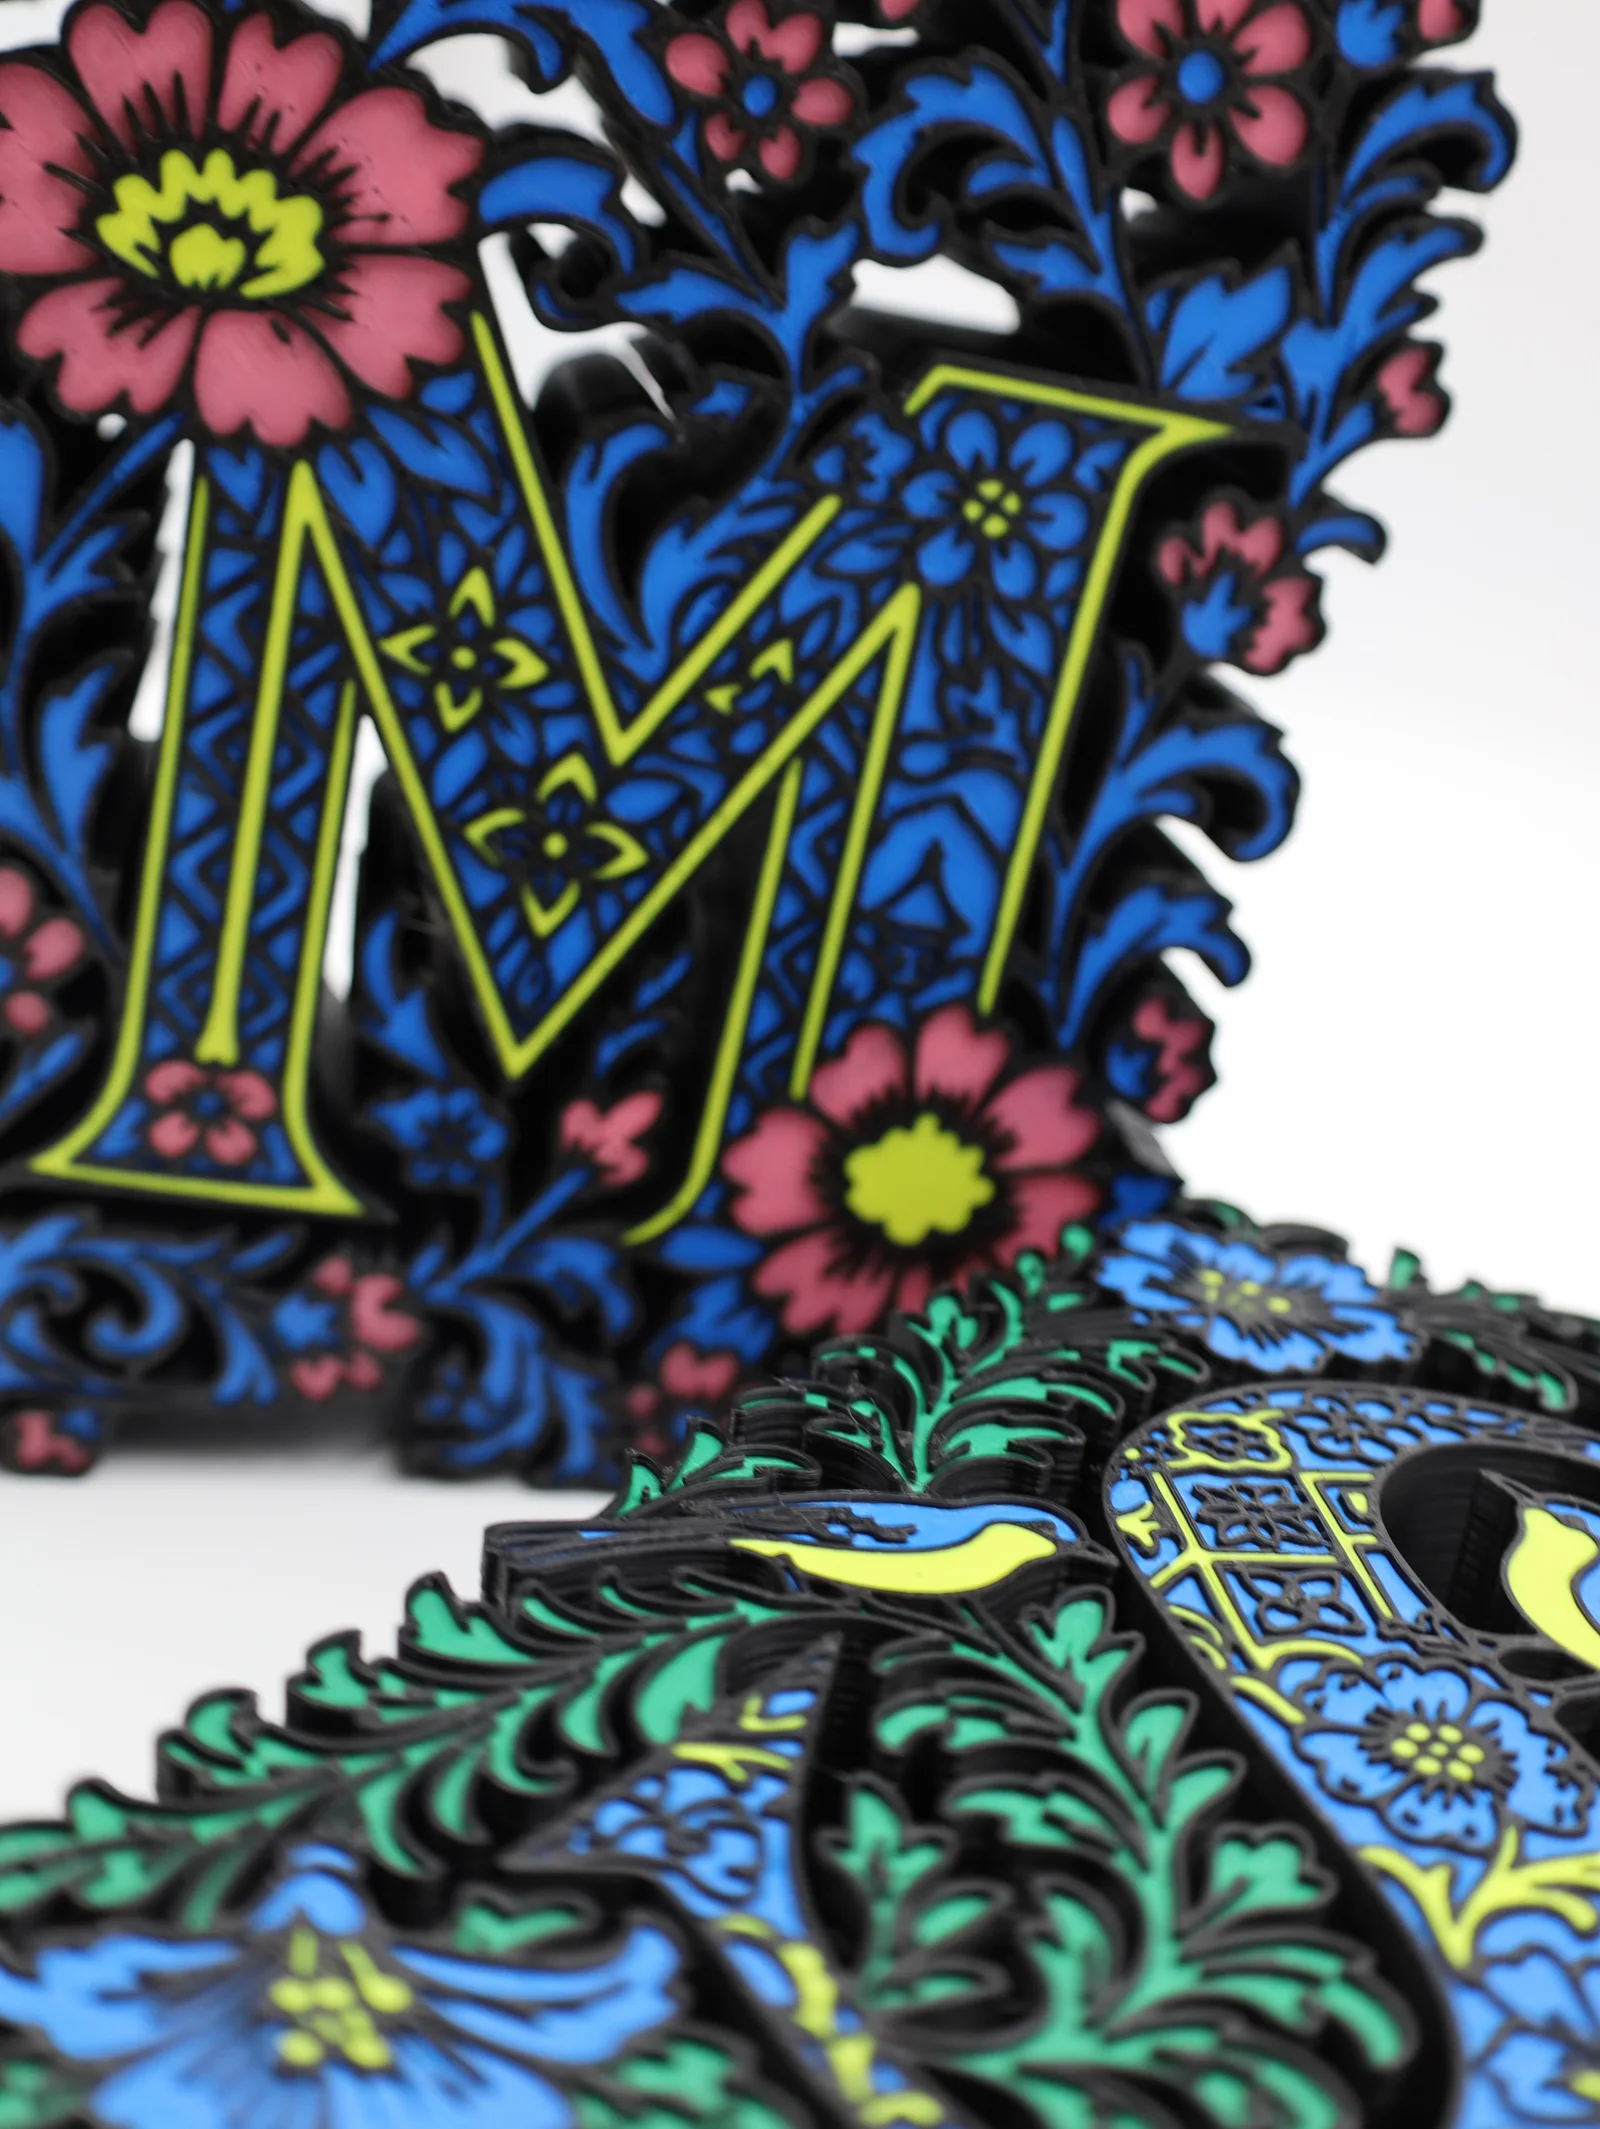
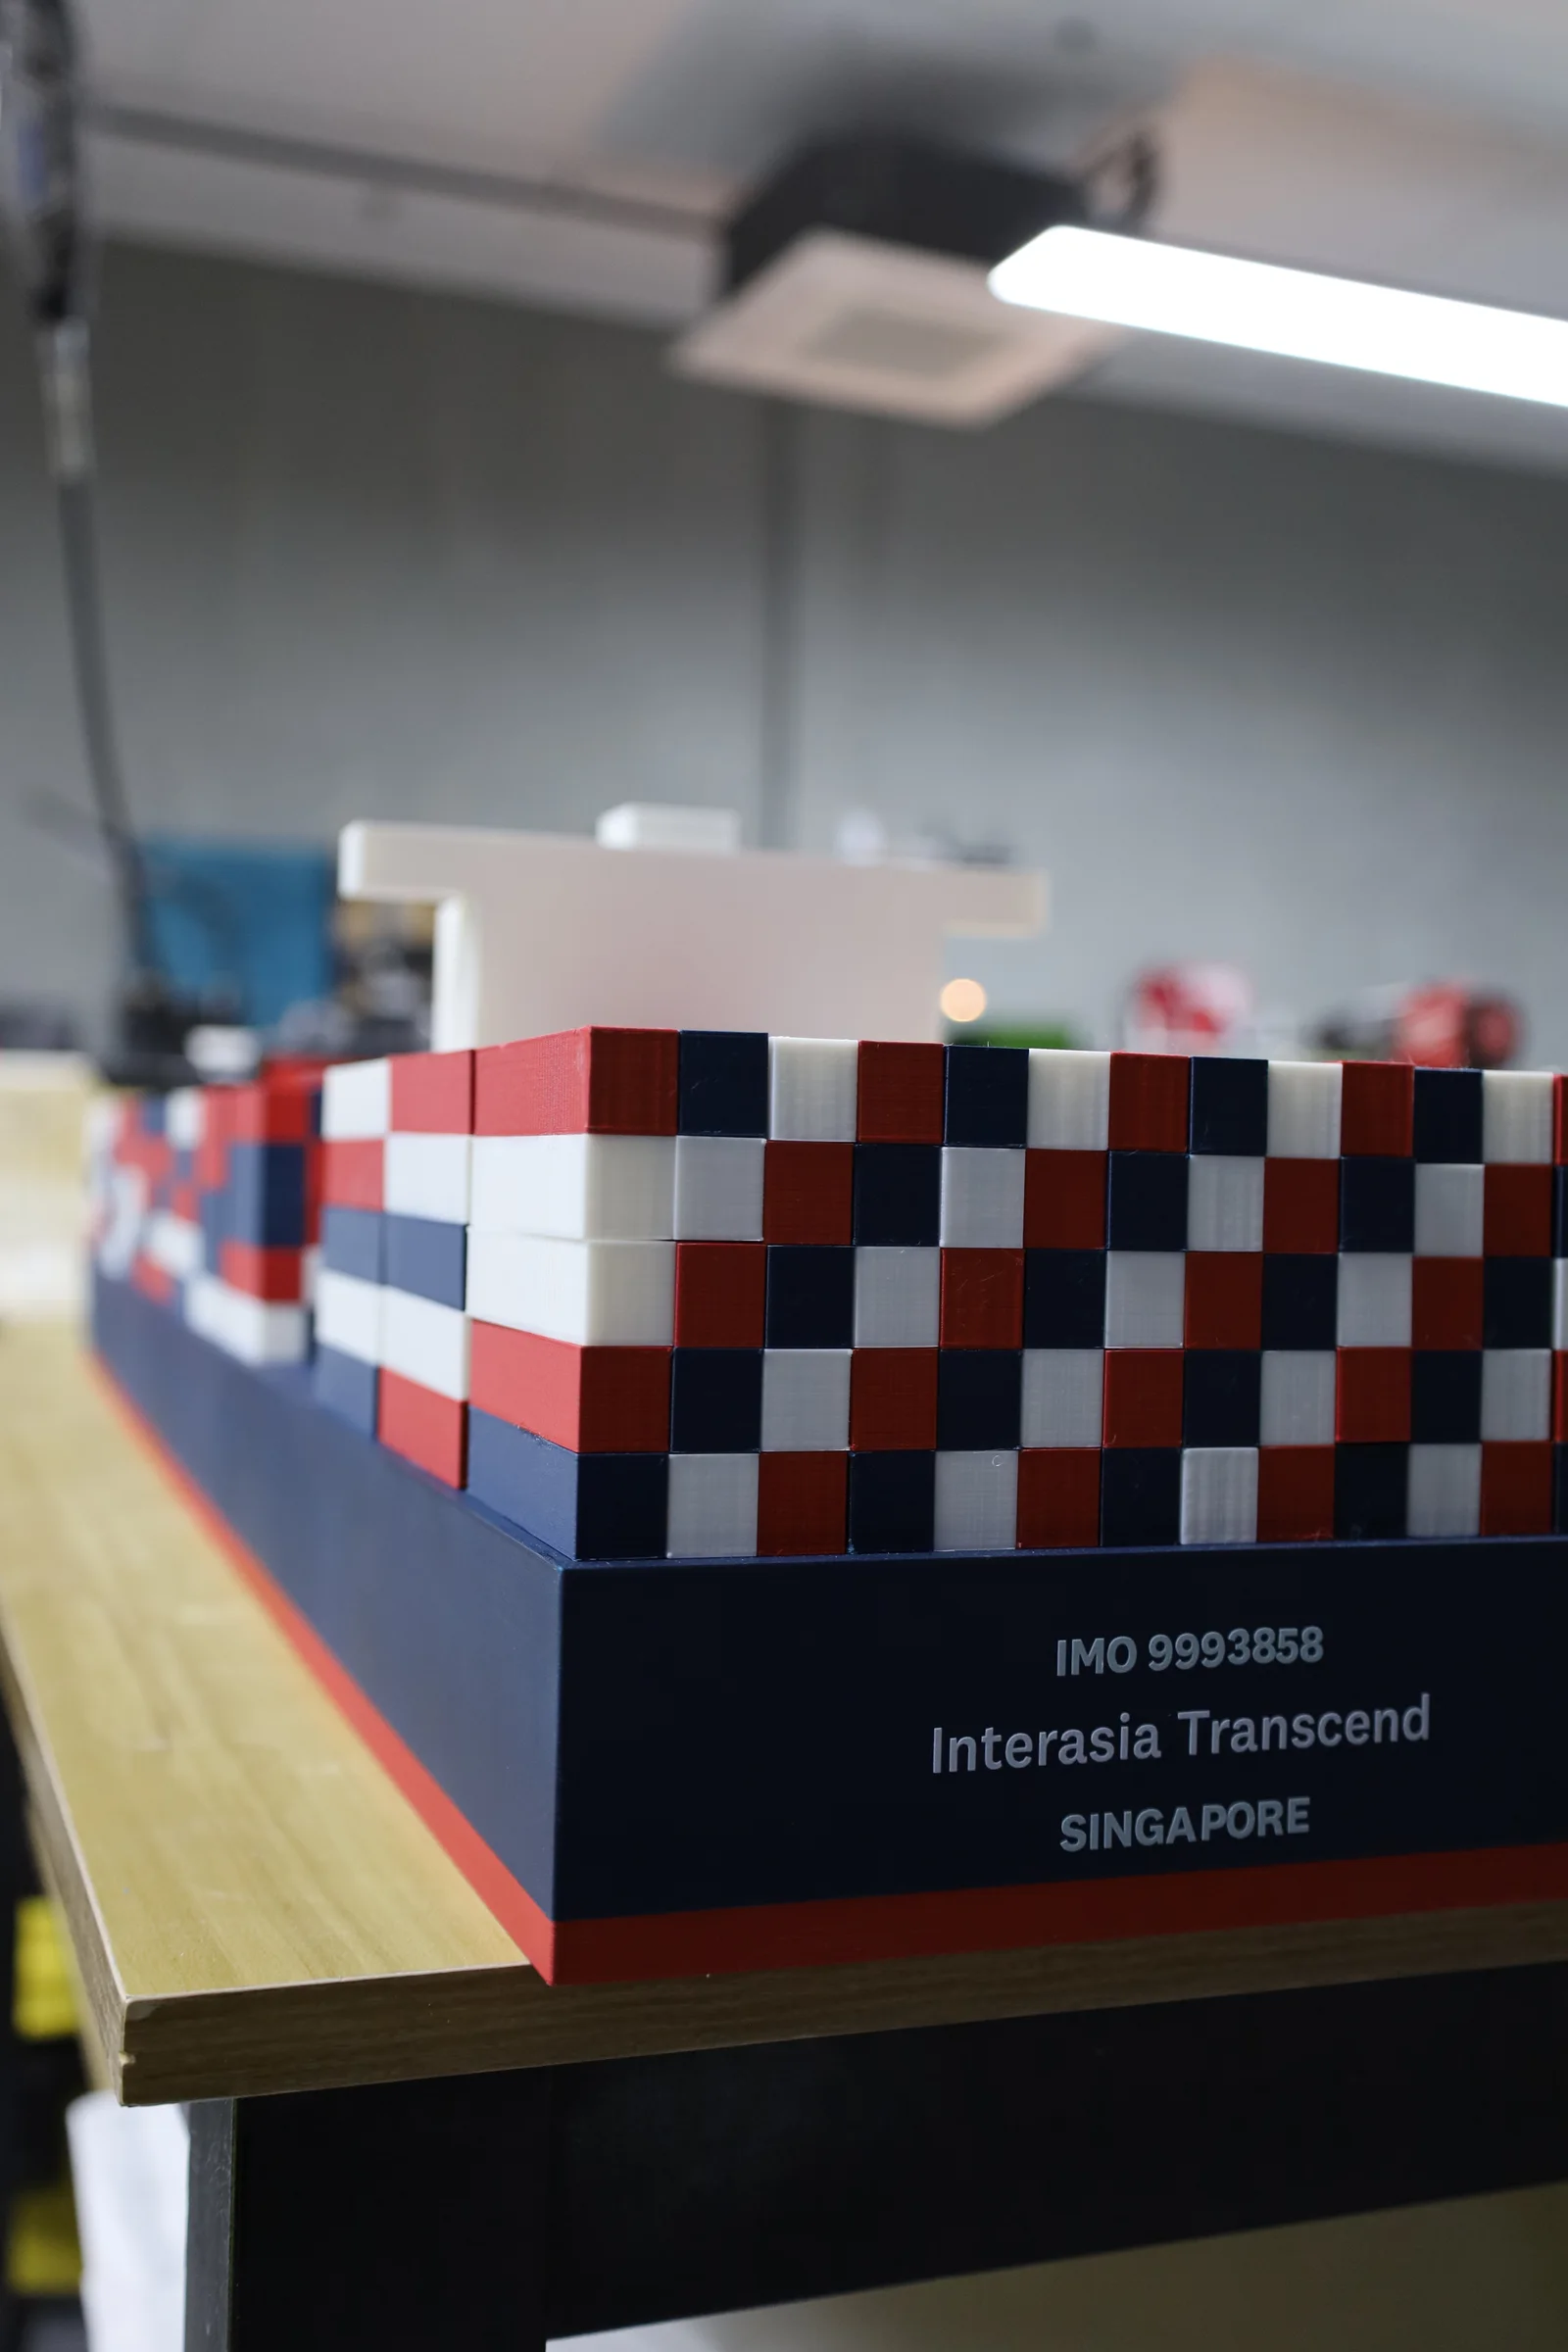
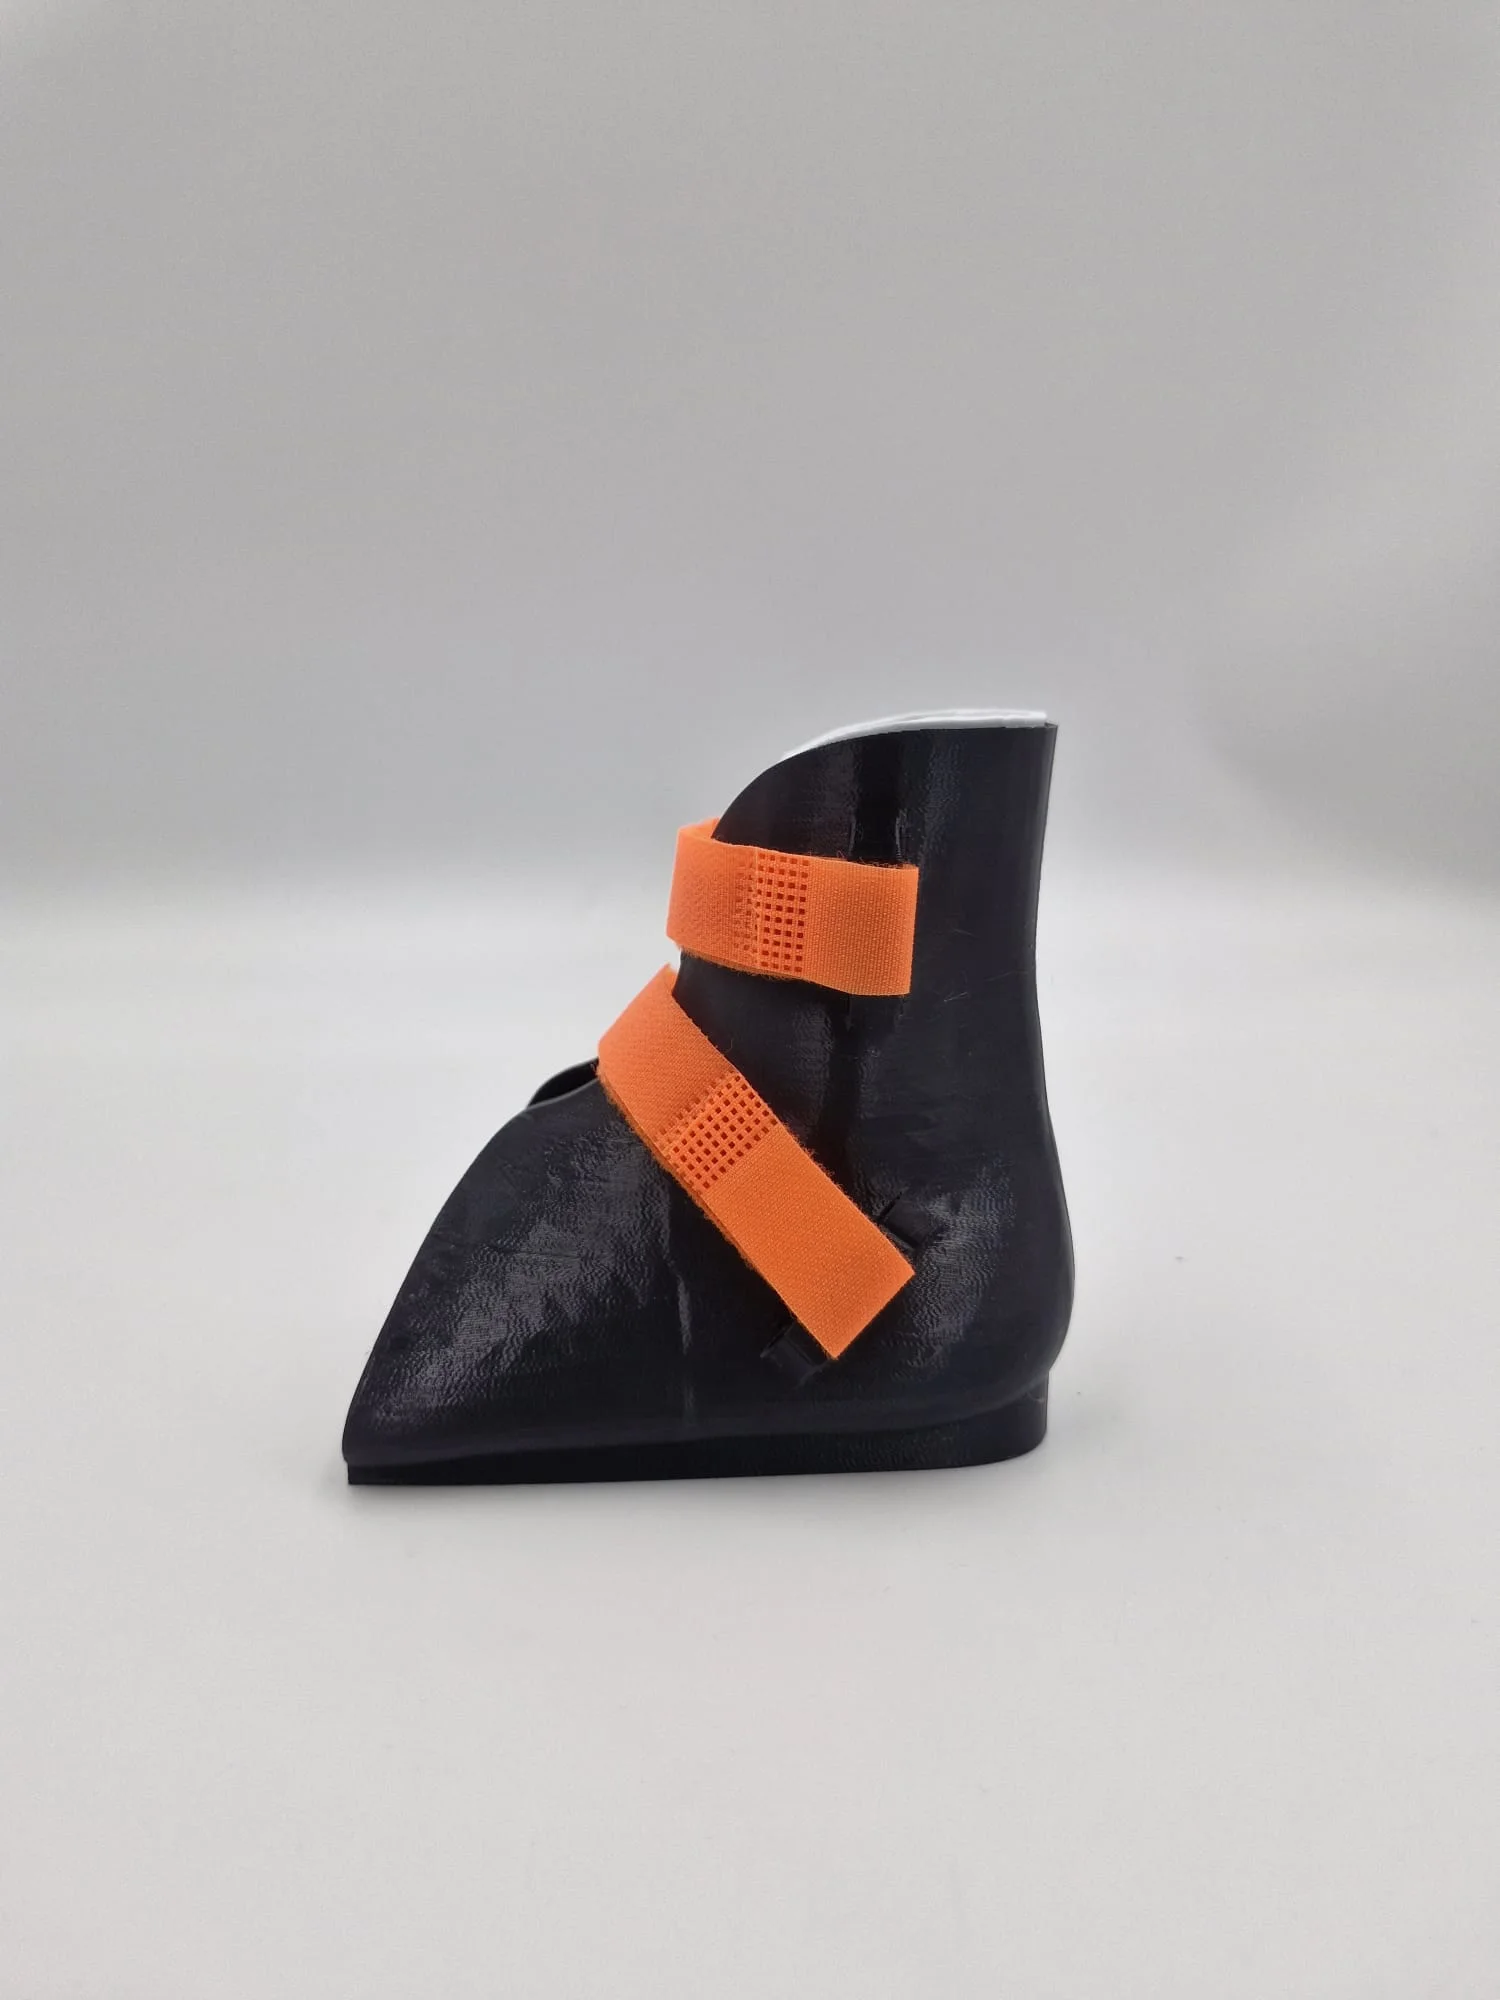
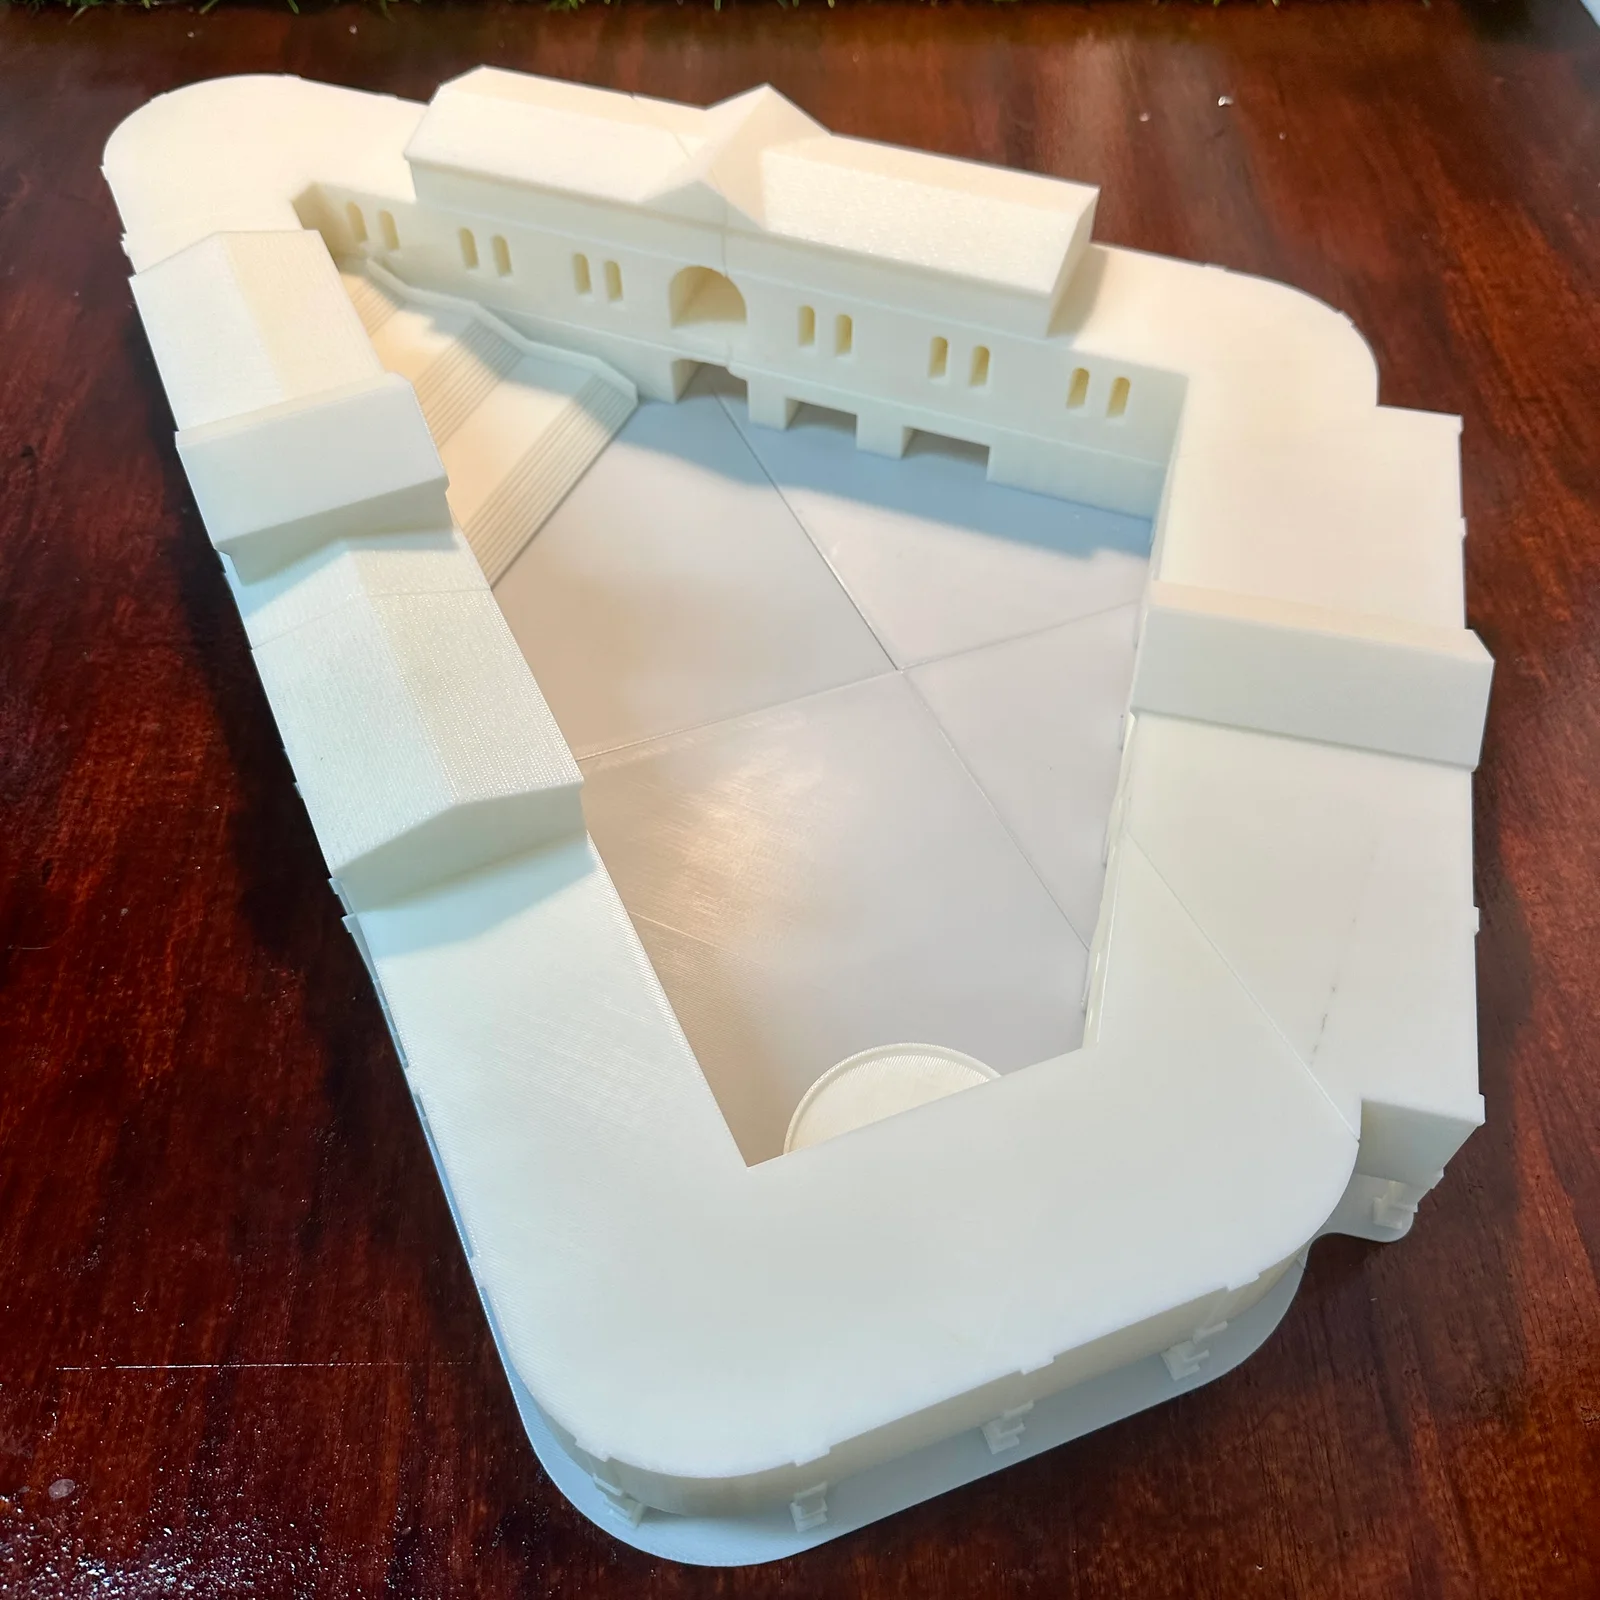
A gallery installation that ran for days, signage letters in four colours, a container ship model, a child's orthosis in flexible TPU, and a concept model left plain white.
None of these is a render and none of them was sent out. Every one is a job an open frame or a closed box handles all day, with no hardened nozzle and no hot chamber anywhere in it.
The range
What the hard materials are for
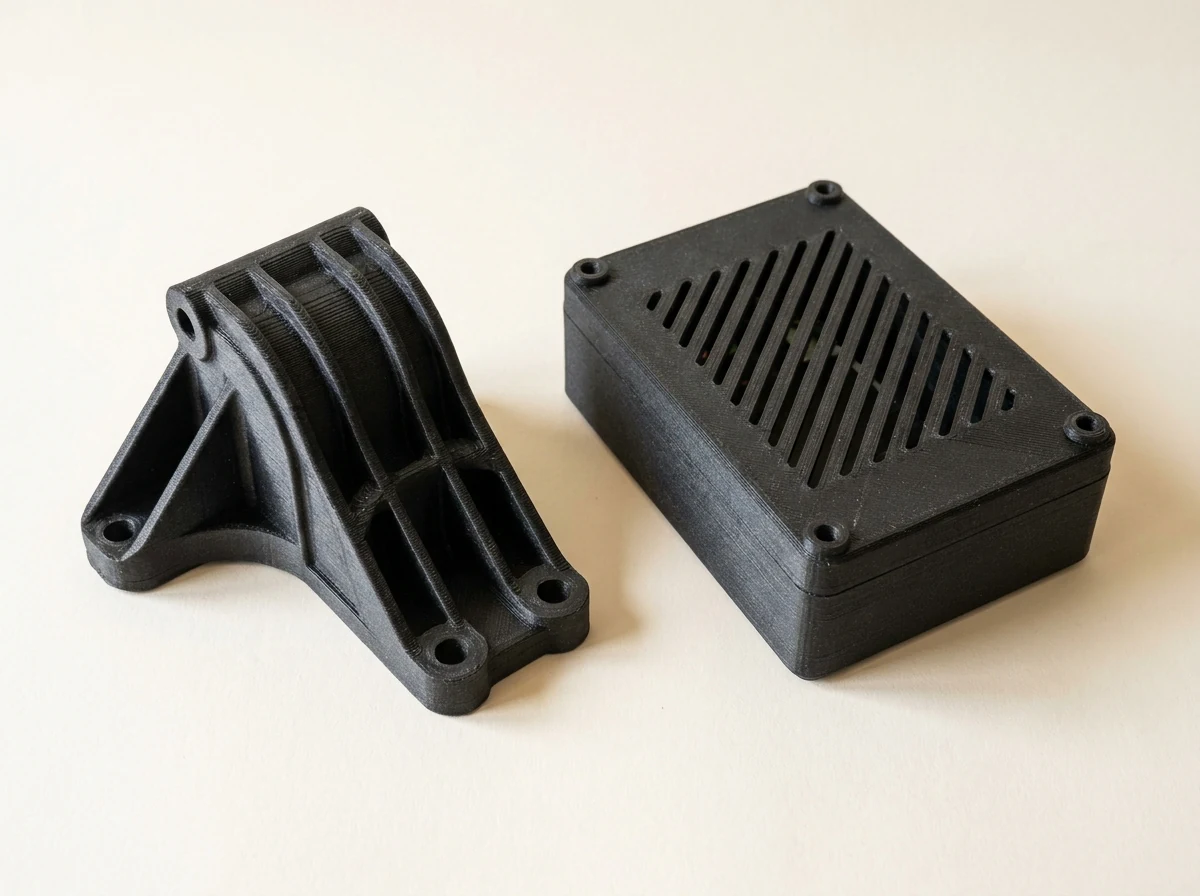
Our own work, printed in filament, in our own shop in Singapore.
The materials the cheap machines refuse.
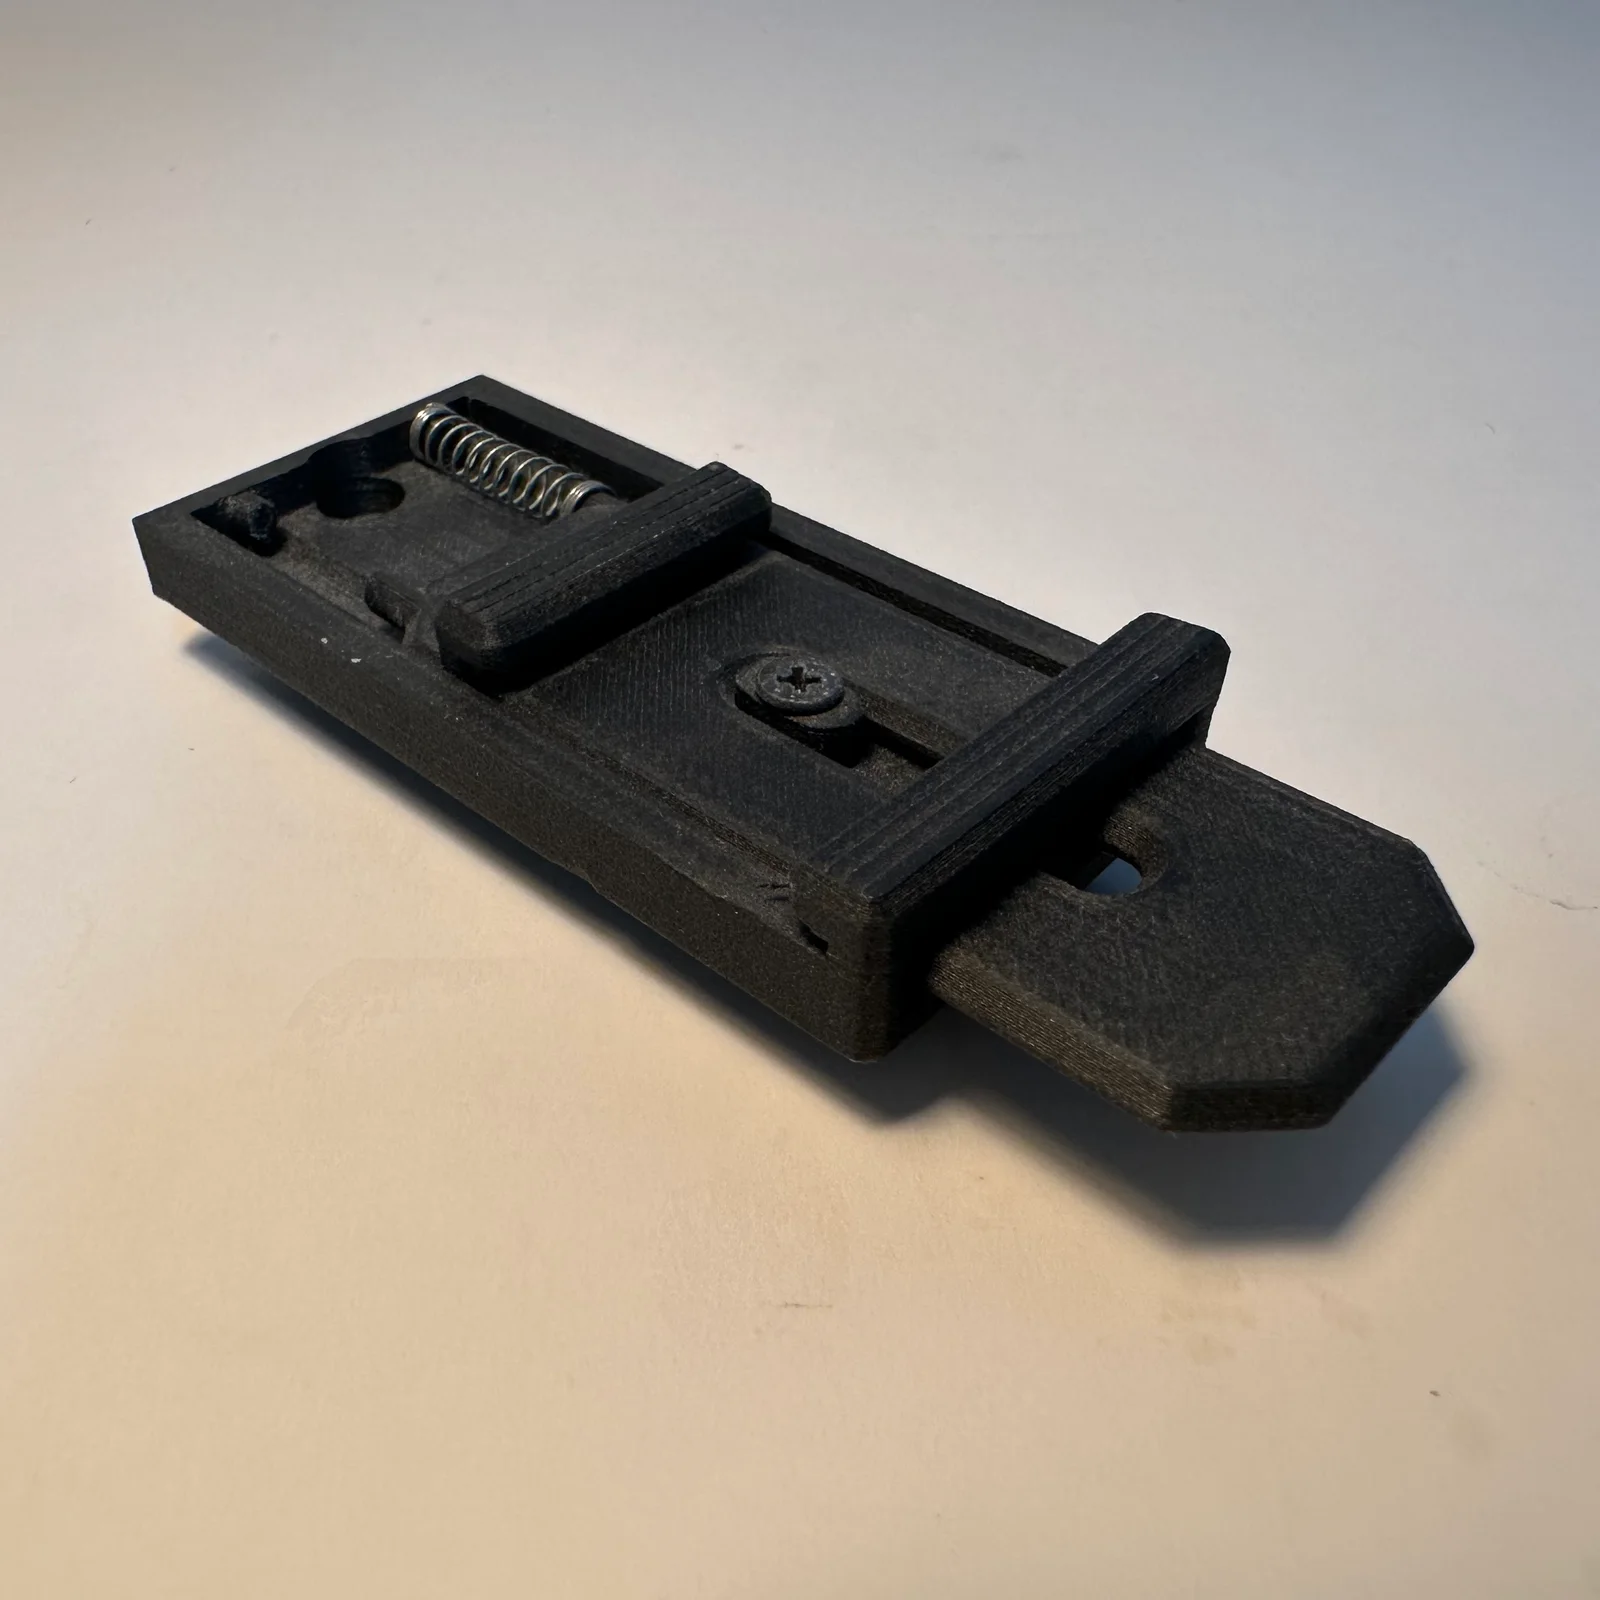
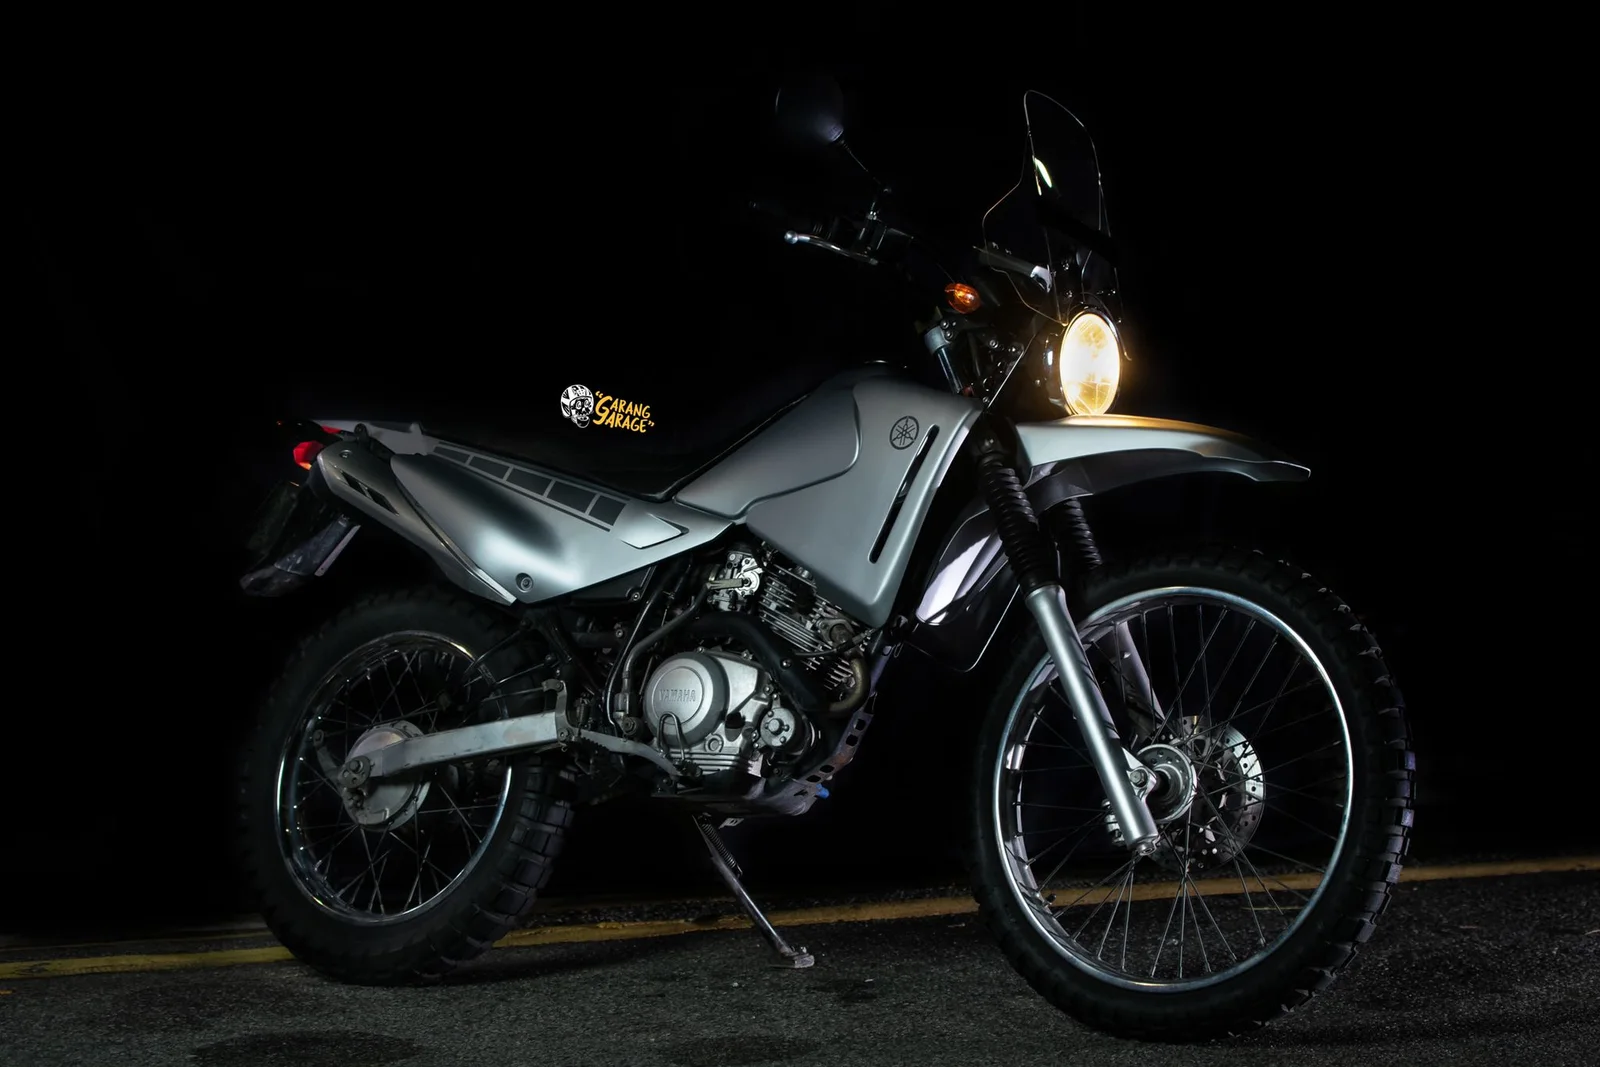
Carbon-filled and high-temperature filament is the reason a hardened nozzle and a driven chamber exist. It is also the reason these parts get used rather than looked at.
A spring-loaded release mechanism in PC-CF, motorcycle body panels in ASA, a small enclosure in PETG-CF, and a set of measurement jigs, also PETG-CF, because a fixture that flexes is not a fixture.
Comparison
The range side by side
Four families, and they climb in order. The A series is open frame, quiet and easy, and prints PLA, PETG, TPU and PVA. The P series closes a box round the part, which is the cheapest reliable route to ABS and ASA, and the X series adds a second nozzle and a chamber it heats on purpose while still fitting on a bench. The H series is the large-format end, 350°C nozzles and a 65°C chamber, with a ladder of its own: the H2S has one nozzle, the H2D adds a second plus the laser option, and the H2C adds the Vortek hotend changer. Build volume is the obvious number, but the chamber and the nozzle temperature decide which materials the machine can actually print.
| Model | Build volume (mm) | Enclosure | Nozzles | Max nozzle | Chamber | Multi-colour | Laser |
|---|---|---|---|---|---|---|---|
| A1 mini | 180 × 180 × 180 | Open frame | 1 | 300°C | None | AMS lite | No |
| A1 | 256 × 256 × 256 | Open frame | 1 | 300°C | None | AMS lite | No |
| A2L | 330 × 320 × 325 | Open frame | 1 | 300°C | None | AMS lite | No (cutting module) |
| P1S | 256 × 256 × 256 | Enclosed | 1 | 300°C | Passive | AMS, AMS 2 Pro | No |
| P2S | 256 × 256 × 256 | Enclosed | 1 | 300°C | Passive | AMS 2 Pro | No |
| X2D | 256 × 256 × 260 | Enclosed | 2 | 300°C | 65°C active | AMS 2 Pro | No |
| H2S | 340 × 320 × 340 | Enclosed | 1 | 350°C | 65°C active | AMS 2 Pro | 10W option |
| H2D | 350 × 320 × 320 | Enclosed | 2 | 350°C | 65°C active | AMS 2 Pro | 10W or 40W |
| H2C | 330 × 320 × 320 | Enclosed | Vortek, up to 7 | 350°C | 65°C active | AMS 2 Pro | 10W or 40W |
Swipe the chart sideways for every column
A passive chamber covers ABS and ASA. "Active" means the machine heats the chamber deliberately, and that's what nylon, PC and the high-temperature fibre blends need to bond between layers. The A2L takes a blade cutting and pen drawing module instead of a laser: it cuts thin flexible stock, not plywood.
Comparison
What each machine can print
Materials are the real constraint. An open-frame machine will physically print ABS, but the part warps off the plate and splits between layers, so it isn't worth attempting.
| Material | A1 mini | A1 | A2L | P1S | P2S | X2D | H2 series |
|---|---|---|---|---|---|---|---|
| PLA, PETG, TPU, PVA | Yes | Yes | Yes | Yes | Yes | Yes | Yes |
| PLA-CF, PETG-CF, PLA Glow | Not recommended | Not recommended | Hardened nozzle | Not recommended | Hardened nozzle | Hardened nozzle | Hardened nozzle |
| ABS, ASA | Not recommended | Not recommended | No | Yes | Yes | Yes | Yes |
| PET | No | No | No | Yes | Yes | Yes | Yes |
| PC | No | No | No | Capable | Yes | Yes | Yes |
| PA (nylon) | No | No | No | Capable | Yes | Yes | Yes |
| PA6-CF, PAHT-CF | No | No | No | Marginal | Hardened nozzle | Hardened nozzle | Hardened nozzle |
| ABS-GF, ASA-CF | No | No | No | Not recommended | Hardened nozzle | Hardened nozzle | Hardened nozzle |
| PPA-CF | No | No | No | No | Hardened nozzle | Hardened nozzle | Hardened nozzle |
| PPS-CF | No | No | No | No | No | No | H2 series, hardened nozzle |
Swipe the chart sideways for every column
The A1 mini and the A2L both top out at an 80°C bed, which rules out anything that needs a 90 to 120°C plate. "Not recommended" is Bambu's own wording, and it means the machine will physically feed the stuff and you won't like the result: on the A1 mini and the A1 that covers ABS, ASA and everything fibre filled, and on the P1S it covers the fibre-filled list until you've done the extruder and hotend upgrade. Where a row says hardened nozzle, that isn't a suggestion either: Bambu's line is that stainless and brass aren't hard enough for filament with hard particles in it, so they wear out quickly and take print quality with them. The P2S, X2D, H2S, H2D and H2C already have hardened steel fitted; the A series and the P1S ship stainless. PPS-CF prints at 310 to 340°C, which is why the bottom row belongs to the 350°C machines and to nothing else we sell. Full material figures are on the filament page, and nozzles are on the hotend page.
Comparison
Nozzle metals, and what each is for
Three metals, and the only thing that really separates them is how well they survive filament with hard particles in it.
| Metal | How you spot it | What it's for | Filaments |
|---|---|---|---|
| Stainless steel | Grey cooling fins | General-purpose printing. High temperature resistance, corrosion resistance, and the cheapest of the three. | PLA, ABS, ASA, PETG, TPU, PVA. The 0.2 mm nozzle is made in stainless only, which is why it isn't abrasion resistant. |
| Hardened steel | Black cooling fins | Anything with hard particles in it. Harder than stainless, with much better wear resistance. | PLA-CF, PETG-CF, PA-CF, glow-in-the-dark, wood and the rest of the fibre and particle filled list. Required, not a nice-to-have. |
| Tungsten carbide | Sold only for the H2, P2S and X2D hotend | High-volume abrasive work. HRA 90 against hardened steel's HRA 74, and it keeps a round hole instead of quietly opening up. | The same fibre-reinforced list as hardened steel, with about 50% more life. 350°C, in 0.4, 0.6 and 0.8 mm. |
Swipe the chart sideways for every column
Tungsten carbide fits the H2D on both hotends, the H2S, the H2C left hotend, the P2S and the X2D. It doesn't fit the X1 or P1 hotend, and on an A-series machine it fits but does nothing for you. For the metals themselves, Bambu publishes the breakdown on the X1 and P1 hotend: the hardened nozzle is heat-treated mould steel at HRC 55 to 60, the stainless one is 304, both on a nickel-plated brass heatblock with a titanium alloy TC4 heat break and a 6063 aluminium heatsink. Prices and sizes are on the hotend page.
Comparison
Nozzle sizes
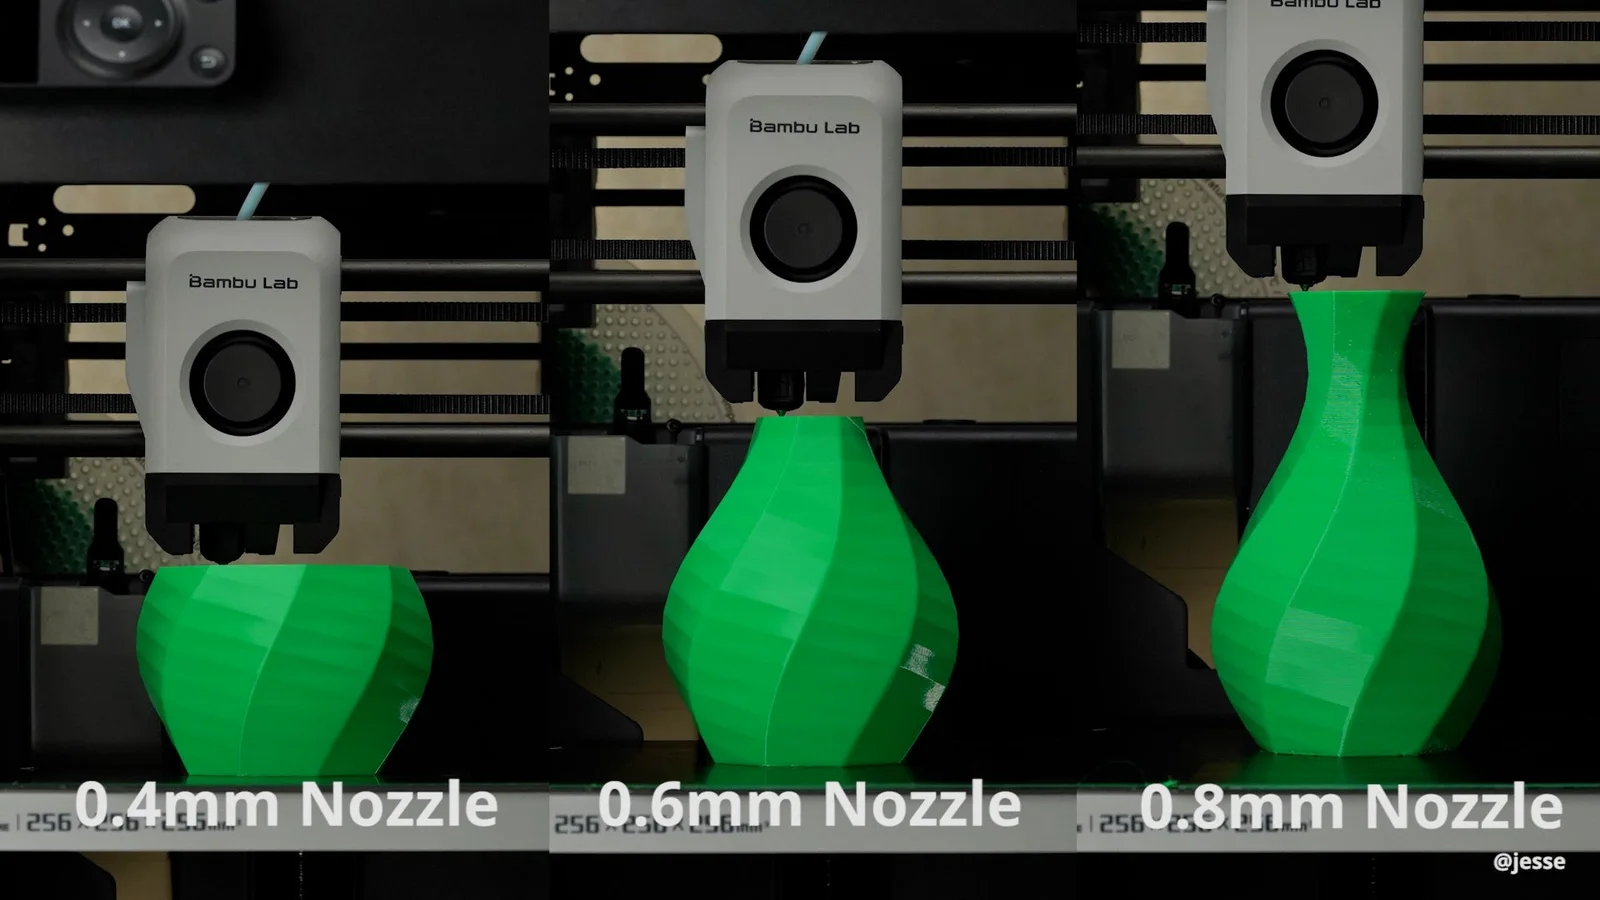
Every machine on this page takes 0.2, 0.4, 0.6 and 0.8 mm. The hole width sets the line width, and the line width sets almost everything else.
| Size | Layer heights | What it's for | What you give up |
|---|---|---|---|
| 0.2 mm | 0.05 to 0.12 mm | Extreme detail: miniatures, jewellery, small lettering, intricate prototypes | Strength, because thin lines bond less well between layers. It's slow, it clogs easily, and Bambu says to keep carbon fibre, glass fibre, sparkle and glow filament well away from it. A regular unclogging pin won't fit through the tip. |
| 0.4 mm | 0.1 to 0.3 mm, 0.2 mm standard | The universal default. Best balance of speed and detail, and what every Bambu profile assumes: enclosures, brackets, consumer products, prototypes | Moderate clog risk on fibre-reinforced filament. Bambu's own PLA-CF and PETG-CF are tested to run cleanly on a 0.4 mm hardened nozzle, but a 0.4 mm high-flow hotend is not recommended for carbon fibre. |
| 0.6 mm | 0.15 to 0.45 mm, usually 0.3 to 0.4 mm | Higher flow, clog resistant, better layer bonding and stronger parts. Rapid prototyping, large models, jigs, fixtures, functional parts. Bambu's first choice for fibre-filled filament. | Detail. Layer lines show, edges soften, and bridging gets worse. More material per part. |
| 0.8 mm | 0.2 to 0.6 mm, usually 0.4 to 0.5 mm | Maximum flow and the thickest layers: large-scale prototypes, structural components, vase mode | Precision and surface finish. Supports are harder to remove and it eats filament. |
Swipe the chart sideways for every column
As the hole gets bigger the detail drops and the clogging risk drops with it. A 0.4 mm nozzle draws lines about 0.4 mm wide, so a wall thinner than that has nowhere to go. Bambu publishes no minimum feature size, so we won't quote one.
Procedure
Changing the nozzle
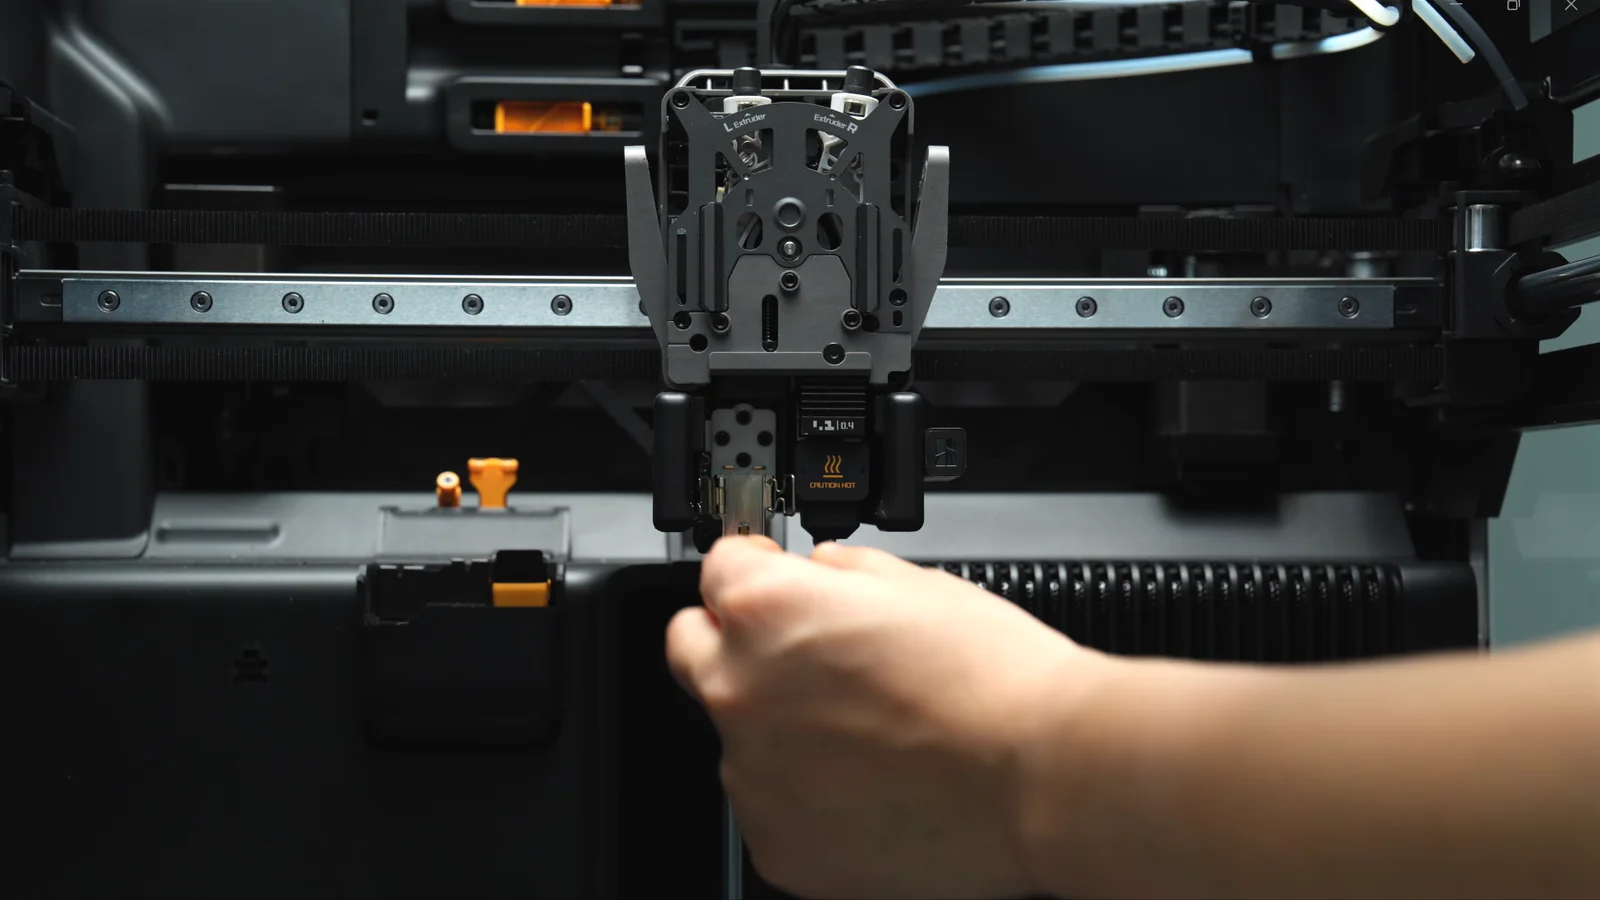
Toolless. Bambu's own words are that the A-series nozzle can be replaced in just a few minutes, and the listed tools are literally "new hotend". The only thing you'll wish you had is a scrap of filament to lever the buckle with.
Cool it, switch it off
Turn the printer off and let the nozzle go cold. Bambu hotends go in cold on purpose: the heatsink, throat, heater block and nozzle are one unit, so there's no joint for filament to ooze out of while you work.
Release the filament
Press the filament lever on the right to release and cut the filament.
Front cover and sock off
Pull the toolhead front cover off from the bottom front right corner, then pull the silicone sock off.
Unlock the buckle
Push the nozzle buckle to the right to unlock it, then swing the left side of the buckle outward. A scrap of filament gives you something to lever with.
Pull the hotend out
Hold it by the heatsink and pull it straight out. If old filament has glued it into the heating base, warm the hotend slightly, put heat-resistant gloves on, ease it loose with tweezers, and cut off any filament left on top before the new one goes in.
New one in, tilted back
Insert it at a slight angle, tilted towards the back of the printer. A built-in magnet catches the screws and pulls it into alignment. Press on the heatsink until it sits flush against the heating assembly.
Lock it, left side first
Flip the left side of the buckle in, then lock the right. If it won't lock, the hotend isn't sitting flat, so take it out and reseat it. Sock back on, front cover clicked back on.
Tell the printer what you fitted
Settings → Maintenance → Nozzle on the screen, and set the new diameter and material. You can't do this in Bambu Studio: since v02.01.01.52 that field is read-only on purpose, so nobody can pretend they swapped a nozzle they didn't. Flow dynamics calibration wants re-running after any nozzle change, and on the A series it runs itself at the wiper before every print anyway. Replace the whole heating assembly rather than just the hotend and Bambu asks for a full calibration afterwards.
Procedure
Changing the nozzle
The P1S is the one machine on this page where the nozzle is a tool job. You'll want an H2.0 Allen key, and a full calibration run before you print anything you care about.
Unload, cool, power off
Unload the filament, get the nozzle below 50°C, then switch the printer off at the mains. Working on a live printer risks a short circuit, which is Bambu's warning, not ours.
Toolhead cover off
Lift the toolhead front cover open, unplug the toolhead fan connector, take the cover away.
Three cables
Disconnect the hotend cooling fan at the top, the thermistor in the middle and the ceramic heater at the bottom, then free them from their clips.
Two screws
H2.0 hex key, out with the two screws, and the hotend lifts away.
Reverse it
New hotend in, two screws, cables back through their clips and into the interface board, front-cover fan cable reconnected, cover closed. If you bought the bare hotend and are reusing your electronics rather than fitting a complete assembly, rebuild it with fresh thermal paste: thermistor first with its cable pre-routed, then the ceramic heater, then the clip, then the sock, then the fan.
Sync and calibrate
Set the new diameter and material on the screen if either changed, then run Calibration on the printer. If it passes, the job went in right. The spec sheet below says how long to allow for it.
Procedure
Changing the nozzle
A latch, and no tools. The heating assembly and the electronics stay on the toolhead; only the metal part comes out. Printer off, hotend at room temperature, filament cut.
Front cover off
The P2S cover is magnetic and simply pulls away. On the H2S and the X2D, pinch the two top corners and lift to release the clips.
Sock off
Pull the silicone sock down and outward.
Unlock, right side first
Unlock the hotend clip on the right, then release the metal plate on the left.
Pull the hotend out
Hold the heatsink top and bottom and draw it straight out. If old filament has stuck it in place, warm it slightly, wear heat-resistant gloves, ease it out with tweezers and cut off the filament left on top.
New one in
Make sure the clip is fully open, sit the new hotend on the heating assembly and check it's in full contact all the way round.
Close left, then right
Close the left metal plate first, then press the right ring in. Refit the silicone sock from the bottom upwards. On a P2S use the sock with the three orange marker dots: the machine's AI recognition looks for them and throws an error if it can't see one.
Sync and check
Set the nozzle type on the screen (on the P2S that's Filament → Nozzle & Extruder → Nozzle Type). Give the hotend a gentle wiggle: no play means it's seated. The printer checks for itself before it calibrates and alarms if the hotend is missing or badly seated, and you press Re-Calibrate once you've fixed it.
Procedure
Changing the nozzle
The same latch as the rest of the H2 family, plus one step nobody expects: on a dual-nozzle machine the flow blocker has to move before the hotend you want is even reachable.
Drop the bed, cool it, power off
Controls → Motion on the screen, run the heatbed to the bottom. Switch the printer off, let the hotend reach room temperature, lift the top glass cover off.
Toolhead cover off
Pinch the two top corners of the toolhead front cover and lift to release the rounded rectangular clips, then pull it off. If filament is loaded, press the cutter for the side you're changing.
Move the flow blocker
The H2D prints with one nozzle at a time and parks a flow blocker under the idle one so it can't drool. Push the lifting rod right and the left hotend lowers while the blocker covers the right; push it left and it's the other way round. Move the rod, never the blocker: the blocker is fragile and forcing it snaps it. Push the rod to its end stop, then fine-adjust so the blocker sits exactly under the nozzle.
Sock, buckle, out
Pull the silicone sock off the exposed hotend, unlock the buckle, pull the hotend out, and cut off any filament left on top of it.
New one in
Pinch the nozzle, push the hotend up from below, then press it inward at the top. Tug it gently. If it doesn't move, it's seated.
Close left, then right
Push the left latch down until it lines up with the nozzle, then press the right clip down. Closing both at once traps the latch inside the clip, and that's the number-one way this goes wrong. Sock and front cover back on, hooked under the extruder and pushed forward until it clicks.
The other side, then the offset
Same procedure for the second hotend, with the rod pushed the other way. Set the nozzle info on the screen afterwards. The two nozzles then have to agree with each other again, which is the nozzle offset calibration described under What it checks before every print; the only number that matters while you're fitting them is the ideal 5 mm height difference between the left and right nozzles. Use official H2D or H2C hotends: third-party nozzles that aren't magnetically conductive break the offset calibration outright.
Procedure
Changing the nozzle
Two different jobs on one machine. The left hotend comes out by hand like any other H2. The right side is the Vortek rack, and it changes hotends by itself, mid-print, without you touching anything.
The right side changes itself
The rack carries six docks. Mid-print the latch unlocks, the hotend on the toolhead is parked in the lowest-numbered empty dock, the next one is installed, and the latch relocks. If docks 1, 3 and 5 are free it takes 1, the one nearest the toolhead. Each hotend heats by induction with no contacts and stores its own filament information so material mapping stays right.
Adding or parking one from the screen
Nozzle and Extruder Settings → Hotends & Rack. Pick an empty dock and press Nest to park the mounted hotend; pick a hotend and press Fetch to install it. To swap one that's sitting on the rack, pick its number and press Uninstall, and the toolhead moves clear so you can lift it out.
By hand, if you'd rather
Lower the heatbed from the screen, let the hotend reach room temperature, power off. Unplug the toolhead enhanced cooling fan connector, pinch its top and lift it off. Move the nozzle flow blocker linkage clear if it's covering the hotend. Pull the hotend latch to the right to unlock, pinch the nozzle tip and draw it out diagonally.
Fitting one
The end with the two openings faces forward. Push the latch left to lock it, then shake the hotend: no play means it's home.
The left hotend
That one is an ordinary H2-series hotend on a buckle, so it's the same procedure as an H2D, flow blocker and all.
Never open one up
Bambu strictly prohibits taking an induction hotend apart. It's a precision assembly with a PCB inside, and opening it voids the warranty. If one misbehaves it comes back to us.
Afterwards
Press Read on the Hotend & Rack screen so the printer re-identifies the diameter and material, then calibrate. Nozzle offset calibration covers the toolhead hotend and every hotend on the rack, so how long it takes depends on how many are loaded.
Procedure
What it calibrates before every print
Bambu's line on this family is that it calibrates the Z-offset, bed level, vibration resonance and nozzle pressure for every print job, automatically. Here's what that actually means.
Wipes the nozzle
The heatbed nozzle wiper does a coarse wipe of the hot nozzle, then a fine wipe of the tip, at the start of every job. The fine wipe drops the nozzle one to two millimetres at one spot on the plate, so a little scuff on the coating there is normal wear, not damage.
Levels the bed by touch
There's no separate probe. The nozzle is the probe: the machine reads the force on the hotend to detect contact and builds a height map, then compensates Z at every XY coordinate through the print. The A1 mini measures 36 points on a 6 × 6 grid; the A1 measures 49 on a 7 × 7 grid using an eddy current sensor in the hotend.
Compensates for its own vibration
An accelerometer on X and an eddy current sensor on Y. The printer shakes the motors through a range of frequencies, records the real vibration curves, identifies the resonance modes and compensates against the motion commands live. The A2L goes further with Adaptive Vibration Compensation, which retunes as the model grows taller and the load on the bed shifts.
Measures how the filament flows today
Flow dynamics calibration. The hotend senses the ripple in extrusion force while it purges at the wiper, works out this filament's hysteresis and compensates in real time. Bambu's phrasing for the A2L: it measures how filament actually flows through this nozzle, with this spool, today. It's the reason you never tune pressure advance by hand on one of these.
Checks the belts
Belt tension is read out of the vibration frequency calibration, and a belt that has drifted raises an HMS alert instead of quietly ruining prints. Each belt tensioner on X and Y carries its own accelerometer.
When to re-run it
Re-run the full calibration after you move the machine, after a firmware update, after changing any part, and if quality drops off. It lives at Settings → Maintenance → Calibration, and motor noise cancelling sits there as a separate menu item rather than a per-print step. Bambu doesn't publish a per-print calibration time for any of its machines, so we won't invent one.
Procedure
What it calibrates before every print
Bambu's own words: just hit print, and the printer handles all the calibrations for you.
Auto bed levelling
Runs before the job. The bed sits on three lead screws driven by one stepper through a belt, ships pre-levelled, and can be trammed by hand with three knobs if it ever gets knocked.
Vibration compensation
Also automatic before the print, so resonance in the frame doesn't turn into ringing on the part.
The full run, after hardware changes
Settings → Calibration on the screen gives you vibration compensation, motor noise cancellation and auto bed levelling as separate routines. You can also start them from Bambu Studio under Devices → Calibrate, or from Bambu Handy. Run them after moving the printer, after a firmware update or maintenance, after changing any hardware, and if print quality drops.
Speed modes, while you're on that screen
Not calibration, but it lives beside it. Silent runs at 50% of normal speed and acceleration, Standard 100%, Sport 124% and Ludicrous 166%.
Procedure
What it calibrates before every print
One sensor on the toolhead does most of the work, and a camera checks its own aim off the heatbed.
The eddy current sensor does three jobs
The nozzle eddy current sensor handles Z-axis homing, bed levelling and dynamic flow calibration. It's a serviceable part with a set gap, so if homing starts failing after a hotend change, that gap is the first thing to check.
The camera calibrates itself
The live-view camera works out its own position and angle from the silkscreen printed on the heatbed. Which is a good reason to keep that silkscreen intact: damage it and camera calibration fails.
Flow, before the job
Dynamic flow calibration runs off the same sensor, so the machine knows how this spool behaves rather than assuming. On the X2D it's automatic for the main hotend only; the auxiliary hotend is calibrated by hand in Bambu Studio.
Belt tension
A built-in belt tension monitor watches it and prompts you when it drifts, instead of leaving you to diagnose ringing.
Running it yourself
Settings → Calibration → Print Calibration, then pick which routines to run. Bambu's rule for when: after moving the printer, after a firmware update or maintenance, after changing any hardware component, and if print quality drops.
Motion accuracy, on the X2D
There's an optional Vision Encoder plate. Put it on a cold bed, run Calibration → Motion Accuracy Calibration, and the toolhead camera reads unique square patterns at a series of positions, comparing measured against theoretical coordinates to build a compensation map. The encoder is sold separately.
Procedure
What it checks before every print
The H2 machines run a pre-flight inspection before they start, and most of it is done by eye.
Looks for anything left on the plate
The live camera lifts the bed and takes two images to simulate binocular vision, reconstructs the scene and segments the bed plane. It runs up to twice, once with the bed low so anything still sitting on the plate is caught, and again with the bed raised. It reliably sees objects bigger than about 3 × 3 × 1 cm near the camera and 5 × 5 × 1 cm further away, with a triangular 6 × 6 cm blind spot right beside the camera.
Checks the plate is the one you sliced for
After the heatbed homes it moves to a fixed height and the live camera photographs the plate to check its type against the sliced file. On the H2C it checks alignment too, and even a slight misalignment stops the job, because the hotend rack and the heatbed sit close together and a crooked plate fouls the rack.
Checks the hotend is the one you sliced for
The toolhead moves near the live camera and gets photographed, and the printer confirms the hotend type matches the file before it heats up.
Lines the two nozzles up
On the dual-nozzle H2D and H2C, nozzle offset calibration runs before the print. Both nozzles touch the bed in turn for the Z difference, and an eddy-current coil behind the heatbed finds the XY difference to about 15 to 20 µm. On Auto it's a quick check that escalates to the full calibration if it fails or the measured offset looks wrong.
Quick vibration check
One quick check before printing, sitting in the start G-code, telling the printer whether belt tension is still normal. Bambu recommends leaving it enabled, and so do we.
H2C only: the rack homes first
Coarse homing of the hotend rack runs automatically before toolhead homing or heatbed movement, so the two can't collide. Fine homing runs whenever a hotend is taken from or placed on the rack.
Motion accuracy, every couple of weeks
A periodic job, not a per-print one, and it needs the separately sold Vision Encoder. Bare bed at room temperature, encoder on it, Calibration → Motion Accuracy Calibration. The toolhead camera reads unique square patterns at a series of positions and builds a compensation map. Bambu suggests running it on a new machine, after any significant knock, relocation or reassembly, after belt work, and every two weeks as routine. Results hold for weeks and don't depend on filament or nozzle.
What keeps watching once it starts
Pre-flight ends when the first layer goes down, and a different set of eyes takes over. On the H2D and H2C a nozzle camera watches the tip itself for spaghetti, clumping and air printing. The H2S doesn't have one, so its live camera does the clog watch instead, looking for material wrapping the toolhead. On all three the live camera also watches for spaghetti, pile-up and its own obstruction, and flame detection runs throughout.
In the box
What's in the A1 mini carton
Bambu's own packing list. Anything marked pre-installed is already on the machine when you lift the lid.
The machine and the printing parts
A1 mini printer, 32GB micro SD card (pre-installed), Bambu Textured PEI plate, purge wiper and its screws, spool holder with bracket and screws, one 520mm PTFE tube, and a 20g filament sample so the first print doesn't wait on a delivery.
Tools and spares
Unclogging pin tool, H2 and H1.5 Allen keys, Bambu scraper blade and screws, cable organiser, lubricant grease, lubricant oil, quick start guide.
The AMS lite combo adds
AMS lite body with its 4-pin cable, the AMS lite stand and screws, the rotary spool holder, four more PTFE tubes (two at 580mm, two at 700mm) and a set of Bambu filament swatches.
In the box
What's in the A1 carton
Bambu's own packing list. The A1 arrives in two pieces, base and frame, and bolts together in a few minutes.
The machine and the printing parts
A1 base housing and printer frame with the base housing screws, 32GB micro SD card (pre-installed), Bambu Textured PEI plate, purge wiper and screws, heatbed nozzle wiper, spool holder, one 600mm PTFE tube for an external spool, a filament sample and a supportive footpad.
Tools and spares
Unclogging pin tool, H2 and H1.5 Allen keys, Bambu scraper blade and screws, cable organiser, lubricant grease, lubricant oil, quick start guide, warranty leaflet, disclaimer and safety guidelines.
The AMS lite combo adds
AMS lite body with its 4-pin cable, the stand and screws, the rotary spool holder, the top mount screw set, four PTFE tubes (two at 730mm, two at 830mm) and a spare filament cutter.
In the box
What's in the A2L carton
Bambu's own packing list. Base and frame ship separately and bolt together, and the accessory box is where the small parts live.
The machine and the printing parts
A2L base housing and printer frame, 32GB micro SD card (pre-installed), the 0.4mm stainless steel nozzle (pre-installed), Bambu Textured PEI plate, power cable, purge wiper, spool holder, one 975mm PTFE tube for an external spool, a filament sample, quick start guide, warranty terms, disclaimer and safety guidelines.
The accessory box
Lubricant oil, lubricant grease, a filament cutter blade, a scraper blade, silicone footpad, foam footpad, unclogging pin, Z motor cover, PTFE tube coupler, H1.5 and H2.0 Allen keys and the screw sets.
The AMS lite combo adds
AMS lite body with its 4-pin cable, the AMS lite stand, the rotary spool holder, four PTFE tubes for the AMS lite (two at 975mm, two at 905mm) and two silicone clamps.
In the box
What's in the P1S carton
Bambu's own packing list. The P1S is the one machine here that ships with a spare hotend.
The machine and the printing parts
P1S with the Textured PEI plate pre-installed on the heatbed, the screen, 32GB micro SD card (pre-installed), spool holder and its screw pack, power cord, PTFE tube, and 250g of filament in a random colour on a Bambu reusable spool.
Tools and spares
A spare 0.4mm stainless steel hotend, hotend clip, nozzle wiping pads, unclogging pin tool, H1.5 and H2.0 Allen keys, screw pack for the scraper, screw pack for the extruder, thermal paste, lubricant grease, quick start guide, disclaimer and warranty leaflet.
The AMS combos add
With AMS: the AMS itself, two spare filament cutters, 6-pin and 4-pin Bambu Bus cables and two filament samples. With AMS 2 Pro: the AMS 2 Pro, a 4-pin cable, the switching adapter, a filament buffer and a PTFE tube coupler.
In the box
What's in the P2S carton
Bambu's own packing list. Almost everything that can be fitted at the factory already is.
The machine and the printing parts
P2S with the build plate and anti-vibration feet pre-installed, the touchscreen, spool holder assembly, two PTFE tubes (555mm and 180mm), power cord, quick start guide, warranty leaflet, disclaimer and safety guidelines. Note the standalone machine has no filament buffer in it, and you need one before an AMS 2 Pro can go on.
The toolbox
Hotend silicone sock, filament cutter, unclogging pin, nozzle wiping pad, scraper blade and its screws, H1.5 and H2.0 Allen keys, lubricant oil and lubricant grease.
The AMS 2 Pro combo adds
AMS 2 Pro, a 6-pin Bambu Bus cable, three PTFE tubes (600mm, 555mm and 350mm) and desiccant for the AMS.
In the box
What's in the X2D carton
Bambu's own packing list. The second extruder and the exhaust fan are in here, not extras.
The machine and the printing parts
X2D with the build plate, anti-vibration feet and filament buffer all pre-installed, two spool holders, the touchscreen, power cord, the auxiliary extruder, the external exhaust fan bundle (fan plus 6-pin cable), two PTFE tubes, quick start guide and warranty leaflet.
The toolbox
A spare hotend, hotend silicone sock, left and right filament cutters, unclogging pin, nozzle wiping pad, scraper blade and screws, the PTFE tube locking nut for the auxiliary extruder, H1.5 and H2.0 Allen keys, an open-end wrench, the flow blocker, lubricant oil and lubricant grease.
The AMS 2 Pro combo adds
AMS 2 Pro, with the external exhaust fan bundle and the AMS desiccant packed inside it, plus a 6-pin Bambu Bus cable.
In the box
What's in the H2S carton
Bambu's own packing list. The safety key is taped to the rear board, and the machine won't run the laser without it.
The machine and the printing parts
H2S with the build plate pre-installed, the safety key on the rear board, spool holder, power cord and the tool box.
The tool box
A 0.4mm nozzle, hotend silicone sock, toolhead cutter, unclogging pin, nozzle wiping pad, nozzle wiping component, scraper blade, screws for the spool holder and the scraper, H1.5 and H2.0 Allen keys, lubricant oil and lubricant grease.
The AMS 2 Pro combo adds
The AMS 2 Pro: four slots with active drying, and the power cord packs inside it.
The laser combo adds
The 10W laser module, the cutting module with pen holder, pen height calibrator and pen fixture, a marker pen, the emergency stop button and a second safety key attached to it, and a 6-pin cable. The tool box gains a 45° fine-point blade, a weeding tool, the laser homing area XY and Z markers, rubber screws for the chamber exhaust fan and a camera privacy cover.
In the box
What's in the H2D carton
Bambu's own packing list. One thing that isn't in it is a USB drive, and you'll want one.
The machine and the printing parts
H2D with the build plate pre-installed, the safety key on the rear board, two spool holders, power cord and the tool box.
The tool box
A 0.4mm nozzle, hotend silicone sock, filament cutter, unclogging pin, nozzle wiping pad, nozzle blocker, scraper blade, screws for the scraper and the spool holder, H1.5 and H2.0 Allen keys, lubricant oil and lubricant grease.
Bring your own USB drive
No USB drive is supplied, and without one you lose video recording and timelapse, LAN-only printing, sending files through developer tools, and log export. Any decent USB 2.0 or faster stick will do.
The AMS 2 Pro combo adds
The AMS 2 Pro: four slots with active drying, with the power cord packed inside it.
The laser combos add
The laser module, the cutting module with pen holder, pen height calibrator and pen fixture, a marker pen, an extra spool holder, the emergency stop button with a second safety key on it, and a 6-pin Bambu Bus cable. The tool box gains a 45° fine-point blade, a weeding tool, the laser homing area XY and Z markers, rubber screws for the chamber exhaust fan and a camera privacy cover.
In the box
What's in the H2C carton
Bambu's own packing list. The hotend count is the one line Bambu's own pages disagree on.
The machine and the printing parts
H2C with the AMS 2 Pro (it's sold as a combo only), the build plate pre-installed, the safety key on the rear board, spool holder, power cord packed inside the AMS, and the tool box.
How many hotends
Bambu's packing list says six: one 0.4mm standard hotend for the left side, plus 0.2mm, 0.6mm and three 0.4mm induction hotends for the rack. Bambu's own H2C FAQ says eight. Two of their pages disagree, so we'll confirm what's actually in your carton before you pay rather than print a number we can't stand behind. Running the full six-hotend rotation needs the separately sold H2C Ultimate Set either way.
The tool box
Hotend silicone sock, filament cutter, unclogging pin, nozzle wiping pad, nozzle blocker, scraper blade, screws for the scraper and the spool holder, H1.5 and H2.0 Allen keys, lubricant oil, lubricant grease and a yellow nozzle cleaning sponge.
Bring your own USB drive
None is supplied. Without one you lose video and timelapse, LAN printing, developer-tool file sending and log export. USB 2.0 or better, real write speed above 10MB/s, FAT32 or exFAT, one drive at a time.
The laser combos add
The laser module, the cutting module with pen holder, pen height calibrator and pen fixture, a marker pen, an extra spool holder, the emergency stop button with a second safety key on it, and a 6-pin Bambu Bus cable. The tool box gains a 45° fine-point blade, a weeding tool, the laser homing area XY and Z markers, rubber screws for the chamber exhaust fan and a camera privacy cover.
Specification
A1 mini spec sheet
Bambu's published figures for this machine, in full. Where they don't publish something, there's no row for it.
- Motion system
- Cartesian bed-slinger. X rides a horizontal rail and crossbeam, Y is the moving print platform on its own rail, Z is a lead screw with nut, coupling and stepper.
- Build volume
- 180 × 180 × 180 mm
- Chassis
- Steel and extruded aluminium
- Hotend
- All-metal, built as one unit. 0.4 mm stainless steel fitted; 0.2, 0.6 and 0.8 mm available.
- Max nozzle temperature
- 300°C
- Max bed temperature
- 80°C
- Chamber
- Open frame. No enclosure and no air filtration.
- Build plates
- Bambu Textured PEI, Smooth PEI, Dual-Texture PEI
- Speed
- 500 mm/s max toolhead speed, 10,000 mm/s² max acceleration
- Max flow
- 28 mm³/s, measured on a 150 × 150 mm single wall in Bambu ABS at 280°C
- Extruder
- Hardened steel gears, filament cutter fitted, 1.75 mm filament
- Bed levelling
- The nozzle is the probe. Force on the hotend detects contact and the machine measures 36 points on a 6 × 6 grid, then compensates Z at every XY coordinate through the print.
- Cooling
- Part cooling fan, hotend fan and mainboard fan, all closed-loop
- Screen
- 2.4 in 320 × 240 IPS touchscreen
- Camera
- Low frame-rate, up to 1080p, timelapse supported. There's an auxiliary light on it but no night vision, so leave a lamp on in the room if you want to check the print from your phone at 2am.
- Sensors
- No lidar and no AI camera on this family, so there's no AI failure detection watching the part while you're out. What it does have is the set that stops an overnight job turning into a bin bag: filament runout, filament tangle, filament odometry, power-loss recovery and nozzle clumping detection.
- Connectivity
- 2.4 GHz Wi-Fi, 802.11 b/g/n, and Bambu-Bus. Micro SD storage with a 32 GB card pre-installed.
- Motion controller
- Dual-core Cortex-M4
- Power
- 100 to 240 V AC 50/60 Hz, 150 W maximum
- Noise
- Under 48 dB in Silent Mode with active motor noise cancelling
- Dimensions
- 347 × 315 × 365 mm
- Net weight
- 5.5 kg
- Filament
- Ideal: PLA, PETG, TPU, PVA. Not recommended: ABS, ASA, PC, PA, PET and any carbon or glass fibre reinforced filament.
- Slicer
- Bambu Studio on macOS and Windows
Bambu publishes no operating temperature range and no extruder motor type for the A1 mini, so there's no row for either.
Specification
A1 spec sheet
Bambu's published figures for this machine, in full. Where they don't publish something, there's no row for it.
- Motion system
- Cartesian bed-slinger, the same layout as the A1 mini at full size
- Build volume
- 256 × 256 × 256 mm
- Hotend
- All-metal, built as one unit. 0.4 mm stainless steel fitted; 0.2, 0.6 and 0.8 mm available.
- Max nozzle temperature
- 300°C
- Max bed temperature
- 100°C
- Chamber
- Open frame. No enclosure and no air filtration.
- Build plates
- Textured PEI, Cool Plate, High Temperature Plate, Dual-Texture PEI
- Speed
- 500 mm/s max toolhead speed, 10,000 mm/s² max acceleration
- Max flow
- 28 mm³/s in Bambu ABS at 280°C
- Extruder
- Hardened steel gears, filament cutter fitted, 1.75 mm filament
- Bed levelling
- An eddy current sensor in the hotend detects nozzle-to-bed contact and the machine measures 49 points on a 7 × 7 grid, compensating Z per XY coordinate through the print.
- Calibration
- Z-offset, bed level, vibration resonance on both X and Y, and nozzle pressure, all run automatically for every print job
- Cooling
- Part cooling fan and hotend fan, closed-loop
- Screen
- 3.5 in 320 × 240 IPS touchscreen
- Camera
- Low frame-rate, up to 1080p, timelapse supported. There's an auxiliary light on it but no night vision, so leave a lamp on in the room if you want to check the print from your phone at 2am.
- Sensors
- No lidar and no AI camera on this family, so there's no AI failure detection watching the part while you're out. What it does have is the set that stops an overnight job turning into a bin bag: filament runout, filament tangle, filament odometry, power-loss recovery and nozzle clumping detection.
- Connectivity
- 2.4 GHz Wi-Fi, 802.11 b/g/n, and Bambu-Bus. Micro SD storage with a 32 GB card pre-installed.
- Motion controller
- Dual-core Cortex-M4
- Power
- 100 to 240 V AC 50/60 Hz. 1300 W maximum at 220 V, 350 W at 110 V.
- Noise
- Under 48 dB in Silent Mode with active motor noise cancelling
- Dimensions
- 465 × 410 × 430 mm
- Net weight
- 8.3 kg
- Filament
- Ideal: PLA, PETG, TPU, PVA. Not recommended: ABS, ASA, PC, PA, PET and any carbon or glass fibre reinforced filament.
- Slicer
- Bambu Studio on macOS and Windows
Units ship with the upgraded heatbed cable: Kevlar reinforcement, thicker insulation, softer copper and extended strain relief. Bambu publishes no operating temperature range or extruder motor type for the A1, so there's no row for either.
Specification
A2L spec sheet
Bambu's published figures for this machine, in full. Where they don't publish something, there's no row for it.
- Motion system
- Cartesian bed-slinger. Belts are 1.5GT on X and Y, 2GT on Z.
- Build volume
- 330 × 320 × 325 mm, about 105% more space than an A1
- Chassis
- Aluminium and steel, with a plastic outer frame
- Hotend
- Stainless steel, 0.4 mm pre-installed. 0.2, 0.4, 0.6 and 0.8 mm supported.
- Max nozzle temperature
- 300°C
- Max bed temperature
- 80°C
- Chamber
- Open frame. No enclosure and no air filtration.
- Build plates
- Flexible steel plate. Textured PEI included; Engineering Plate and Cool Plate SuperTack also supported.
- Speed
- 500 mm/s max toolhead speed, 10,000 mm/s² max acceleration
- Max flow
- 28 mm³/s, measured on a 150 mm round model, single outer wall, Bambu PLA Basic at 220°C
- Extruder
- Servo extruder motor with hardened steel gears and a built-in filament cutter. 1.75 mm filament.
- Calibration
- Adaptive Vibration Compensation, a multi-point calibration that retunes as the model grows taller and the load on the bed changes, plus flow dynamics calibration before every job.
- Cooling
- Part cooling fan and hotend cooling fan, both closed-loop
- Screen
- 3.5 in 240 × 320 touchscreen
- Camera
- Low frame-rate, up to 1080p, live view at 0.5 fps, timelapse supported
- Sensors
- No lidar and no AI camera on this family, so there's no AI failure detection watching the part while you're out. What it does have is the set that stops an overnight job turning into a bin bag: filament runout, filament tangle, filament odometry, power-loss recovery, air printing detection, and clumping detection by a physical contact switch rather than a camera guessing at it.
- Connectivity
- 2.4 GHz Wi-Fi only, 802.11 b/g/n, and Bambu-Bus. No Ethernet.
- Storage
- Micro SD only, 32 GB card pre-installed. There's no internal storage at all, so the card has to be in the slot to send or start a job.
- Motion controller
- Single-core Cortex-M4 plus single-core Cortex-M7
- Power
- 200 to 240 V AC in the Singapore version, 50/60 Hz. 1000 W maximum. Standby 4.7 to 5.2 W offline, 5.1 to 5.5 W on Wi-Fi, and about 0.145 kWh over a one-hour PLA print.
- Noise
- Below 49 dB in Silent Mode, peaking around 52 dB in Standard Mode
- Environment
- 15 to 30°C, humidity below 85%
- Dimensions
- 544 × 529 × 505 mm
- Net weight
- 12.8 kg
- Filament
- Suitable: PLA, PETG, TPU, PVA. Suitable with a hardened nozzle: PLA-CF, PETG-CF.
- Cutting module (optional)
- 300 × 300 mm cutting area, 300 × 255 mm drawing area, pens 10.5 to 12.5 mm, LightGrip and StrongGrip mats, 45° × 0.35 mm blade, 50 to 600 gf blade pressure, up to 0.5 mm thick. Recognises the blade or pen fitted and detects the mat type.
- AMS
- Up to four AMS units plus one AMS lite in series, so up to 19 colours. AMS 2 Pro and AMS HT need their own power to dry on this machine.
- Slicer
- Bambu Studio on macOS, Windows and Linux
The 80°C bed is Bambu's own ceiling, not a corner cut, and it's the number the filament list above follows from.
Specification
P1S spec sheet
Bambu's published figures for this machine. There's no standalone spec page for the P1 series, so these come from the store listing and the wiki.
- Motion system
- Enclosed CoreXY. Z runs on three lead screws driven by one stepper through a belt; the bed ships pre-levelled, supports auto bed levelling, and can be trammed by hand with three knobs.
- Build volume
- 256 × 256 × 256 mm. Bambu Studio defaults to a 250 mm printable height to protect the bed.
- Shell
- Enclosed, plastic and glass
- Hotend
- All-metal. 0.4 mm stainless steel included; 0.2, 0.6 and 0.8 mm optional.
- Max nozzle temperature
- 300°C
- Max bed temperature
- 100°C
- Chamber
- Passive, with no chamber heater
- Build plates
- Bambu Textured PEI, Cool Plate, Engineering Plate, High Temperature Plate
- Speed
- 500 mm/s max toolhead speed, 20,000 mm/s² max acceleration
- Speed modes
- Silent runs at 50% of normal speed and acceleration, Standard 100%, Sport 124%, Ludicrous 166%
- Cooling
- Control board fan, chamber temperature regulator fan and auxiliary part cooling fan, all closed-loop
- Air filtration
- Activated carbon filter
- Camera
- 1280 × 720 at 0.5 fps, timelapse supported
- Sensors
- Filament runout
- Screen
- 2.7 in 192 × 64 display with button control
- Connectivity
- Wi-Fi, Bluetooth and Bambu-Bus. Micro SD storage. USB output 5 V / 1.5 A.
- Power
- 100 to 240 V AC 50/60 Hz. 1000 W maximum at 220 V, 350 W at 110 V. Idle 5.8 to 6 W.
- Dimensions
- 389 × 389 × 458 mm. Bambu suggests reserving 500 × 500 × 950 mm of space.
- Net weight
- 12.95 kg, 17.60 kg boxed
- Filament
- Ideal: PLA, PETG, TPU, PVA, PET, ABS, ASA. Capable: PA, PC. Fibre-reinforced filament is not recommended without an extruder and hotend upgrade.
- AMS
- Compatible with the AMS and the AMS hub, up to 16 colours across four units. Chaining them needs a filament buffer or a hub depending on how many units you run, so tell us the plan and we'll get the parts right.
Bambu publishes no noise figure, no maximum flow rate and no operating temperature range for the P1S, so none of those are here. A full calibration after a hotend change takes about 20 minutes, which is the only calibration duration Bambu publishes for any machine.
Specification
P2S spec sheet
Bambu's published figures for this machine, in full.
- Technology
- FDM, enclosed CoreXY
- Build volume
- 256 × 256 × 256 mm
- Chassis
- Plastic and steel, with a plastic and glass outer frame
- Hotend
- Hardened steel, 0.4 mm fitted. 0.2, 0.4, 0.6 and 0.8 mm supported.
- Max nozzle temperature
- 300°C
- Max bed temperature
- 110°C. Getting from 35 to 110°C quickly means holding maximum power for about 3 to 5 minutes.
- Chamber
- No active heating. The machine warms the chamber through internal circulation, and an adaptive airflow switching unit draws cool outside air in for PLA or closes the loop for high-temperature material so the filter cleans the air instead. There's no exhaust fan, which is what makes it quieter than the P1S.
- Build plates
- Flexible steel plate. Textured PEI included; Smooth PEI and Cool Plate SuperTack supported.
- Speed
- 600 mm/s max toolhead speed, 20,000 mm/s² max acceleration
- Max flow
- 40 mm³/s, measured on a 250 mm round model, single outer wall, Bambu ABS at 280°C
- Extruder
- Bambu high-precision PMSM servo motor with hardened steel gears and a built-in filament cutter. Up to 8.5 kg of extrusion force, 70% more than its predecessor, sampling resistance and position at 20 kHz to catch grinding and clogs live. 1.75 mm filament.
- Cooling
- Part cooling, hotend cooling and auxiliary part cooling, all closed-loop
- Air filtration
- Activated carbon, with VOC and particulate matter filtration
- Camera
- One camera, built in: live view at 1920 × 1080 and 30 fps. It calibrates its own position and angle from the silkscreen printed on the heatbed, so treat that silkscreen as part of the machine. There's no toolhead camera on a P2S. That one is the X2D's, and it's what does close inspection and calibration work up at the nozzle.
- Sensors
- 20 in total. Door sensor, filament runout, filament tangle (sensed by the extruder motor, so it works without an AMS), filament odometry with an AMS, power-loss recovery. AI detection watches for spaghetti, material pile-up, air printing and clogs while the job runs, and pauses and prompts rather than ploughing on.
- Screen
- 5 in 854 × 480 touchscreen
- Storage
- 8 GB built-in eMMC plus a USB port
- Processing
- Dual-core Cortex-M4 plus single-core Cortex-M7 motion control, quad-core 1.5 GHz ARM A7 application processor, 2 TOPS NPU
- Connectivity
- Dual-band Wi-Fi, 802.11 a/b/g/n. No Ethernet.
- Power
- 100 to 120 or 200 to 240 V AC 50/60 Hz. 1200 W maximum at 220 V, 1000 W at 110 V. About 200 W steady state on PLA, 7.8 to 8.2 W idle.
- Noise
- Below 50 dB in Silent Mode, measured at 1 m
- Environment
- 10 to 30°C, humidity below 85%
- Dimensions
- 392 × 406 × 478 mm
- Net weight
- 14.9 kg
- Filament
- PLA, PETG, ABS, ASA, TPU, the support materials, PET, PA, PC, PVA, PLA-CF, PETG-CF, ABS-GF, ASA-CF, PA6-CF, PA6-GF, PAHT-CF, PPA-CF and PET-CF
- AMS
- Up to four AMS 2 Pro and four AMS HT, so eight units, 20 slots and up to 20 colours. One AMS 2 Pro is powered and dried straight off the machine, with none of the separate switching adapter an X1 or P1 needs. The original AMS works with a P2S buffer adapter. The A1-series AMS hub is not compatible.
- Slicer
- Bambu Studio on macOS, Windows and Linux
Specification
X2D spec sheet
Bambu's published figures for this machine, in full. Two nozzles means two of some rows.
- Technology
- FDM, enclosed CoreXY, dual nozzle. The main nozzle is direct drive; the auxiliary extruder sits on the rear panel and feeds the toolhead through a PTFE tube, which keeps the toolhead light and small.
- Build volume
- Main nozzle 256 × 256 × 260 mm. Auxiliary nozzle 235.5 × 256 × 256 mm. Dual nozzle 235.5 × 256 × 256 mm. Total volume across both, 256 × 256 × 260 mm.
- Chassis
- Plastic and steel, with a plastic, glass and metal outer frame
- Hotend
- Hardened steel, 0.4 mm fitted. 0.2, 0.4, 0.6 and 0.8 mm supported. Both nozzles run the same type and size.
- Max nozzle temperature
- 300°C
- Max bed temperature
- 120°C
- Chamber
- Active heating up to 65°C, with a chamber exhaust fan
- Build plates
- Textured PEI, Smooth PEI, Cool Plate SuperTack, Engineering Plate
- Speed
- 1,000 mm/s max toolhead speed, 20,000 mm/s² max acceleration
- Max flow
- 40 mm³/s on the standard hotend, 65 mm³/s on the optional high-flow hotend
- Extruders
- Main: hardened steel gear with a Bambu high-precision PMSM servo motor. Auxiliary: hardened steel gear with a stepper motor. Built-in filament cutter, 1.75 mm filament. A flow blocker covers whichever nozzle is idle so it can't drool.
- Cooling
- Part cooling, hotend cooling, main control board, chamber exhaust, chamber heat circulation and auxiliary part cooling, all closed-loop
- Air filtration
- G3 pre-filter, H12 HEPA and granulated coconut-shell activated carbon, with VOC and particulate filtration
- Cameras
- Live view 1920 × 1080 at 30 fps, toolhead camera 1600 × 1200 at 30 fps
- Sensors
- 31 in total, ten of them temperature sensors across the nozzle, heatbed and chamber. Door sensor, filament runout, filament tangle, filament odometry with an AMS, power-loss recovery. AI detection watches for spaghetti, material pile-up, air printing and clogs while the job runs, and pauses and prompts rather than ploughing on.
- Screen
- 5 in 1280 × 720 touchscreen
- Storage
- 8 GB built-in eMMC plus a USB port
- Processing
- Dual-core Cortex-M4 plus single-core Cortex-M7 motion control, quad-core ARM application processor with a dedicated NPU
- Connectivity
- Dual-band Wi-Fi, 802.11 a/b/g/n. No Ethernet.
- Power
- 200 to 240 V AC in the Singapore version, 50/60 Hz. 1600 W maximum at 220 V, 1100 W at 110 V. Steady state 250 W on PLA and 550 W on PC, both at 25°C ambient.
- Noise
- Below 50 dB in Silent Mode, measured at 1 m
- Environment
- 10 to 30°C, humidity below 85%
- Dimensions
- 392 × 406 × 478 mm
- Net weight
- 16.25 kg
- Filament, main hotend
- PLA, PETG, ABS, ASA, TPU, the support materials, PET, PA, PC, PVA, plus carbon and glass fibre reinforced PLA, PETG, ABS, ASA, PA6, PAHT, PPA and PET
- Filament, auxiliary hotend
- The same list minus PLA Aero, with PLA Silk, PETG-CF, ASA-CF, PA6-CF, TPU for AMS and Support for PA/PET flagged as print with caution. Bambu rates auxiliary-nozzle quality slightly below the main nozzle, so put the show surface on the main one.
- Calibration
- Automatic dynamic flow calibration on the main hotend only; the auxiliary hotend is calibrated by hand in Bambu Studio. Motion accuracy calibration is supported but needs the separately sold Vision Encoder.
- AMS
- Up to four AMS 2 Pro and eight AMS HT, so 12 units and 24 slots, and up to 25 colours with both hotends in play. The original AMS is plug and play but can't dry. AMS lite is not supported.
- Slicer
- Bambu Studio on macOS, Windows and Linux
Specification
H2S spec sheet
Bambu's published figures for this machine, in full.
- Technology
- FDM, enclosed CoreXY, single nozzle
- Build volume
- 340 × 320 × 340 mm, the largest single-nozzle volume in the range
- Chassis
- Aluminium, steel, plastic and glass
- Hotend
- All metal, hardened steel, 0.4 mm included. 0.2, 0.4, 0.6 and 0.8 mm supported.
- Max nozzle temperature
- 350°C
- Max bed temperature
- 120°C
- Chamber
- Active heating up to 65°C
- Build plates
- Textured PEI, Smooth PEI
- Speed
- 1,000 mm/s max toolhead speed, 20,000 mm/s² max acceleration
- Max flow
- 40 mm³/s on the standard hotend, 65 mm³/s on the optional high-flow hotend
- Extruder
- Bambu high-precision PMSM servo motor with hardened steel gears and a built-in filament cutter. Up to 10 kg of extrusion force, 67% more than a regular stepper, sampling resistance and position at 20 kHz. 1.75 mm filament.
- Cooling
- Part cooling, hotend cooling, main control board, chamber exhaust, chamber heat circulation and auxiliary part cooling, all closed-loop
- Air filtration
- G3 pre-filter, H12 HEPA and granulated coconut-shell carbon, with VOC and particulate filtration
- Cameras
- Toolhead 1600 × 1200 at 30 fps, live view 1920 × 1080 at 30 fps, and on the Laser Edition a BirdsEye camera at 3264 × 2448 and 15 fps
- Sensors
- 23 sensors and 3 cameras. Five NTC temperature sensors across nozzle, heatbed and chamber, five flame sensors, front-door and top-cover sensors, filament runout, tangle and odometry, power-loss recovery, and an emergency stop button on the laser combo.
- Screen
- 5 in 720 × 1280 touchscreen
- Storage
- 8 GB built-in eMMC plus a USB port
- Processing
- 2 TOPS NPU
- Connectivity
- Dual-band Wi-Fi including 5 GHz, 802.11 a/b/g/n
- Power
- 100 to 120 or 200 to 240 V AC 50/60 Hz. 1800 W maximum at 220 V, 1250 W at 110 V. About 200 W on a PLA print, 26.5 W idle.
- Noise
- 50 dB average and 55.6 dB peak printing Bambu's own high-speed benchy, measured at 1 m against a 40 dB background
- Environment
- 10 to 30°C, humidity below 85%
- Dimensions
- 492 × 514 × 626 mm. Allow 800 × 1020 × 1050 mm of space with an AMS 2 Pro on top, or 1100 mm wide if you side-mount the AMS.
- Net weight
- 30 kg, or 30.5 kg for the Laser Edition
- Filament
- PLA, PETG, TPU, PVA, BVOH, ABS, ASA, PC, PA, PET, PPS, plus carbon and glass fibre reinforced PLA, PETG, PA, PET, PC, ABS, ASA, PPA and PPS
- Laser (optional)
- 10 W only. Semiconductor, 455 ±5 nm blue engraving laser with an 850 ±5 nm infrared height-measuring laser, 10 W ±1 W, 0.03 × 0.14 mm spot, up to 400 mm/s engraving, up to 5 mm cutting in basswood plywood, 310 × 260 mm engraving area. Class 4 module inside a Class 1 machine. XY by visual positioning to under 0.3 mm, Z height by Micro Lidar to ±0.1 mm. Built-in air pump at 30 kPa and 30 L/min, 100 mm ventilation adapter. The 40 W module does not fit: the head is wider than the H2S toolhead and would foul the air duct, cable chain and XY homing.
- Cutting module (optional)
- 297.5 × 300 mm cutting area, 300 × 255 mm drawing area, pens 10.5 to 12.5 mm, 45° × 0.35 mm blade, 50 to 600 gf, up to 0.5 mm thick, with blade, pen and mat recognition
- Motion accuracy
- Under 50 µm, distance-independent, with the separately sold Vision Encoder
- AMS
- Up to four AMS 2 Pro and eight AMS HT, so 12 units, 24 slots and up to 24 colours. The original AMS works but can't dry. AMS lite is not supported.
- Slicer
- Bambu Studio on macOS, Windows and Linux
Bambu's own pages disagree on maximum power. The H2S spec page prints 2050 W at 220 V and 1170 W at 110 V, while the H2S FAQ and Bambu's printer power-parameters page both give 1800 W and 1250 W for the whole H2 series. We've printed the pair Bambu repeats, and it's also what the H2C draws. If your circuit is tight, plan against the higher figure.
Specification
H2D spec sheet
Bambu's published figures for this machine, in full. Two nozzles means two build volumes, depending on how the job is sliced.
- Technology
- FDM, enclosed CoreXY, dual nozzle
- Build volume
- Single nozzle 325 × 320 × 320 mm on the left and 325 × 320 × 325 mm on the right, so 325 mm is the tallest the machine prints and anything over 320 mm goes on the right nozzle. Dual nozzle 300 × 320 × 320 mm. Total across both nozzles, 350 × 320 × 320 mm.
- Chassis
- Aluminium, steel, plastic and glass
- Hotend
- All metal, hardened steel, 0.4 mm included. 0.2, 0.4, 0.6 and 0.8 mm supported. Both nozzles have to run the same size in one job.
- Max nozzle temperature
- 350°C
- Max bed temperature
- 120°C
- Chamber
- Active heating up to 65°C
- Build plates
- Textured PEI, Smooth PEI
- Speed
- 1,000 mm/s max toolhead speed, 20,000 mm/s² max acceleration
- Max flow
- 40 mm³/s on the standard hotend, 65 mm³/s on the optional high-flow hotend
- Extruder
- Bambu high-precision PMSM servo motor with hardened steel gears. Up to 10 kg of extrusion force, sampling torque, resistance and position at 20 kHz. 1.75 mm filament.
- Cooling
- Part cooling, auxiliary part cooling, chamber heat circulation, hotend cooling, main control board and chamber exhaust, all closed-loop
- Air filtration
- G3 pre-filter, H12 HEPA and granulated coconut-shell carbon
- Cameras
- Live view 1920 × 1080, nozzle camera 1920 × 1080, toolhead camera 1920 × 1080, and on the Laser Edition a BirdsEye camera at 3264 × 2448
- Sensors
- 36 sensors, 4 computer vision cameras and 2 servo motors. Fifteen of the sensors sit on the single filament path from AMS to nozzle, tracking feed velocity, tension, filament tip location, the extruder's thermal environment and dynamic extrusion pressure. Door sensor, filament runout, tangle and odometry, power-loss recovery, flame detection.
- Nozzle offset
- Under 25 µm between the two nozzles, calibrated before each print by non-contact eddy current sensing that isn't thrown off by a dirty nozzle
- Motion accuracy
- 50 µm, distance-independent, using the separately sold Vision Encoder plate and its 5 µm optical measurement
- Screen
- 5 in 720 × 1280 touchscreen
- Storage
- 8 GB built-in eMMC plus a USB port. No USB drive is supplied, and without one you lose timelapse, LAN-only printing and log export.
- Processing
- 2 TOPS NPU
- Connectivity
- Dual-band Wi-Fi, 802.11 a/b/g/n
- Power
- 100 to 120 or 200 to 240 V AC 50/60 Hz. 2200 W maximum at 220 V, 1320 W at 110 V. About 197 W on a PLA print, 25 to 27 W idle. Buy the version that matches your mains.
- Environment
- 10 to 30°C
- Dimensions
- 492 × 514 × 626 mm
- Net weight
- 31 kg
- Filament
- PLA, PETG, TPU, PVA, BVOH, ABS, ASA, PC, PA, PET, plus carbon and glass fibre reinforced PLA, PETG, PA, PET, PC, ABS, ASA, PPA and PPS
- Laser (optional)
- 10 W and 40 W. Semiconductor, 455 ±5 nm blue engraving laser with an 850 ±5 nm infrared height-measuring laser. 10 W ±1 W with a 0.03 × 0.14 mm spot, up to 400 mm/s and 5 mm cutting depth over a 310 × 270 mm area. 40 W ±2 W with a 0.14 × 0.2 mm spot, up to 1000 mm/s and 15 mm cutting depth over a 310 × 250 mm area. Both in basswood plywood. Class 4 module inside a Class 1 machine. XY positioning under 0.3 mm, Z height by Micro Lidar to ±0.1 mm. Flame, temperature, door and module-installation detection, safety key included, 100 mm ventilation adapter.
- Cutting module (optional)
- 300 × 285 mm cutting area, 300 × 255 mm drawing area, pens 10.5 to 12.5 mm, 45° × 0.35 mm blade, 50 to 600 gf, up to 0.5 mm thick, with blade, pen and mat recognition
- AMS
- Up to four AMS 2 Pro and eight AMS HT, so 12 units, 24 slots and up to 25 colours. One or two AMS 2 Pro units connect straight to the machine; beyond that you need the 4-in-1 PTFE adapter. One AMS 2 Pro is powered and dried entirely over the 6-pin cable; a second and beyond need their own power to dry. AMS lite is not supported.
- Software
- Bambu Studio, Bambu Suite and Bambu Handy, on macOS and Windows
Bambu publishes a noise figure for the H2S and the H2C but not for the H2D, so we're not quoting one here. If it matters to your room, ask and we'll measure the one on our bench.
Specification
H2C spec sheet
Bambu's published figures for this machine, in full. The Vortek rack gives it more hotends than anything else on this page.
- Technology
- FDM, enclosed CoreXY, dual nozzle plus the Vortek induction hotend rack
- Build volume
- Single nozzle 325 × 320 × 320 mm on the left and 305 × 320 × 325 mm on the right. Dual nozzle 300 × 320 × 320 mm. Total across both, 330 × 320 × 320 mm.
- Chassis
- Aluminium and steel, with a plastic and glass outer frame, and a chamber built entirely from flame-retardant material. Side panels are plastic; the front doors are glass on the standard machine and PC on the laser version. The top cover swaps with an H2D's.
- Hotends
- Hardened steel, 0.2, 0.4, 0.6 and 0.8 mm supported, standard or high flow. The left hotend is an ordinary H2-series unit. The right is a Vortek induction hotend: 10 g, 20 × 15 × 56 mm, contactless, up to temperature in about 8 seconds.
- Hotend rack
- Six docks, each with a position sensor and a status light. One hotend rides the toolhead and up to five park on the rack, swapped automatically mid-print. Coarse homing reads surface magnets and runs before toolhead homing so the two can't collide; fine homing runs whenever a hotend is taken or placed.
- Max nozzle temperature
- 350°C on every hotend in the system
- Max bed temperature
- 120°C
- Chamber
- Active heating up to 65°C
- Build plates
- Flexible steel plate. Textured PEI included, Engineering Plate supported.
- Speed
- 1,000 mm/s max toolhead speed, 20,000 mm/s² max acceleration
- Max flow
- 40 mm³/s
- Extruder
- Bambu high-precision PMSM servo motor with hardened steel gears and a built-in filament cutter. Up to 10 kg of extrusion force, 70% more than a stepper, sampling at 20 kHz. 1.75 mm filament.
- Cooling
- Part cooling, hotend cooling, main control board, chamber exhaust, chamber heat circulation, auxiliary part cooling and a toolhead enhanced cooling fan, all closed-loop
- Air filtration
- G3 pre-filter, H12 HEPA and granulated coconut-shell carbon
- Cameras
- Toolhead camera 1600 × 1200, live view and nozzle cameras both 1920 × 1080, and on the Laser Edition a BirdsEye camera at 3264 × 2448
- Sensors
- 59 on a fully equipped Laser Edition with the BirdsEye camera and six induction hotends, with a quad-camera vision system. Door sensor, filament runout, tangle and odometry, power-loss recovery, flame detection.
- Pre-print inspection
- The vision system scans the build surface for debris, checks the plate type and its alignment, and confirms the hotend type against the sliced file before it starts
- Motion accuracy
- Under 50 µm with the separately sold Vision Encoder
- Screen
- 5 in 720 × 1280 touchscreen
- Storage
- 8 GB built-in eMMC plus a USB port. No USB drive is supplied; USB 2.0 or better, real write speed above 10 MB/s, FAT32 or exFAT, one drive at a time.
- Processing
- Dual-core Cortex-M4 plus single-core Cortex-M7 motion control, quad-core ARM application processor with an NPU
- Connectivity
- Wi-Fi including 5 GHz, 802.11 a/b/g/n. No Ethernet.
- Power
- 200 to 240 V AC in the Singapore version, 50/60 Hz. 1800 W maximum, 1792 W measured peak, 28.6 W idle on the network, about 200 W on a PLA print, about 193 W on PETG and about 294 W on PC. Low Power Mode caps the peak at about 860 W by throttling the AC heaters, which heats more slowly rather than using less energy overall.
- Noise
- 50 dB average and 61 dB peak printing Bambu's own high-speed benchy, the peak being the moment the Vortek changes hotends. Measured at 1 m against a 40 dB background.
- Environment
- 10 to 30°C
- Dimensions
- 492 × 514 × 626 mm
- Net weight
- 32.5 kg
- Filament
- PLA, PETG, TPU, PVA, BVOH, ABS, ASA, PC, PA, PET, PPS, plus carbon and glass fibre reinforced PLA, PETG, PA, PET, PC, ABS, ASA, PPA and PPS
- Laser (optional)
- 10 W and 40 W on the laser version, alongside cutting. A standard H2C does cutting only and takes the same upgrade kit as the H2D, where the air pump is external rather than built in.
- AMS
- Up to four AMS 2 Pro and eight AMS HT, so 12 units, 24 slots and up to 25 colours. The original AMS works but can't dry. AMS lite is not supported.
- Slicer
- Bambu Studio on macOS, Windows and Linux
An H2D or H2S can be converted to an H2C with a Vortek upgrade kit, but Bambu says the job is long and skilled and that buying an H2C outright is cheaper. Firmware currently mixes standard and high-flow hotends in one print but not different nozzle sizes; a Filament Track Switch Module is expected in 2026. Every print and idle figure above is off Bambu's printer power-parameters page, which is the one place they publish all three materials side by side. The H2C FAQ disagrees with it in three places: 205 W on PLA against 200 W, 27 W idle against 28.6 W, and 298 W for both PETG and PC, which reads like a copy error. So we quote the page that separates them, and the running costs further up are worked from the same numbers.
By the numbers
What it costs to run
Bambu measures the watts. We did the sums at Singapore's regulated tariff.
- 2.6 can hour of PLA on an A1 mini80 W measured
- 3.0 can hour of PLA on an A195 W measured
- 4.6 can hour of PLA on an A2L145 W measured
- S$1.16a month left switched on and idlean A1 at 5 W over 730 hours. An A1 mini idles higher, 7 W and S$1.63, which is Bambu's own measurement and not a typo. An A2L is 5.3 W and S$1.23
- 60 cthe plastic in a 30 g PLA phone standPLA Basic at S$20 a kilo
By the numbers
What it costs to run
Bambu measures the watts. We did the sums at Singapore's regulated tariff.
- 3.4 can hour of PLA on a P1S105 W measured
- 4.5 can hour of ABS on a P1S140 W measured
- 6.4 can hour of PLA on a P2S200 W steady state
- S$0.40a 12 hour overnight PLA print on a P1Sthe plastic in it costs several times that
- S$5.00the plastic in a 250 g PETG bracketPETG Basic at S$20 a kilo
By the numbers
What it costs to run
Bambu measures the watts. We did the sums at Singapore's regulated tariff.
- 8.0 can hour of PLA on an X2D250 W at 25°C ambient
- 17.6 can hour of PC on an X2D550 W measured
- 6.3 can hour of PLA on an H2D197 W measured
- S$6.06a month left switched on and idlean H2D at 26 W, 730 hours. An X2D idles at 8 W, so S$1.86
- S$8.75a 400 g, 12 hour PLA print on an H2Dplastic and power together
By the numbers
What it costs to run
Bambu measures the watts. We did the sums at Singapore's regulated tariff.
- 6.4 can hour of PLA on an H2S or an H2C200 W steady state on both
- 10.5 can hour of PC on an H2San H2C is cheaper here, 9.4 c
- 5.7 can hour of PETG on an H2San H2C, 6.2 c
- S$6.17a month left switched on and idlean H2S at 26.5 W over 730 hours. An H2C draws 28.6 W, so S$6.66
- S$8.77a 400 g, 12 hour PLA printplastic and power together, PLA Basic at S$20 a kilo
Wear parts
What wears out on an A1 mini
The parts no warranty covers, at our prices, ex-GST.
- Hotend
- S$23 for a complete A-series hotend in any size, which is the cheapest hotend on this page to live with. Clean it every 5 spools of PLA or PETG, every 2 spools of anything fibre-filled, and replace it when cleaning stops helping.
- Build plate
- The 180 × 180 mm plates only, and a 256 mm one won't stand in: S$40 textured PEI, S$42 smooth PEI, S$50 dual-texture, S$24 for a 3D Effect plate. A plate is a consumable and adhesion drops with use.
- Air filter
- Nothing to buy. The A1 mini is open frame, so there's no carbon filter in it to replace.
Wear parts
What wears out on an A1
The parts no warranty covers, at our prices, ex-GST.
- Hotend
- S$23 for a complete A-series hotend in any size, which is the cheapest hotend on this page to live with. Clean it every 5 spools of PLA or PETG, every 2 spools of anything fibre-filled, and replace it when cleaning stops helping.
- Build plate
- The 256 × 256 mm plates: S$75 textured PEI, S$73 dual-texture, S$65 Cool Plate SuperTack, S$59 Engineering, S$36 for a 3D Effect plate. A plate is a consumable and adhesion drops with use.
- Air filter
- Nothing to buy. The A1 is open frame, so there's no carbon filter in it to replace.
Wear parts
What wears out on an A2L
The parts no warranty covers, at our prices, ex-GST.
- Hotend
- S$23 for a complete A-series hotend in any size, the same part the A1 and A1 mini take. Clean it every 5 spools of PLA or PETG, every 2 spools of anything fibre-filled, and replace it when cleaning stops helping.
- Build plate
- The A2L's plate is its own size and we don't list a spare on the build plate page yet, so message us and we'll bring one in. The textured PEI plate in the box is a consumable like every other and adhesion drops with use.
- Air filter
- Nothing to buy. The A2L is open frame, so there's no carbon filter in it to replace.
Wear parts
What wears out on a P1S
The parts no warranty covers, at our prices, ex-GST.
- Hotend
- S$65 for a complete P1-series hotend in any size. It's the dearest hotend on this page outside the high-flow parts, and it's the one that costs you a tool job rather than a clip. Clean it every 5 spools of PLA or PETG, every 2 spools of anything fibre-filled.
- Build plate
- The 256 × 256 mm plates: S$75 textured PEI, S$73 dual-texture, S$65 Cool Plate SuperTack, S$59 Engineering, S$36 for a 3D Effect plate. A plate is a consumable and adhesion drops with use.
- Air filter
- S$12 for the X1 and P1S activated carbon filter, the cheapest in the range. Every 1,440 printing hours, which is 60 days of continuous running. Carbon adsorbs until it stops and gives no warning, so the hour count is the only signal you get.
Wear parts
What wears out on a P2S
The parts no warranty covers, at our prices, ex-GST.
- Hotend
- S$34 for a standard H2 and P2 hotend, S$95 for a high flow one, S$155 for the 0.4 mm tungsten carbide high flow. Clean it every 5 spools of PLA or PETG, every 2 spools of anything fibre-filled.
- Build plate
- The second-generation 256 × 256 mm plates, which carry the updated QR code: S$69 textured PEI, S$73 dual-texture, S$65 Cool Plate SuperTack, S$59 Engineering, S$36 for a 3D Effect plate. A plate is a consumable and adhesion drops with use.
- Air filter
- S$26 for the P2S activated carbon filter. Every 1,440 printing hours, which is 60 days of continuous running. Carbon adsorbs until it stops and gives no warning, so the hour count is the only signal you get.
Wear parts
What wears out on an X2D
The parts no warranty covers, at our prices, ex-GST.
- Hotend
- S$34 for a standard H2 and P2 hotend, S$95 for a high flow one, S$155 for the 0.4 mm tungsten carbide high flow. You're buying two of everything on this machine, so budget accordingly. Clean them every 5 spools of PLA or PETG, every 2 spools of anything fibre-filled.
- Build plate
- The second-generation 256 × 256 mm plates, which carry the updated QR code: S$69 textured PEI, S$73 dual-texture, S$65 Cool Plate SuperTack, S$59 Engineering, S$36 for a 3D Effect plate. A plate is a consumable and adhesion drops with use.
- Air filter
- S$30 for the X2D activated carbon filter. Every 1,440 printing hours, which is 60 days of continuous running. Carbon adsorbs until it stops and gives no warning, so the hour count is the only signal you get.
Wear parts
What wears out on an H2
The parts no warranty covers, at our prices, ex-GST.
- Hotend
- S$34 for a standard H2 and P2 hotend, S$95 for a high flow one, S$155 for the 0.4 mm tungsten carbide high flow. Clean it every 5 spools of PLA or PETG, every 2 spools of anything fibre-filled.
- Build plate
- The 350 × 320 mm plates, shared between the H2S and the H2D: S$115 textured PEI, S$115 Engineering, S$111 Cool Plate SuperTack. A plate is a consumable and adhesion drops with use.
- Air filter
- S$36 for the H2-series activated carbon filter, one part across the H2S, H2D and H2C. Every 1,440 printing hours, which is 60 days of continuous running. Carbon adsorbs until it stops and gives no warning, so the hour count is the only signal you get.
Wear parts
What wears out on an H2C
The parts no warranty covers, at our prices, ex-GST.
- Hotend
- The left side takes an ordinary H2 and P2 hotend: S$34 standard, S$95 high flow, S$155 for the 0.4 mm tungsten carbide high flow. The Vortek induction hotends the rack carries aren't on that page, so ask us and we'll quote them. Clean any of them every 5 spools of PLA or PETG, every 2 spools of anything fibre-filled, and never open an induction hotend up.
- Build plate
- The H2C's plate is its own part at 330 × 320 mm, so an H2S or H2D plate won't fit: S$107 textured PEI, S$107 Engineering. A plate is a consumable and adhesion drops with use.
- Air filter
- S$36 for the H2-series activated carbon filter, one part across the H2S, H2D and H2C. Every 1,440 printing hours, which is 60 days of continuous running. Carbon adsorbs until it stops and gives no warning, so the hour count is the only signal you get.
Procedure
Ordering and setting up
Most models are pre-order with a lead time of about 10 days, so message us to confirm current stock before you plan around a date.
Pick model and configuration
Printer only, with an AMS, or a laser combo. The price and what's in the box update as you choose.
Confirm stock with us
Singapore units ship in the 200–240V configuration. We'll tell you whether your combination is on the shelf or on the next container.
Collect or have it delivered
Self-collect at Bendemeer, or islandwide delivery. Printers ship as bulky freight, so delivery is quoted at checkout.
Set it up
The A and P series are running in about 15 to 20 minutes out of the box. We're on WhatsApp if the first print doesn't go to plan.
Ownership
The ownership sheet
Everything the spec table leaves out, and true of all nine machines. What the warranty really covers here, what it costs to keep one fed, and what happens when something goes wrong. The wear parts panel prices the hotend, the plate and the filter for the model you've picked, because those three differ on nearly every machine.
- Warranty in Singapore
- 12 months from the day you receive it. Bambu's two-year term covers the EU, Switzerland, Norway, Iceland, the US and Canada. Singapore falls under the rest of the world, so 12 months is the number, whatever a forum tells you.
- If it goes in for repair
- The clock pauses for the days the machine is away. A replaced part does not restart it.
- Covered for the full term
- Structure, motion and electronics. Axes, belts, motors, heatbed, chamber heater, mainboards, touchscreen, every camera, the exhaust fan, the filament buffer, the purge wiper, the glass door.
- Covered for three months only
- This is the tier that surprises people, and it is a different list on every family. A1 mini, A1, A2L and P1S: the extruder unit minus its gear assembly and filament sensor, plus the 32 GB micro SD card. H2S, H2D and H2C: the dual extruder unit minus its gear assembly, the extruder idlers and filament sensor, and the laser air assist tube connector. X2D: the auxiliary extruder and its upper cover. P2S: no printer part sits in this tier at all.
- Not covered at all
- The hotend and every part of it, the extruder gear assembly, build plates and spare sheets, PTFE tube and connector, glue, cutters, scrapers, wipers and air filters. Bambu still replaces any of them at its discretion for a manufacturing defect while the printer is in warranty.
- What voids it
- Third-party accessories that cause damage, unofficial firmware or flashing tools, service by an unauthorised centre, and skipping the maintenance intervals. That last clause is Bambu's, not ours.
- Desiccant
- S$8 for six sachets. Roughly every 4 to 6 weeks of continuous AMS use, or when the colour turns.
- Lubricant oil
- S$12. Monthly, on the rails.
- Electricity
- About 32 cents a kilowatt hour ex-GST at the July to September 2026 regulated tariff. It is revised every quarter.
- Mains
- The A1 mini, A1 and P1S are universal 100 to 240 V. The A2L, P2S, X2D, H2S, H2D and H2C are built as two separate part numbers instead, a 100 to 120 V version and a 200 to 240 V one, and what we ship here is the 200 to 240 V version. On the machines with a heated chamber the high-voltage and low-voltage chamber heater assemblies are different parts and must not be mixed, so this is not something you change your mind about later.
- Setup
- About 20 minutes on an A1 mini and 15 on a P1S. Those are the only two figures Bambu publishes. Everything else arrives assembled: unlock the transit brackets the app prompts you about, plug it in, and let it calibrate itself.
- Where to put it
- 10 to 30°C where Bambu publishes a range, and 15 to 30°C on the A2L. They give no operating range at all for the P1S, and a temperature but no humidity figure for the H2D and H2C. Out of direct sunlight, which upsets the infrared sensors. On your own network rather than a guest network, which routinely breaks LAN binding. The A1, A1 mini and A2L are 2.4 GHz only, so check your router is not hiding that band.
- A clogged hotend is not a defect
- Bambu says so in the warranty and it is fair. Test it first: extrude by hand, and a straight strand means clear while a curling strand means a partial clog. Bambu's own line is that occasional clogs are normal and not a sign of a serious fault.
- If downtime costs money
- Our annual preventive maintenance package covers a yearly service at your premises, unlimited issue checks and a loaner while yours is with us. The three wear parts it swaps, the nozzle unit, the build plate and the PTFE tube, are exactly the three that nobody's warranty covers. Tick it on when you add the printer to the cart. It isn't offered on every model, and where it isn't, message us and we'll quote the work directly.
- Buying it here
- Prices exclude GST and 9% is added at checkout. Business buyers can check out against a purchase order once we've verified the account. Bambu does not support cross-regional service, so a grey import gets serviced wherever it was bought.
- If you're not ready to own one
- We rent the same machines by the day from the printer rental page, and we print parts to order through the instant quote.
Part prices are ours, ex-GST, correct at 20/08/2026. Warranty terms are Bambu's, from their published policy. Power and interval figures are Bambu's own; the cost arithmetic is ours.