

Bambu Lab Hotend
$23.00 – $155.00 SGD
excl. GST · 9% added at checkout
Made to order
Quick-swap nozzle assembly for the A1 and A1 mini. Hardened steel, so it takes abrasive filament (carbon fibre, glow, glitter, wood fill) without wearing out. 0.4mm is the everyday size.
Made to order, ships in about 7 days.
SKU · SQ3462016
Bambu Lab
Bambu Lab Hotend
Which hotend fits which machine, what the nozzle is made of, how you change it, and what each size is actually good at.
By printer
Hotends aren't interchangeable between series. Pick the family first, then the size and the material.
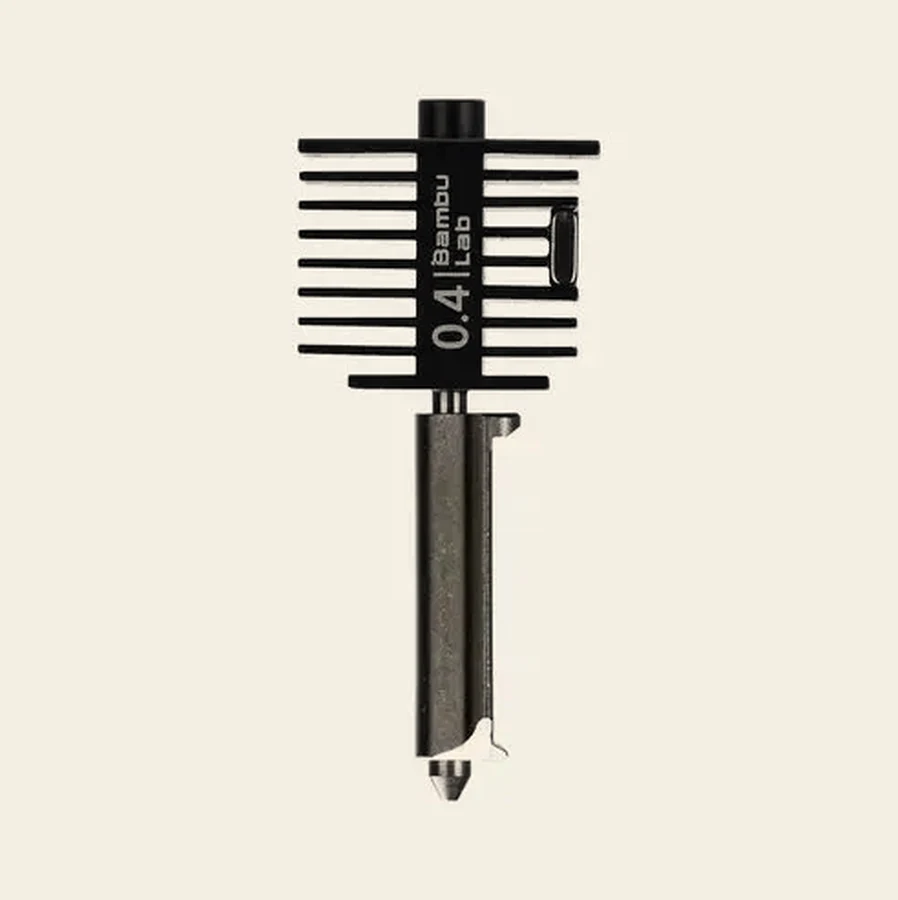
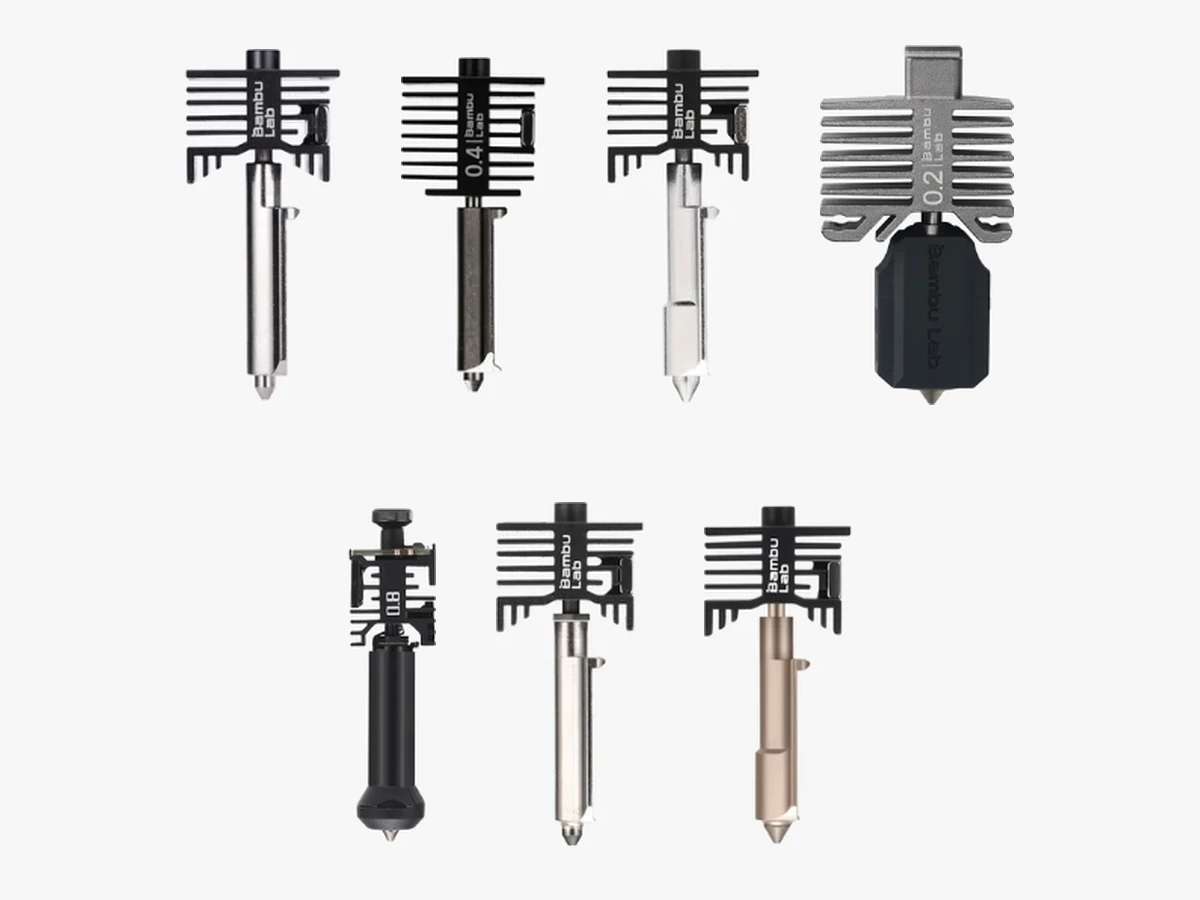
A1 seriesFrom S$23
A1 and A1 mini. A quick-swap nozzle assembly rather than a full hotend, which is why it's the cheapest of the lot. One buckle, no tools.
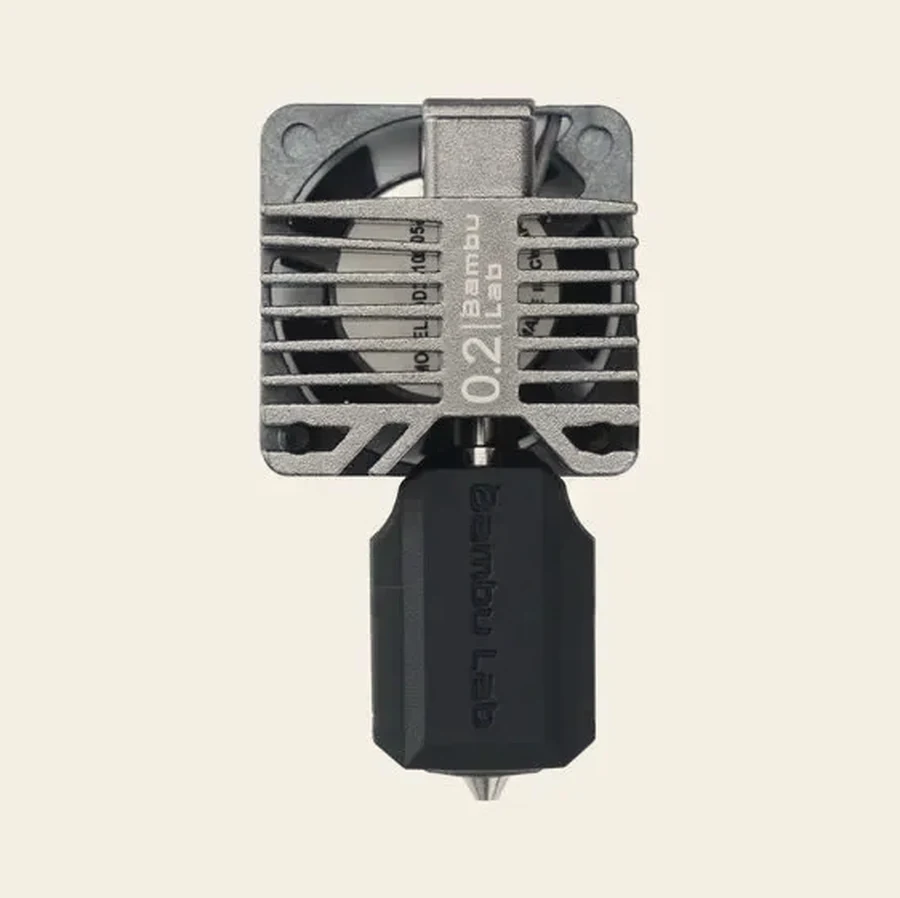
P1 seriesS$65
P1P and P1S. A complete hotend with the ceramic heater and thermistor built in, so you replace a worn or badly clogged unit outright instead of unpicking it. Two screws, three plugs.
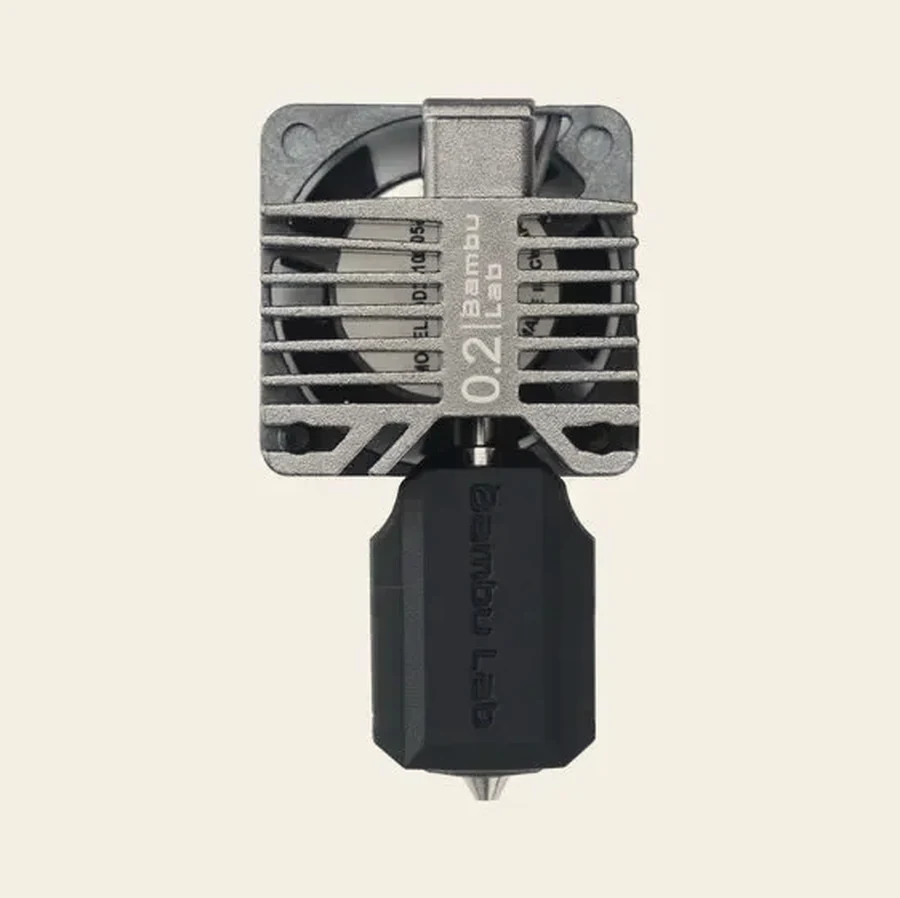
X1 seriesS$65
X1 and X1 Carbon. The same complete-assembly design as the P1: nozzle, heater and thermistor in one part. Bambu lists it as not compatible with the X1E.
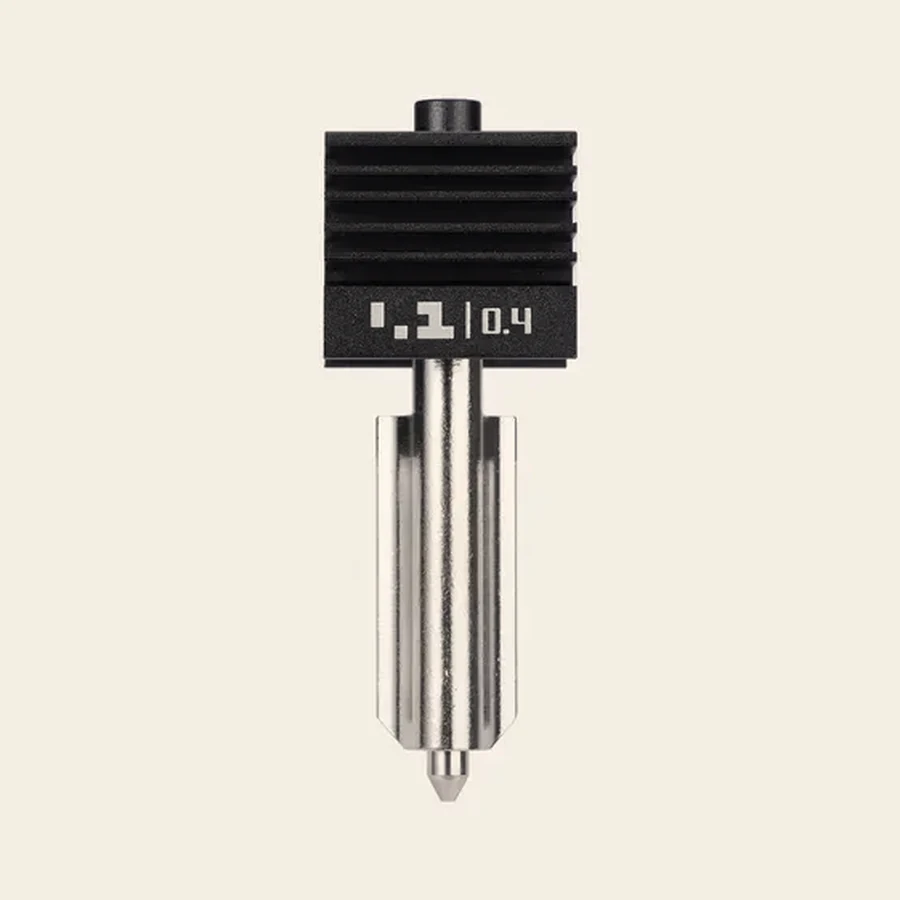
H2 and P2 seriesFrom S$34
H2S, H2D, P2S, X2D and the H2C's left side. Quick-swap, no tools.
The A1 quick-swap assembly
The cheapest replacement in the range, and the fastest to change.
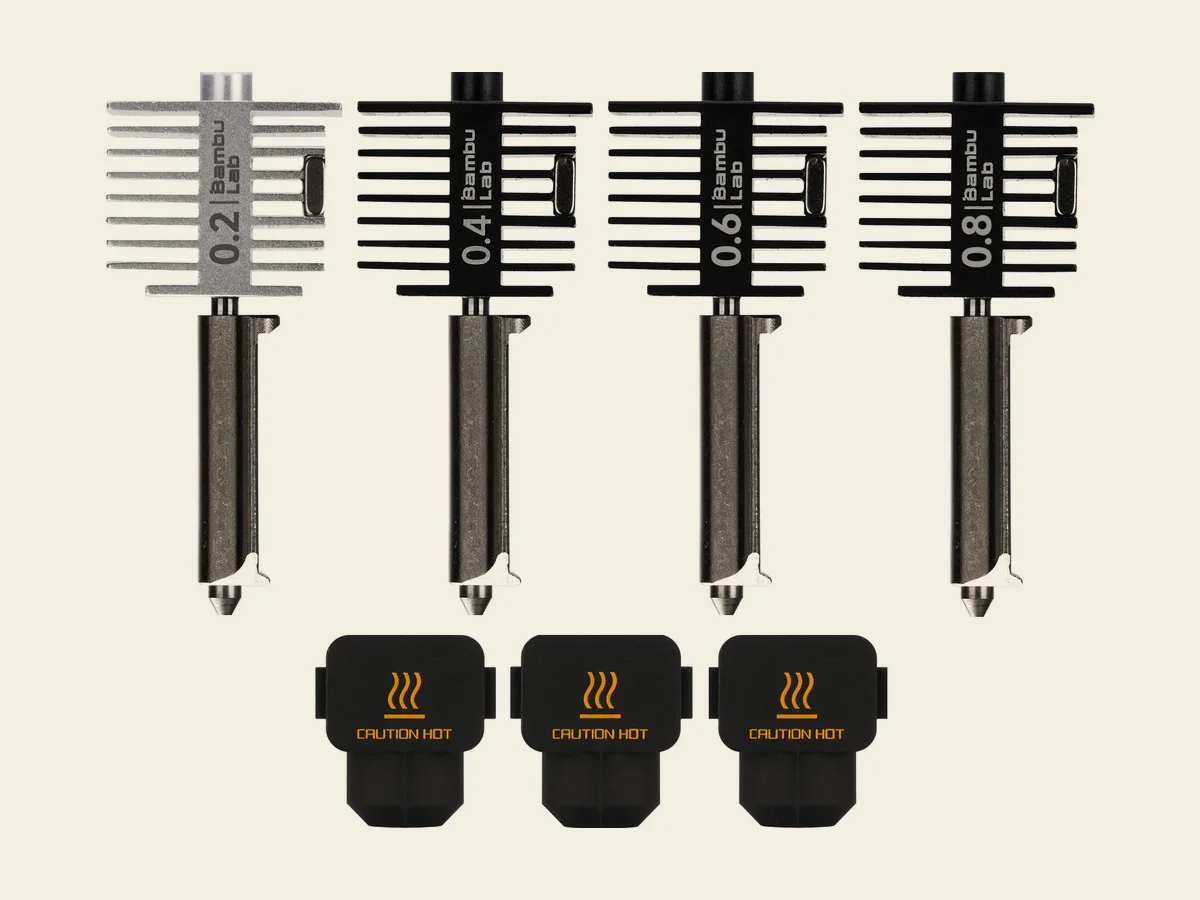
The A1 and A1 mini take a nozzle assembly, not a full hotend. Nozzle, heatblock, heat break and heatsink come out as one piece and the heating assembly stays on the machine. That's why it's S$23 instead of S$65.
Bambu's own words for the job are "toolless design" and "a few minutes". Power off, let it cool, pop the front cover, pull the sock, push the buckle across, pull. There's a magnet in the new one that catches the screws and lines it up for you.
It's cheap enough that keeping a spare 0.4mm hardened on the shelf costs almost nothing, and it saves you a stalled job. Hardened steel is the sensible default here. It's the same price as stainless, and it survives the filled PLAs an A1 owner is most likely to try.
Stainless is the only material made at 0.2mm, so that's what you buy for miniatures. Keep it away from anything filled. Bambu rates the A series nozzle to 300°C, and that's your ceiling on both machines.
The P1 complete hotend
One part carries the nozzle, the heater and the thermistor, so a tired heat path comes out in one go.
The P1P and P1S take a complete hotend at S$65: nozzle, ceramic heater, thermistor, silicone sock and hotend fan in one assembly. You're replacing the whole heat path instead of picking a clogged nozzle apart. That's the right trade when a machine is earning.
It's a screwdriver job, not a clip. Unload the filament, get the nozzle below 50°C, power off, unplug three cables and take out two screws with the H2.0 Allen key that came with the machine.
Then set aside another twenty minutes. Bambu's instruction after a P1 hotend swap is to run the printer's own Calibration, and it's the one place Bambu puts a number on it: "This process takes about 20 minutes."
If prints keep failing on and off and calibration hasn't fixed it, a tired hotend is a common culprit, and swapping the assembly rules out the heater and thermistor at the same time. Hardened steel for anything filled or abrasive, stainless for the cleanest surface on plain PLA and PETG.
The X1 complete hotend
This is the machine most likely to be running abrasive material, so it's the one to keep a spare for.
The X1 and X1 Carbon use the same complete-assembly design as the P1: nozzle, heater and thermistor in one S$65 part, 47.3mm long, rated to 320°C. Bambu lists this part as not compatible with the X1E, so message us your model if you're on one.
X1 owners tend to run more engineering material than most, and that's exactly what wears a nozzle out. If you print carbon-fibre or glass-filled blends regularly, treat a hardened-steel hotend as a consumable and keep a spare.
One wiring detail worth knowing before you start. The thermistor plug has a latch on it and the fan and heater plugs don't. Bambu warns that pulling it without releasing the latch first can damage the plug, the board connector, or both.
PPS-CF and PPA-CF are the most abrasive materials Bambu sells, and they're on the list where Bambu requires hardened steel. Don't fit anything else for them.
The H2 and P2 quick-swap hotend
The only family that gets high flow and tungsten carbide.
The H2S, H2D, P2S, X2D and the H2C's left hotend share a quick-swap hotend that changes without tools. The standard version is S$34 and one part fits every machine in the group. It's the thermal half only: a latch separates it from the heating assembly, and the electronics stay on the toolhead.
It's also the hottest hotend Bambu makes, rated to 350°C against 320°C for the P1 and X1 parts and 300°C for the A1's. That's what the high-temperature blends like PPA-CF and PPS-CF need.
Two upgrades exist here and nowhere else in the range: high flow, and a tungsten carbide nozzle. The Standard or high flow panel below has the flow numbers. The abrasive-filament panel has the case for carbide.
One thing to plan around on a dual-nozzle machine like the H2D, X2D or H2C: a single print job can't mix two different nozzle sizes.
One clip, and it's out
No tools, no wiring to unplug, no cold pull first.
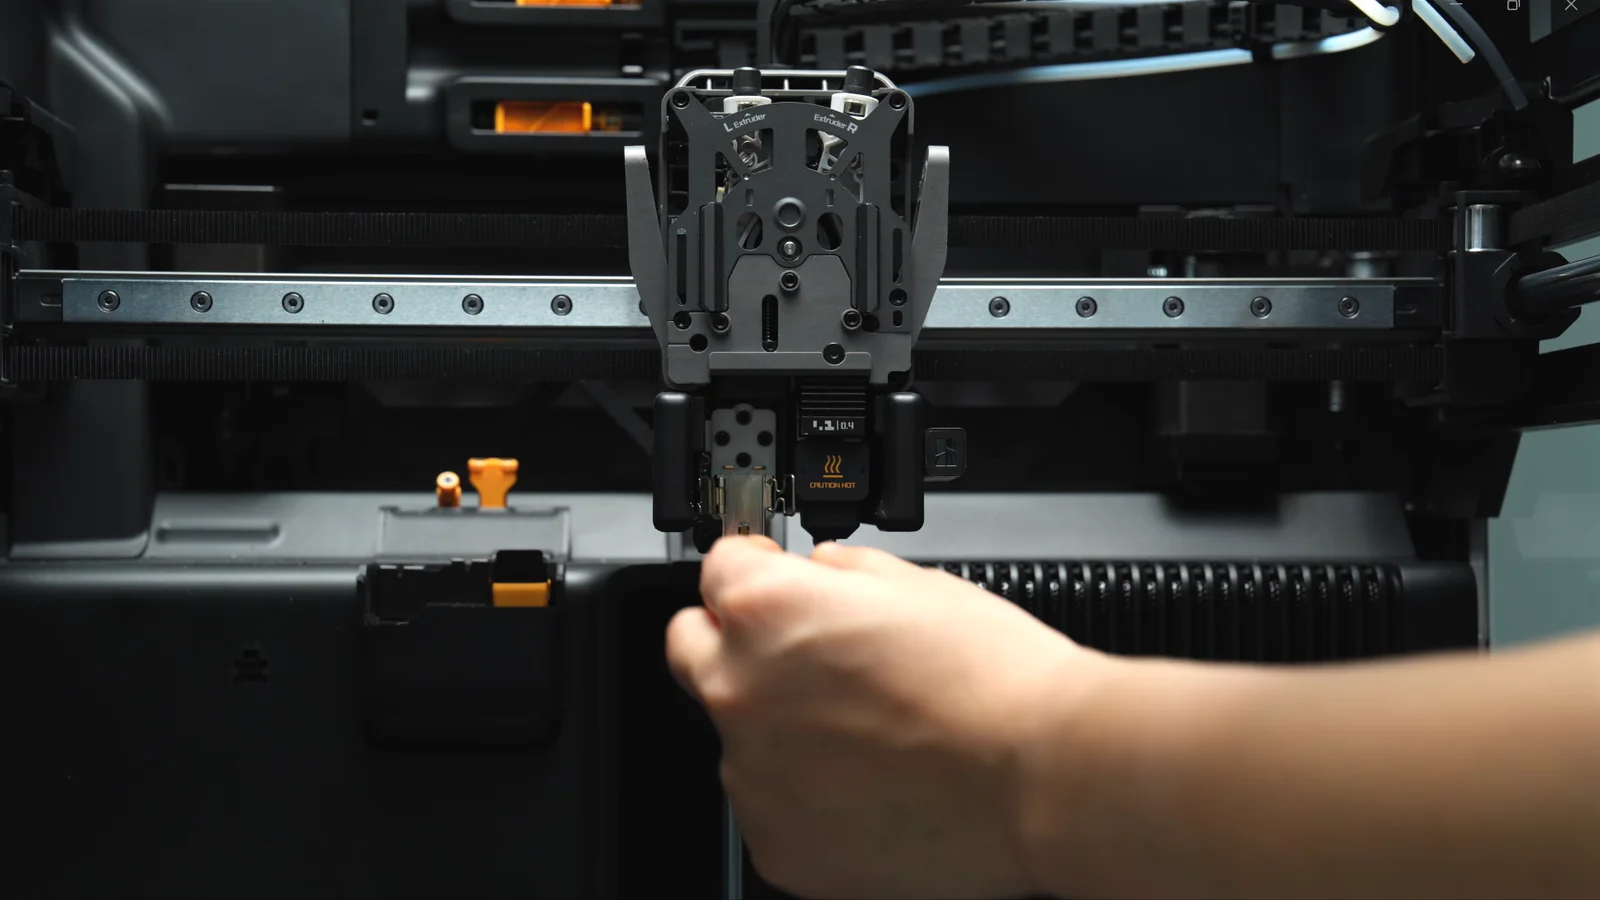
Quick-swap means a single release latch on the front of the toolhead. Release it, the hotend comes out, the new one drops in. Bambu's own list of tools and materials for the job is one line long: "New hotend."
Bambu hotends also go in cold, which is unusual. Because the heatsink, heat break, heatblock and nozzle are one unit, there's no joint you have to tighten hot and nothing oozes out of the interface. The only time you warm one up is when old filament has glued it in place, and then it's tweezers, heat-resistant gloves, and a snip to clean the filament off the top before the new one goes in.
That matters more than a convenience feature sounds. A nozzle change stops being a job you put off until the weekend. In practice you'll swap to a 0.2mm for one detailed print and back again, or drop in a hardened nozzle for an abrasive roll instead of running it through the one you've got.
The P1 and X1 assemblies further up this page are the older design. Still straightforward, but it's a few minutes and a screwdriver instead of a click.
Abrasive filament is what kills nozzles
The orifice widens before anything else tells you.
Carbon-fibre and glass-filled blends, glow-in-the-dark, sparkle, marble and wood fill all carry hard particles in them. Bambu's line on stainless and brass is blunt: their "hardness is insufficient, so they wear out quickly, affecting print quality and nozzle life".
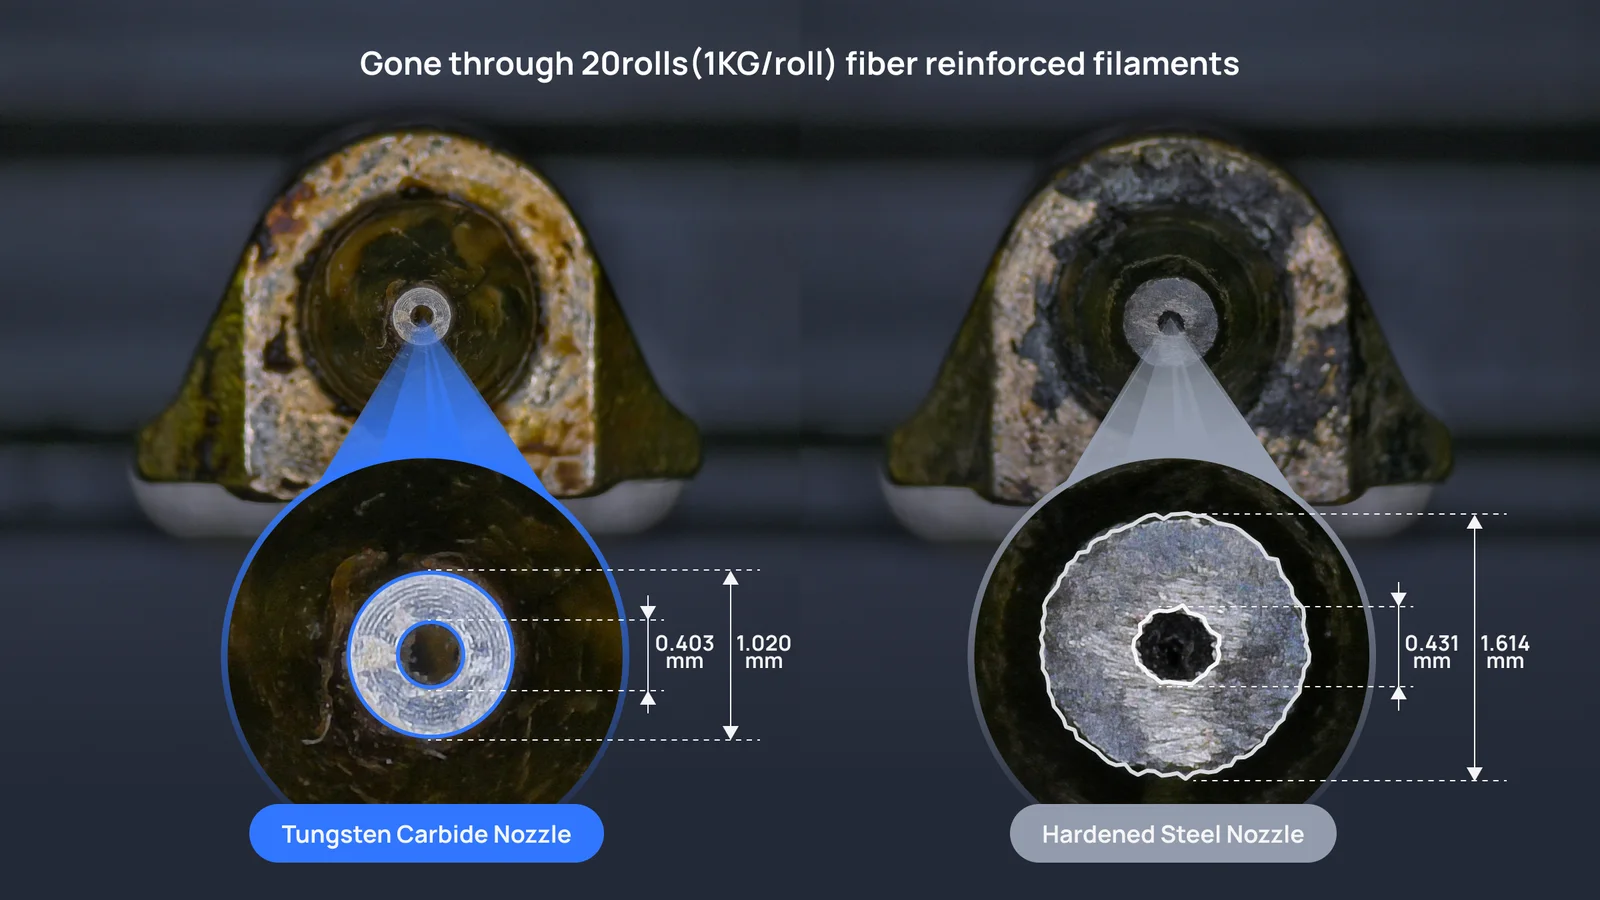
Above is Bambu's own test after twenty 1kg rolls of fibre-reinforced filament. The hardened-steel 0.4mm orifice had opened to 0.431mm and the worn ring around it measured 1.614mm across. The tungsten carbide beside it read 0.403mm and 1.020mm. The symptoms creep up on you: lines get fat, dimensions drift, surfaces roughen. It reads like a slicer problem, not a worn part.
Hardened steel is the answer, and for a long list of materials Bambu doesn't treat it as optional: PLA-CF and GF, PLA Glow, PETG-CF, ABS-GF, PA-CF and GF, PA6-CF and GF, PAHT-CF and GF, PET-CF and GF, PPA-CF and GF, PPS-CF and GF. It costs the same as stainless across the A1 range and very little more elsewhere.
Stainless steel is for PLA, PETG, ABS, ASA, TPU and PVA, where it leaves a slightly cleaner surface. It's also the only material offered at 0.2mm. Keep it away from composites.
Tungsten carbide is the top tier, HRA 90 against hardened steel's HRA 74. Bambu's claim for it is "a 50% increase in lifespan when printing abrasive, high-performance fiber-reinforced filaments". It's the buy for daily filled-filament work, not for a machine that mostly runs PLA.
A wider hole, fewer hours
Nozzle size is the one setting you buy instead of changing in the slicer.
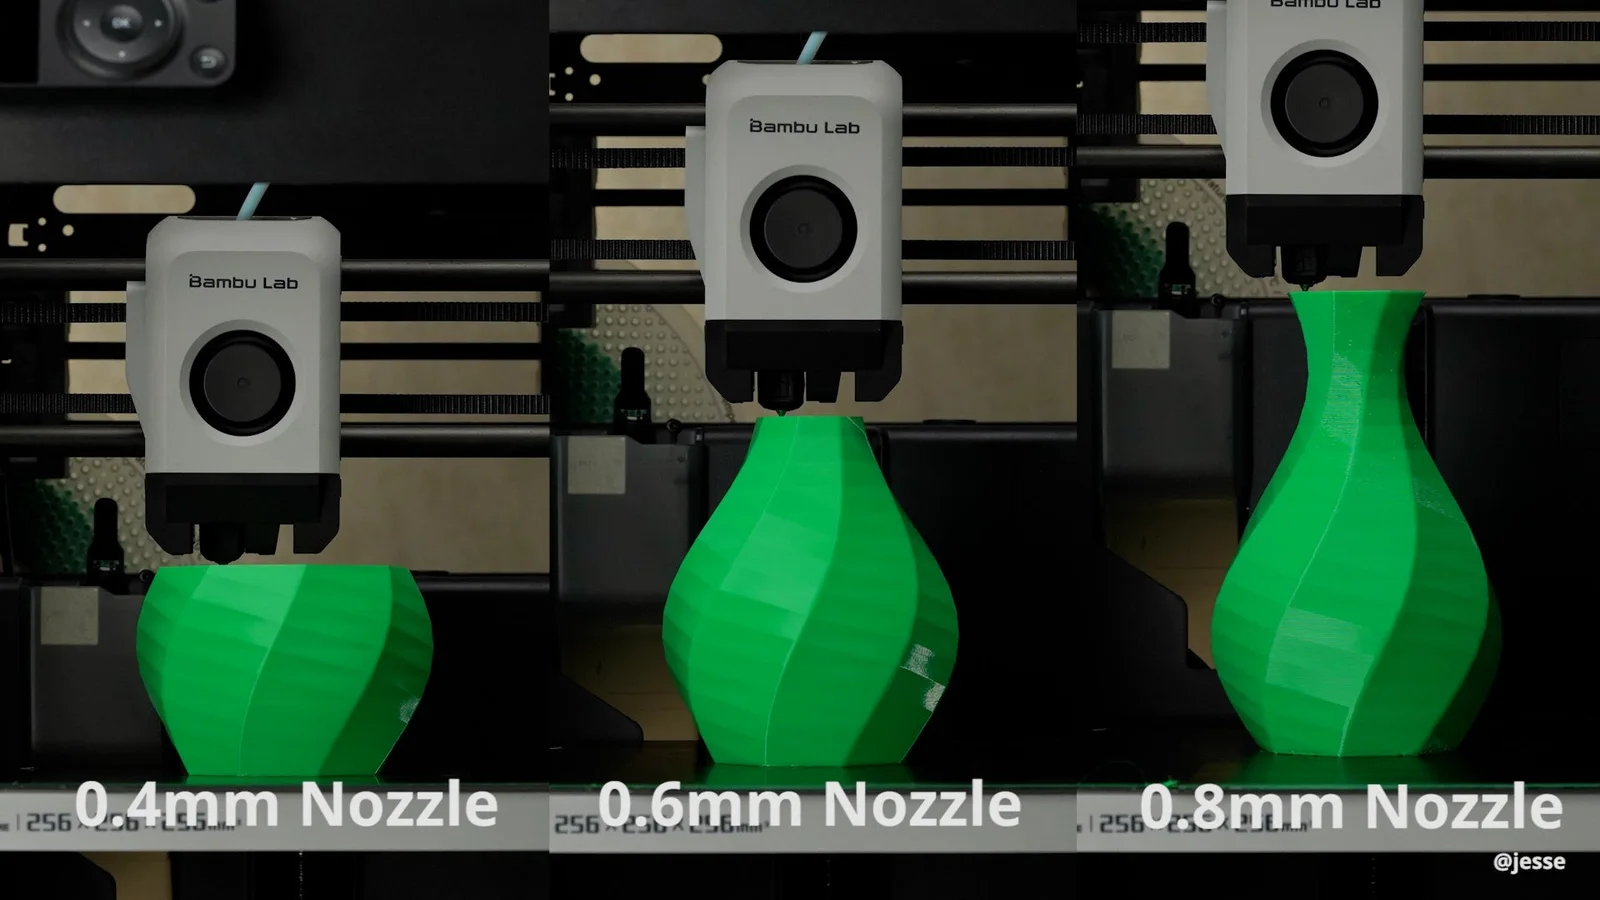
A wider nozzle lays down a thicker line. The same model finishes sooner, but you can see the layers. A narrower one holds detail and takes longer to get there. That's the whole trade, and it's why almost every machine leaves the factory with a 0.4mm on it.
The other half of it is clogging. A 0.2mm orifice blocks on a speck a 0.8mm would never notice. That's why you keep the smallest size for miniatures instead of leaving it in.
Standard or high flow
It buys hours on a long job and almost nothing on a short one.
Standard is the right buy for almost everyone, and it's the only type made for the P1 and X1. A high-flow hotend does physically fit an A1, but Bambu is clear that it "performs the same as a Standard Flow Hotend on the A1/A2 Series".
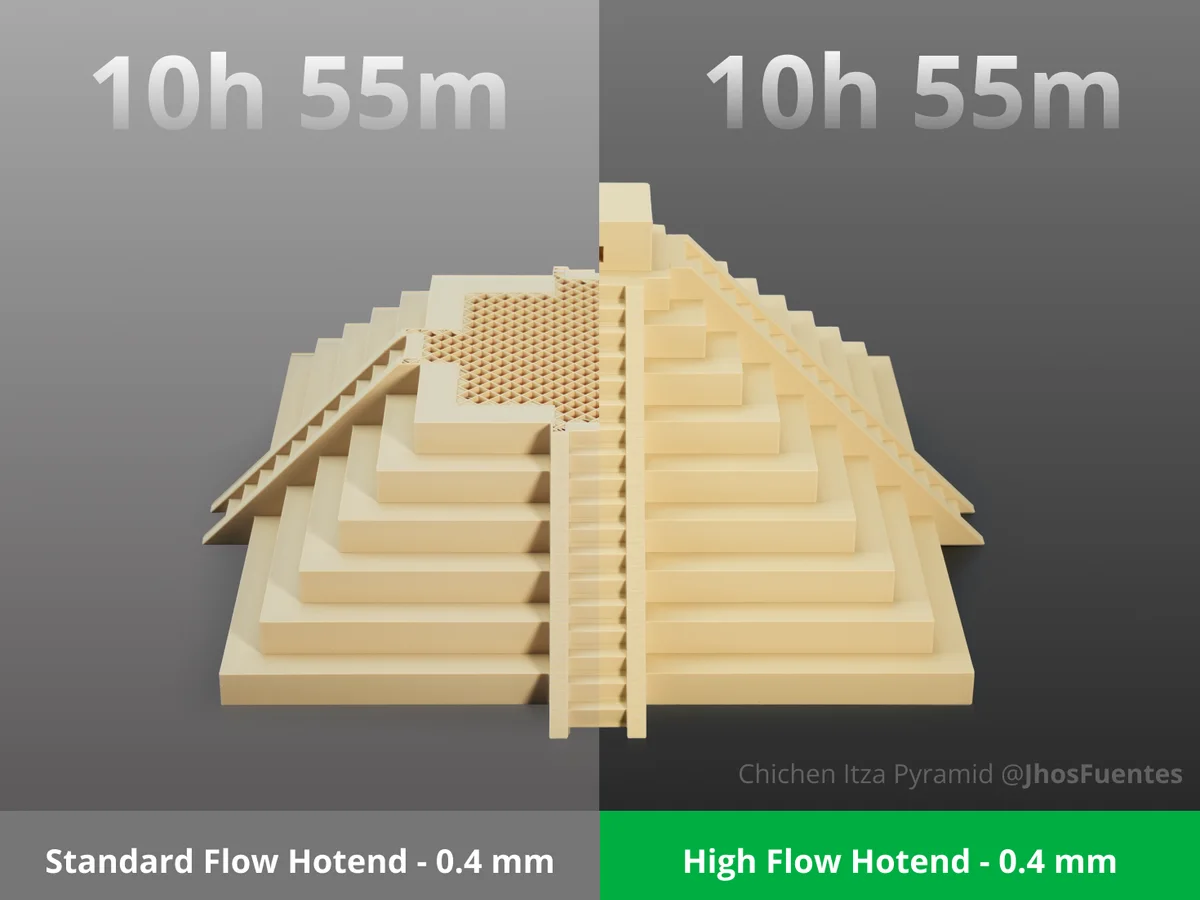
High flow is an H2 and P2 upgrade, from S$95. The nozzle is reshaped so more filament touches hot metal on the way through, and the heater is stronger, so the melt keeps up. Bambu's figures are 62.5% more maximum volumetric speed and up to 30% off print time, without giving up precision.
In absolute terms, on Bambu PLA Basic at 0.4mm, that's 40mm³/s against 24. On PLA Matte it's 48 against 28. It earns that back on long production runs and large parts. On a handful of small prints a week you'll barely notice.
Two things to watch. The standard H2 hotend is a single part that fits both the H2 and the P2, but the high-flow versions are machine-specific, so pick the one that matches yours. And Bambu does not recommend the 0.4mm high flow for carbon-fibre filament, because CF is difficult to clear once it clogs. Go 0.6mm for those, or stay on standard flow.
Fitting and when to replace
Nothing here needs a tool the printer didn't come with.
Every hotend here is a genuine Bambu part, and it goes in with the tools that came with the printer, nothing more. The A1 and H2 or P2 assemblies are latch-and-click. The P1 and X1 units take a few minutes and one H2.0 Allen key. Step by step for your family is on the How to use tab.
Replace it when line width drifts, when dimensions creep despite a good calibration, or after a clog that a cold pull and a needle won't shift. Bambu's own test is simple: clean it first, and if cleaning doesn't bring the extrusion back, it's worn. Keeping a spare 0.4mm on the shelf is cheap insurance if the machine is earning.
Prices exclude GST. We add 9% at checkout. PayNow is free; paying by card adds a flat 4% processing fee. Self-collect free at Bendemeer, or islandwide courier at $15 flat, free once the order passes $250 before GST. If you're not sure which part your machine takes, message us the model and we'll confirm before you order.
Worn opens up. Clogged shuts down.
They look nothing alike once you know what you're looking for.
A clog starves the nozzle. You get gaps in the walls, thin or missing infill, or nothing at all coming out while the printer carries on moving. The field test is to extrude by hand: a clear nozzle lays a strand straight down, a partly blocked one curls it as it leaves the tip. A partial clog also throws the K value off, because the pressure inside the nozzle stops being steady.
Wear does the opposite. The hole gets bigger. Bambu calls a nozzle worn at about 20% over spec, so a 0.4mm measuring 0.48mm. Lines come out fat, dimensions run large, plastic leaks around the outside of the tip, and the Flow Dynamics number won't settle from print to print. Flow calibration hides it for a while, which is why it usually gets blamed on the slicer.
One job separates them: clean it. Cold pull, a needle through the tip at 250°C, or the hot hex wrench method. If the extrusion comes back, it was a clog. If it doesn't, in Bambu's words, "please replace it with a new spare hot end".
Bambu's own reassurance is worth repeating, because a clog feels like a broken printer and isn't: "Even with proper maintenance, occasional clogs are normal and not a sign of serious malfunction."
What you're looking at
Symptom on the left, what it actually is in the middle, what to do about it on the right.
| What you see | What it is | What to do |
|---|---|---|
| Gaps in the walls, thin or missing infill, printer moving normally | Under-extrusion, usually a partial clog | Cold pull, then a needle through the tip at 250°C. Skip the needle on a 0.2mm nozzle, it won't fit. |
| Nothing comes out at all | Full clog | Hot hex wrench method, then repeated cold pulls. A gas lighter, never a butane torch: overheating can wreck the hotend. |
| The strand curls instead of running straight when you extrude by hand | Partial clog, usually debris carried in on the filament | Clean it, then clean the extruder and keep the spool out of the dust. |
| Fat lines and dimensions running large, after a clean | Worn nozzle. The orifice has opened up. | Replace it. Cleaning can't bring the hole back. |
| Plastic leaking round the outside of the tip | Worn nozzle | Replace it. Bambu names this one specifically. |
| The K value won't settle between prints | Worn nozzle, or a partial clog | Clean, re-run Flow Dynamics, and if it still drifts, it's worn. |
| A growing lump of plastic wrapped round the hotend | A blob, not a clog | Stop. Clean it hot (below). Then work out why the part came off the plate before you print again. |
| Nozzle temperature warnings, or a reading that won't hold steady | Missing, split or loose silicone sock | Fit a new sock. It's cold air off the part cooling fan moving the number. |
Swipe the table sideways for every column
Cleaning cadence, from Bambu: every 5 spools on PLA and PETG, every 2 spools on carbon fibre, and a cold pull at least once a month if you switch materials often. Coming down from PAHT-CF, PET-CF, PPA-CF or PPS-CF, purge at 250–300°C then step down to 220–240°C while still extruding.
A blob is not a clog
It's the one hotend job you do hot, and the printer will usually catch it before you do.
A blob is molten plastic wrapping the outside of the hotend into a growing lump. Nothing is blocked. Bambu's usual cause is a plate that wasn't cleaned properly: the print lets go, the nozzle drags it around, and plastic balls up on the metal.
Most current machines watch for it with the extrusion-force sensor. The toolhead moves off the model and makes a tentative touch: nothing there means no force, a blob means the lump hits the bed and the sensor reads it. It checks once after the walls of the first object on layer three, then roughly every 8g of filament consumed, and pauses the print when it finds one. Bambu is honest that it isn't 100% accurate, so it asks you to look before you decide.
Cleaning is the exception to everything else on this page. You raise the X axis, put the printer in Maintenance Mode so the hotend stays heated, set it about 30°C above the material's print temperature (250°C for PLA), and pick the softened plastic off with flat tweezers in heat-resistant gloves. A hair dryer helps. Take the fans off first.
If you print a lot of PETG on an X1 or P1, the E3D ObXidian's diamond-like coating exists specifically to stop plastic sticking to the outside of the nozzle. We don't stock it, but that's what it's for.
The sock, the wiper and the sponge
Three small parts decide whether the nozzle stays clean and the temperature stays put.
The silicone sock is the black cover round the nozzle, rated to 300°C. It does two jobs: it stops the part cooling fan blowing the nozzle temperature around, and it keeps filament from sticking to the metal. Run without one and you get exactly what you'd expect, a nozzle temperature warning and a set temperature that won't match the measured one.
Bambu publishes no replacement interval for it. It publishes six symptoms instead: cracks or splits, looseness, a shape stretched out of true by heat, filament building up on the heatblock, discolouration or brittleness, and rub marks from the nozzle wiper. Any one of those and it's done. They're family-specific too, and the P2S and X2D sock carries three orange dots the machine's camera looks for, so an older sock gets rejected.
The nozzle wiper and purge wiper take residue off the tip at the start of every job, and the cleaning sponge takes off what's carbonised on and gone black. All of them are wear parts with their own part number per machine, and they're on the consumables page along with unclogging pins and scrapers.
One thing not to worry about: on an A1 the fine wipe drops the nozzle a millimetre or two onto one fixed spot on the build plate, so a scuff shows up there on a new plate. Bambu says that's normal and it is.
A1 series hotend, in numbers
Bambu's published figures for the part, plus what the machine itself is rated to.
| Fits | A1 and A1 mini |
|---|---|
| What the part is | Quick-swap nozzle assembly: nozzle, heatblock, titanium heat break and heatsink in one piece. The heating assembly it clips into stays on the printer. |
| Nozzle material | Stainless steel at 0.2 and 0.4mm, hardened steel at 0.4, 0.6 and 0.8mm. Grey cooling fins mean stainless, black fins mean hardened. |
| Diameters | 0.2, 0.4, 0.6 and 0.8mm |
| Max temperature | 300°C. That's Bambu's rating for the part, and it's where the A1 and A1 mini cap the nozzle too. |
| Max volumetric flow | Bambu publishes no figure for this hotend on its own. The A1 and A1 mini are rated 28mm³/s at the machine, measured on Bambu ABS at 280°C. |
| Heater wattage | Not published by Bambu, and the heater isn't part of this assembly anyway. |
| Standard or high flow | Standard. A high-flow hotend physically fits the A1 series, but Bambu says it "performs the same as a Standard Flow Hotend" there, so there's nothing to gain. |
| Ships fitted with | 0.4mm stainless steel, on both the A1 and the A1 mini |
| Tools to change it | None. Bambu calls it a toolless design and says "a few minutes". |
Bambu doesn't publish a nozzle life figure for any material, on this part or any other. What it does give is a cleaning cadence, and that's in the nozzle-material table further down this tab.
P1 series hotend, in numbers
A complete assembly, so the spec covers the electronics as well as the metal.
| Fits | P1P and P1S |
|---|---|
| What the part is | Complete hotend: nozzle, ceramic heater, thermistor, silicone sock and hotend fan in one unit. Bambu also sells a metal-only version for reusing your existing electronics. |
| Nozzle tip | Hardened steel is heat-treated mould steel, HRC 55–60. Stainless is 304. |
| Heatblock | Nickel-plated brass |
| Heat break | Titanium alloy TC4, grade 5, so the heat stays in the melt zone instead of creeping up the throat |
| Heatsink | Aluminium alloy 6063, with its own cooling fan |
| Diameters | 0.2, 0.4, 0.6 and 0.8mm, each one in stainless or hardened steel. We stock 0.2mm stainless and 0.4, 0.6 and 0.8mm hardened. |
| Max temperature | 320°C for the part. The P1S caps the nozzle at 300°C. |
| Max volumetric flow | Not published by Bambu for this hotend. |
| Heater wattage | Not published by Bambu. |
| Length | 47.3mm |
| Packaged weight | 40g complete, 30g for the metal-only version |
| Standard or high flow | Standard only. Bambu's high-flow hotend is not made for the P1. |
| Ships fitted with | 0.4mm stainless steel |
| Tools to change it | An H2.0 Allen key, which is in the machine's own toolbox |
| Afterwards | Run the printer's Calibration. Bambu: about 20 minutes. |
The metal-only version comes with two M3-14 step screws, a silicone sock, thermal grease and a retaining clip, because you rebuild it onto your old heater and thermistor. The complete hotend needs none of that.
X1 series hotend, in numbers
Same architecture as the P1 part, different SKU, and one compatibility trap.
| Fits | X1 and X1 Carbon. Bambu lists this part as not compatible with the X1E. |
|---|---|
| What the part is | Complete hotend: nozzle, ceramic heater, thermistor, silicone sock and fan in one unit. A metal-only version exists for reusing your electronics. |
| Nozzle tip | Hardened steel is heat-treated mould steel, HRC 55–60. Stainless is 304. |
| Heatblock | Nickel-plated brass |
| Heat break | Titanium alloy TC4, grade 5 |
| Heatsink | Aluminium alloy 6063 |
| Diameters | 0.2, 0.4, 0.6 and 0.8mm, each one in stainless or hardened steel. We stock 0.2mm stainless and 0.4, 0.6 and 0.8mm hardened. |
| Max temperature | 320°C |
| Max volumetric flow | Not published by Bambu for this hotend. |
| Heater wattage | Not published by Bambu. |
| Length | 47.3mm |
| Packaged weight | 40g complete, 30g for the metal-only version |
| Standard or high flow | Standard only. Bambu's high-flow hotend is not made for the X1. |
| Ships fitted with | 0.4mm hardened steel, which is unusual: everything else in the range leaves the factory on stainless |
| Tools to change it | H2.0 Allen key, plus a Q-tip and needle-nose pliers if you're rebuilding a bare hotend onto your old electronics |
| The one gotcha | The thermistor plug has a latch and the fan and heater plugs don't. Open it before pulling, or you can damage the plug or the PCB connector. |
If the old thermal grease has gone hard, don't pull. Bambu's instruction is to wet it with alcohol and give it about five minutes first.
H2 and P2 hotend, in numbers
The newest design in the range, and the only one that comes in three nozzle materials and two flow rates.
| Fits, standard flow | One part for the H2S, H2D, P2S, X2D and the H2C's left hotend |
|---|---|
| Fits, high flow | H2 series, P2S and X2D. Buy the H2 version or the P2 version to match your machine. |
| Not for | X1, P1 and A1. Nothing in this family fits them. |
| What the part is | Quick-swap hotend, the thermal half only. A latch separates it from the heating assembly, and the electronics stay on the toolhead. |
| Nozzle material | Stainless or hardened steel at 0.2, 0.4, 0.6 and 0.8mm. Tungsten carbide as well, which Bambu makes at 0.4, 0.6 and 0.8mm and never at 0.2mm. We stock 0.2mm stainless, hardened steel from 0.4mm up, and carbide at 0.4mm. |
| Max temperature | 350°C, the hottest hotend Bambu makes. Tungsten carbide is rated the same. |
| Max volumetric flow, 0.4mm | Standard 24mm³/s, high flow 40mm³/s, both on Bambu PLA Basic |
| Max volumetric flow, 0.6 and 0.8mm | 40mm³/s on the high-flow hotend. Bambu publishes no standard-flow figure at these sizes. |
| Heater wattage | Not published by Bambu. What it does say is that the high-flow version has a stronger heater and a reshaped melt zone with more filament-to-metal contact. |
| Standard or high flow | Both. High flow is Bambu's 62.5% more maximum volumetric speed, and up to 30% off print time. |
| Tungsten carbide | 49.2mm long, 26g packaged. The hardness and life figures are in the nozzle materials table below. |
| Ships fitted with | 0.4mm hardened steel across the family |
| Tools to change it | None |
| Afterwards | Set the nozzle type on the screen. The printer checks the hotend is properly seated before it calibrates, and dual-nozzle machines want a nozzle offset calibration. |
Bambu's high-flow test conditions, so you can judge the claim: 62.5% was measured on ABS, a 240mm single-wall cylinder, 0.2mm layers, 1.0mm outer wall, 280°C, vase mode; the 30% time saving on a 300mm PLA Basic cube at 15% infill.
Nozzle size, plainly
0.4mm is the default and prints almost everything. Change it only when you have a specific reason.
| Size | Layer heights | Max flow | What it's for | Where it's the wrong choice |
|---|---|---|---|---|
| 0.2mm | 0.05–0.12mm | About 2mm³/s. Bambu says be cautious raising it, because the limit is the extruder skipping, not the heater. | Miniatures, jewellery, small text and logos, moulds | Never anything filled. Bambu: carbon-fibre particles are usually bigger than 0.2mm and clog it fast, and the same goes for glass fibre, glow, sparkle and galaxy. Weaker parts too, because thin lines bond less well. Slowest by a wide margin. |
| 0.4mm | 0.1–0.3mm, 0.2mm standard | 24mm³/s standard, 40mm³/s high flow | Everything: toys, brackets, enclosures, mechanical parts, prototypes | Little. The exception is the 0.4mm high flow, which Bambu does not recommend for carbon-fibre filament, because CF is hard to clear once it clogs. |
| 0.6mm | 0.15–0.45mm, 0.3–0.4mm common | 40mm³/s high flow | Functional parts, jigs and fixtures, large models, and Bambu's first choice for fibre-filled filament | Fine detail, crisp small text and bridging. Layer lines are visible and edges go soft. |
| 0.8mm | 0.2–0.6mm, 0.4–0.5mm typical | 40mm³/s high flow | Big draft parts, structural components, vase mode | Precision and surface finish. Supports get hard to remove and you'll burn through filament. |
Swipe the table sideways for every column
Layer heights are Bambu's own, and they all work out to roughly 25% to 75% of the nozzle diameter. As the hole gets bigger, detail drops but so does the clogging risk. The flow figures are Bambu's tested numbers for the H2 and P2 hotends; it publishes no equivalents for the A1, P1 or X1. On a dual-nozzle machine, one print job can't mix two nozzle sizes.
What the nozzle is made of
Three materials, and it's the filament that decides which one you need, not the printer.
| Material | How you spot it | What it's for | What chews it out | What Bambu publishes on life |
|---|---|---|---|---|
| Stainless steel | Grey cooling fins. 304 stainless at the tip. | PLA, PETG, ABS, ASA, TPU and PVA. Bambu lists it as high temperature resistant, corrosion resistant and cost-effective, and it's the only material made at 0.2mm. | Anything with hard particles in it: PLA-CF and GF, PETG-CF, PLA Glow, Sparkle, Marble, Wood. Bambu: their "hardness is insufficient, so they wear out quickly". | No life figure published. Clean the nozzle every 5 spools of PLA or PETG. |
| Hardened steel | Black cooling fins. Heat-treated mould steel, HRC 55–60. | Everything stainless does, plus the list Bambu requires it for: PLA-CF and GF, PLA Glow, PETG-CF, ABS-GF, PA-CF and GF, PA6-CF and GF, PAHT-CF and GF, PET-CF and GF, PPA-CF and GF, PPS-CF and GF. | Nothing is off-limits, but fibre still wears it. Bambu's own test opened a 0.4mm to 0.431mm over twenty 1kg rolls of fibre-reinforced filament. | No life figure published. Clean every 2 spools when you're printing carbon fibre. |
| Tungsten carbide | Sold only for the H2 series, P2S, X2D and the H2C's left hotend. No 0.2mm version exists. | Heavy daily work in fibre-reinforced filament. Bambu: it "maintains its circular and accurate shape even after extended use". | Nothing Bambu sells, in practice. It's the hardest thing on the shelf. | HRA 90 against hardened steel's HRA 74, which Bambu turns into "a 50% increase in lifespan when printing abrasive, high-performance fiber-reinforced filaments". |
Swipe the table sideways for every column
Bambu publishes no nozzle life in spools, kilograms or hours for any material, so we're not going to invent one. The cleaning cadence above is the closest thing to a service interval it gives, and the real test is simpler: when cleaning stops fixing the extrusion, the nozzle is worn.
Flow rate, tested
Bambu's own numbers for the H2 and P2 hotend, measured on Bambu PLA Basic. Your column and your row are highlighted.
| Nozzle | Standard flow | High flow |
|---|---|---|
| 0.2mm | About 2mm³/s | Not made |
| 0.4mm | 24mm³/s | 40mm³/s |
| 0.6mm | Not published | 40mm³/s |
| 0.8mm | Not published | 40mm³/s |
Swipe the table sideways for every column
Other materials at 0.4mm: standard flow does 28mm³/s on PLA Matte and 24mm³/s on PETG HF, high flow does 48 and 32. The 0.2mm figure is Bambu's general guidance for that nozzle on any machine, and the reason it's low isn't the heater: pushing filament through a hole that small leads to extruder skips and grinding first.
Changing an A1 hotend
Toolless, cold, and a few minutes by Bambu's own reckoning.
Power off and let it cool
Everything below happens with the printer switched off and the nozzle cold. Bambu hotends are designed to go in cold: the heatsink, heat break, heatblock and nozzle are one unit, so there's no joint to tighten hot and nothing oozes at the interface.
Release the filament
Press the filament lever on the right of the toolhead to release and cut the filament.
Front cover off
Pull from the bottom front right corner to unclip the toolhead front cover.
Sock off
Pull the silicone sock down and off. Have a look at it while it's in your hand: cracks, looseness or a stretched shape mean it wants replacing too.
Unlock the buckle
Push the nozzle buckle to the right to unlock it, then swing the left side outward. A scrap of filament makes a handy lever if your fingers won't fit.
Pull the hotend out
Hold the heatsink section and pull it straight out. If old filament has glued it in, warm the hotend slightly, pry gently with tweezers, and put heat-resistant gloves on first. Snip any filament off the top before the new one goes in.
New one in, tilted back
Insert it at a slight angle, tilted toward the back. A built-in magnet catches the screws and helps it line up. Press on the heatsink so it sits flush against the heating assembly.
Close the buckle, left side first
Flip the left side in, then lock the right. If it won't lock, the hotend isn't sitting flat. Don't force it, reseat it.
Sock and cover back on
Refit the silicone sock, then the front cover, pressing the bottom corners until it clicks. Then work through the list below before you print.
Changing a P1 hotend
Two screws, three plugs, and a calibration run afterwards. Bambu's procedure for the complete assembly.
Unload, cool, power off
Unload the filament, get the nozzle below 50°C, then switch the printer off. Bambu is firm about this: working on a live printer risks a short, a dead board, or worse.
Front cover off
Lift the toolhead front cover open, disconnect the toolhead fan connector, then take the cover away.
Three plugs out
Hotend cooling fan at the top, thermistor in the middle, ceramic heater at the bottom. Release each one from its clip as you go.
Two screws out
H2.0 hex key, the two screws, then lift the hotend out.
Only if you're reusing the electronics
The metal-only hotend means moving the fan, sock, fixing clip, ceramic heater and thermistor across. Fresh thermal paste, thermistor in first with its cable pre-routed, then the ceramic heater whose cable pins the thermistor cable down, then the clip, the sock and the fan.
New assembly in
Drop it in and run the two screws down evenly. Firm, not hard: overtightening distorts the seat.
Cables back
Route them through their clips and plug them into the interface board, reconnect the front cover fan cable, close the cover.
Calibrate, about 20 minutes
Power on, sync the nozzle size and material on the screen if either changed, then run the printer's Calibration. Bambu: "This process takes about 20 minutes. If the process passes, it means the operation has been successful."
Changing an X1 hotend
Same shape of job as the P1, with one connector that bites people.
Cool it on the screen, then power off
Check the hotend is at 50°C or lower in Temperature/Axis settings, then switch the printer off.
Front cover off
The X1 front cover is magnetic. Lift it away and set it aside.
Three plugs, and mind the thermistor
The big 2-pin plug is the ceramic heater, the 4-pin is the hotend fan, the very small 2-pin is the thermistor. The thermistor plug has a latch and the other two don't. Open it before pulling, or you can damage the plug, the PCB connector, or both.
Two screws out
H2 Allen key, the two screws near the top of the heatsink. Move the wires out of the plastic clip and lift the assembly out.
Only if you're rebuilding a bare hotend
Thermal grease generously on both sides of the ceramic heater and around the thermistor hole. Thermistor first, wires down the heatsink channel; then the heater between the two raised tabs with its wires facing away; then the retaining clip with the bulge over the thermistor; then the sock, wire notch on the channel side; then the fan. Hard old grease gets alcohol and five minutes, never a hard pull.
New assembly in
The screw holes sit behind the bracket. Two screws tightened evenly and not overtightened. Watch the fan orientation: fitted backwards it causes fan-speed errors and nuisance stops.
Plugs back in order
Thermistor, then fan, then heater. Cables through the clip, front housing back on.
Set the new nozzle on the screen
Tell the printer the new diameter and material, then work through the list below before you print.
Changing an H2 or P2 hotend
No tools. The only fiddly bits are the flow blocker on a dual-nozzle machine and the order you close the clip in.
Lower the bed and let it cool
On the screen, Controls then Motion, and send the heatbed to the bottom. Power the printer off and let the hotend reach room temperature. On an H2D, take the top glass cover off too.
Front cover off
Pinch the two top corners of the toolhead front cover and lift to release the clips. Press the filament cutter for whichever nozzle you're changing.
Move the flow blocker (H2D and H2C)
These print with one nozzle at a time and cover the idle one with a flow blocker on a lifting rod. Push the rod, never the blocker itself: it's fragile and it snaps. Push the rod to its end stop, then fine-adjust so the hotend you want is uncovered.
Sock off, latch open
Pull the silicone sock down and outward, then unlock the buckle. On a P2S or X2D, release the right side of the clip first, then the metal plate on the left.
Pull the hotend out
Hold the heatsink top and bottom and pull. Then cut off any filament left on top of the hotend with pliers or scissors, or the new one won't seat properly.
New hotend in
Pinch the nozzle, push the hotend up from below, then press it inward at the top. Tug it gently: if it doesn't move, it's home.
Close the clip in the right order
Push the left latch down until it lines up with the nozzle, then press the right clip down. Doing both together traps the latch inside the clip, which is the number one wrong-install failure. On a P2S or X2D it's the reverse of removal: left metal plate first, then the right pressure ring.
Sock and cover back on
Push the sock up from the bottom until it's snug and flat, not touching the plastic around it. Hook the front cover under the extruder and push forward until it clicks.
After the swap, before you print
The part is only half the job. This is what has to be re-run, and it's the same list whichever machine you're on.
Tell the printer what you fitted
Nozzle size and material are set on the printer, not in the slicer. Bambu Studio's field has been read-only since v02.01.01.52, deliberately, so nobody can pretend they changed a nozzle they didn't. A1: Settings, Maintenance, Nozzle. P2S: Filament, Nozzle and Extruder, Nozzle Type.
Check it doesn't wiggle
Hold it and try to move it. Any play and it isn't seated. On the H2 and P2 the printer checks for you and refuses to calibrate if the hotend is missing or badly seated, and you clear it with Re-Calibrate on the screen.
Re-run Flow Dynamics
Bambu lists a nozzle change as a trigger in its own words, "as there is tolerance in the manufacturing". A worn nozzle is on the same list, because the friction inside changes. On the A1 it happens automatically at the wiper; everywhere else, leave the per-print calibration switched on.
Calibrate the machine
Bambu's rule is to calibrate "when changing any hardware component", because each new part shifts weight, length and position a little. The P1 is the only family with a published duration: about 20 minutes.
Dual nozzles: check the offset
The H2D, X2D and H2C need both nozzles to agree on where they are. Leave the pre-print nozzle offset calibration on Auto and it runs a quick check, escalating to the full routine if the numbers look wrong. Bambu's ideal height difference between left and right is 5mm, and the XY calibration lands within about 15 to 20 microns.
Watch the first print
First layer, then come back at layer three. That's where a badly seated hotend, a wrong nozzle setting or a split sock shows itself. After that, leave it alone.