

Bambu Lab Filament Path Parts
$6.00 – $97.00 SGD
excl. GST · 9% added at checkout
Made to order
It fans one AMS port on an X1 or P1 series printer out to four. That's up to four AMS 2 Pro units chained onto the printer at once, and up to 16 colours in one job.
Made to order, ships in about 7 days.
SKU · BL-AMSHUB-X1P1
Bambu Lab
Bambu Lab Filament Path Parts
Everything that carries filament from the spool to the nozzle. Here's what to buy for a tangle, a jerky pull, a worn tube, or a printer running more AMS units than it can talk to on its own.
Which part do you need
Ten parts, ten different jobs. Pick the one that matches what's actually going wrong.
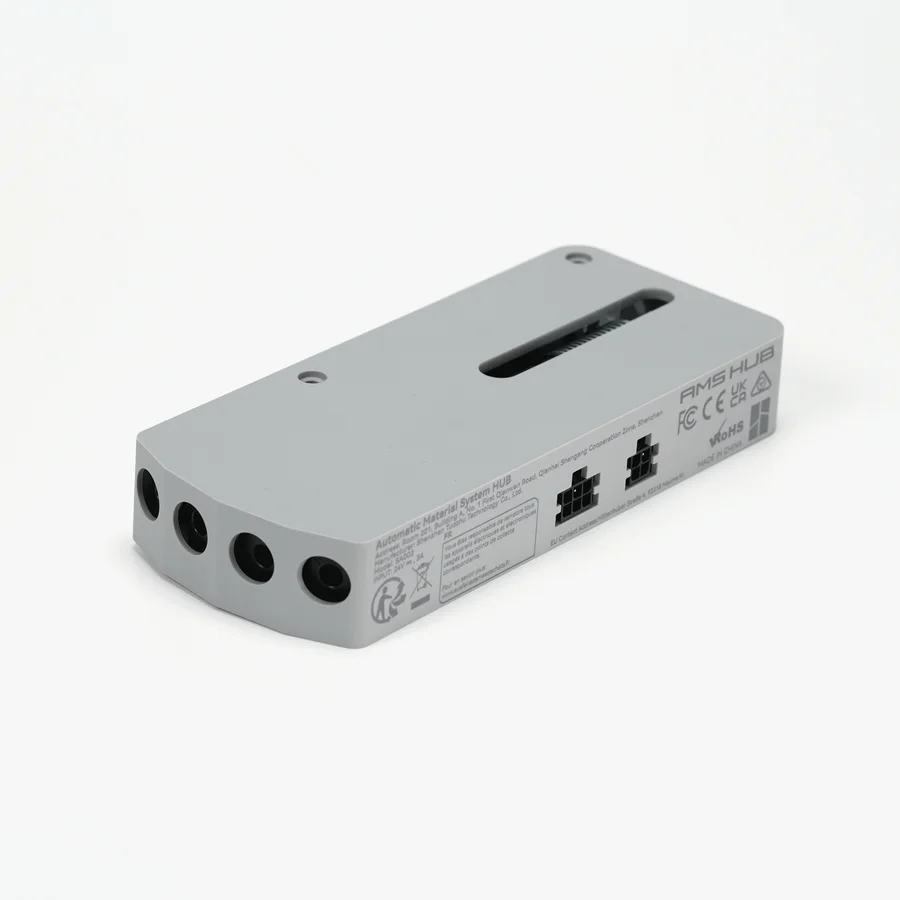
AMS HubFrom S$40
Splits one AMS port into four, so an X1, P1 or A1 series printer can run more than one AMS 2 Pro at once. Buy the version that matches your printer, not the AMS you're adding.
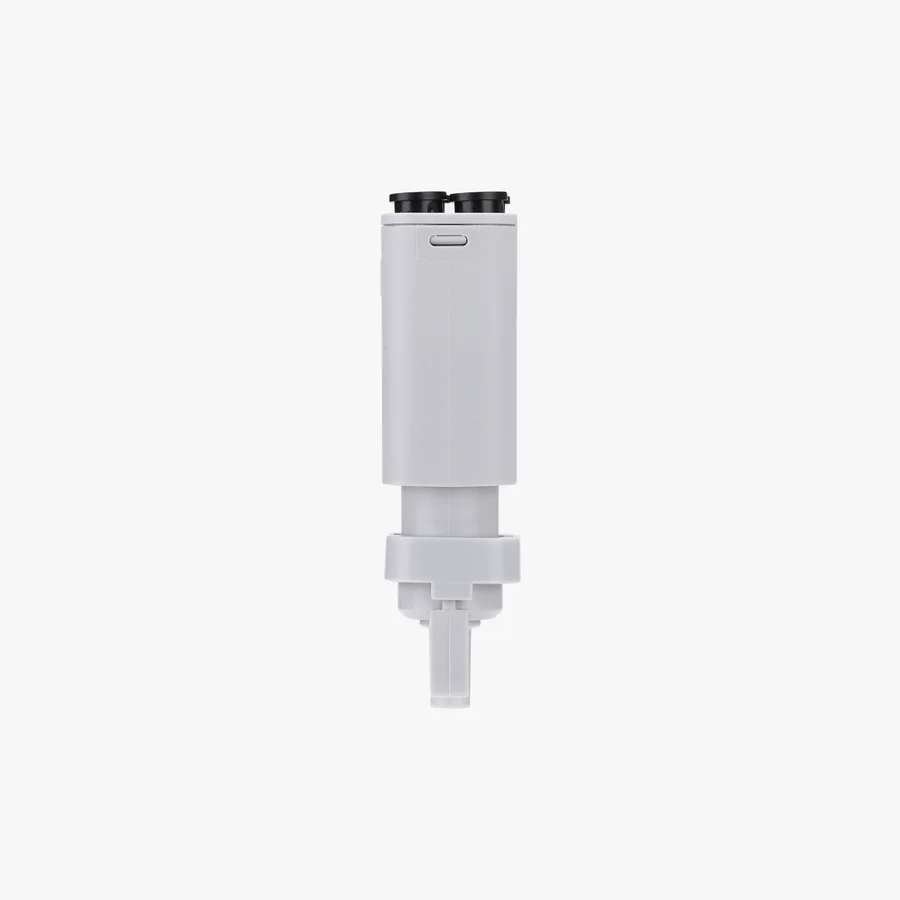
AMS lite HubS$12
The small part the AMS lite's four tubes all end in, and the thing its tangle alarm depends on. A spare for a worn or failed original, not an upgrade.
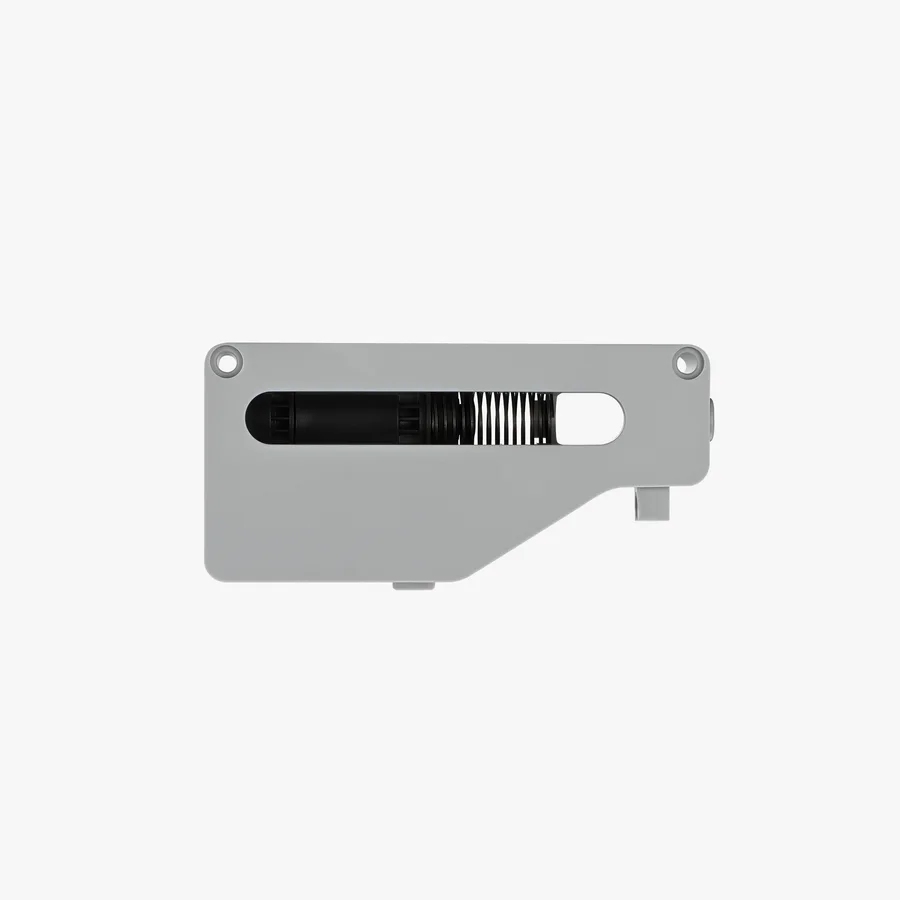
Filament BufferFrom S$50
Smooths the pull between an external AMS and the toolhead. You need one per AMS unit, and the connector is specific to your printer series.
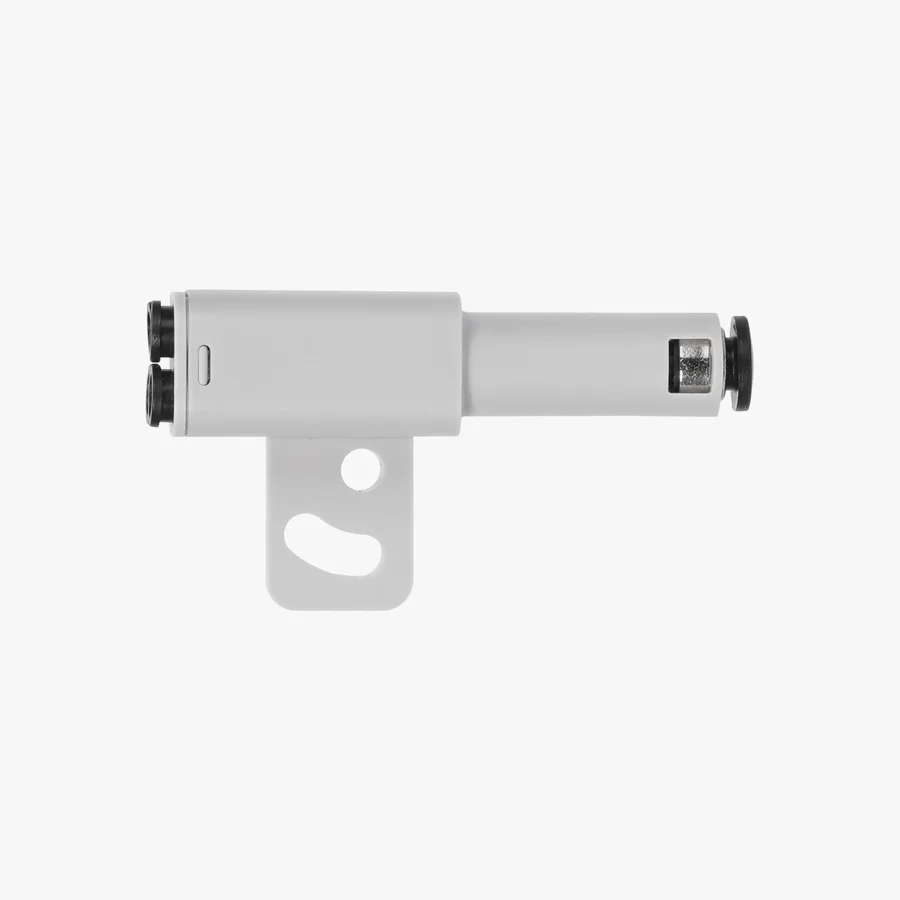
4-in-1 PTFE AdapterFrom S$10
Merges four AMS feed lines into the single path the toolhead reads. You need this once you're chaining more than two AMS 2 Pro units.
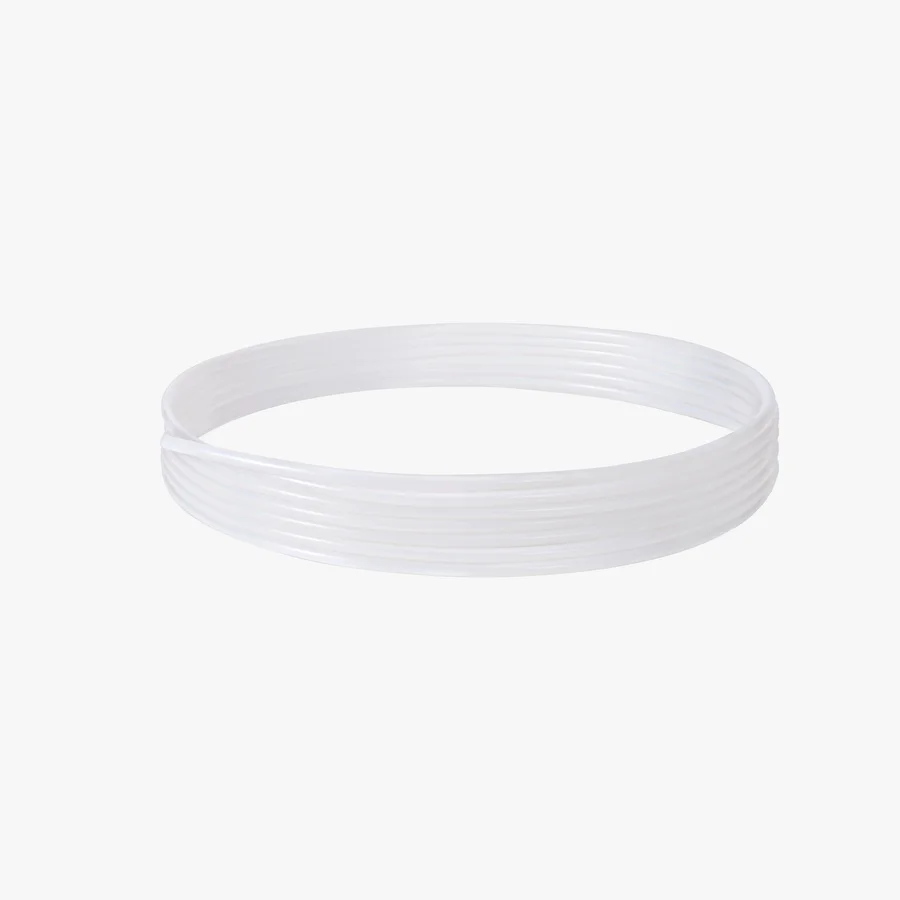
PTFE TubeS$20/roll
A 4 metre roll you cut to length, in white or grey. What you buy when a feed run is kinked, scored inside, or worn out by abrasive filament.
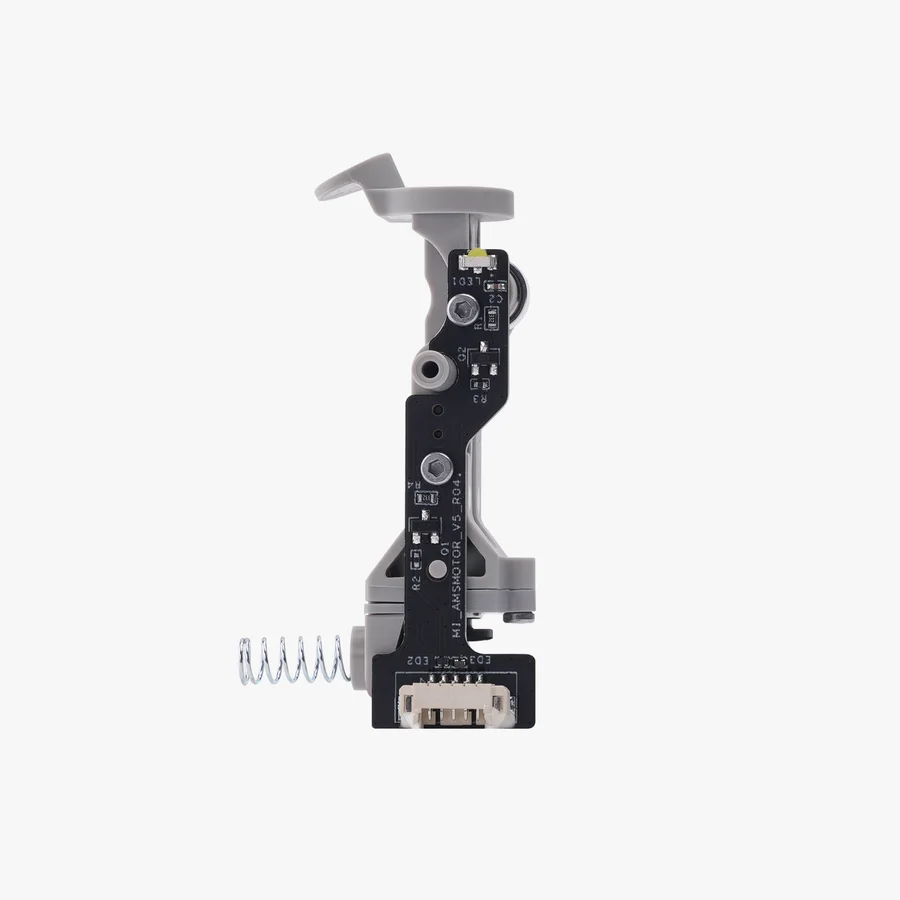
AMS Feeding FunnelS$16
The sensor stage inside an AMS's first feeder: it reads an inserted filament and pulls it forward automatically.
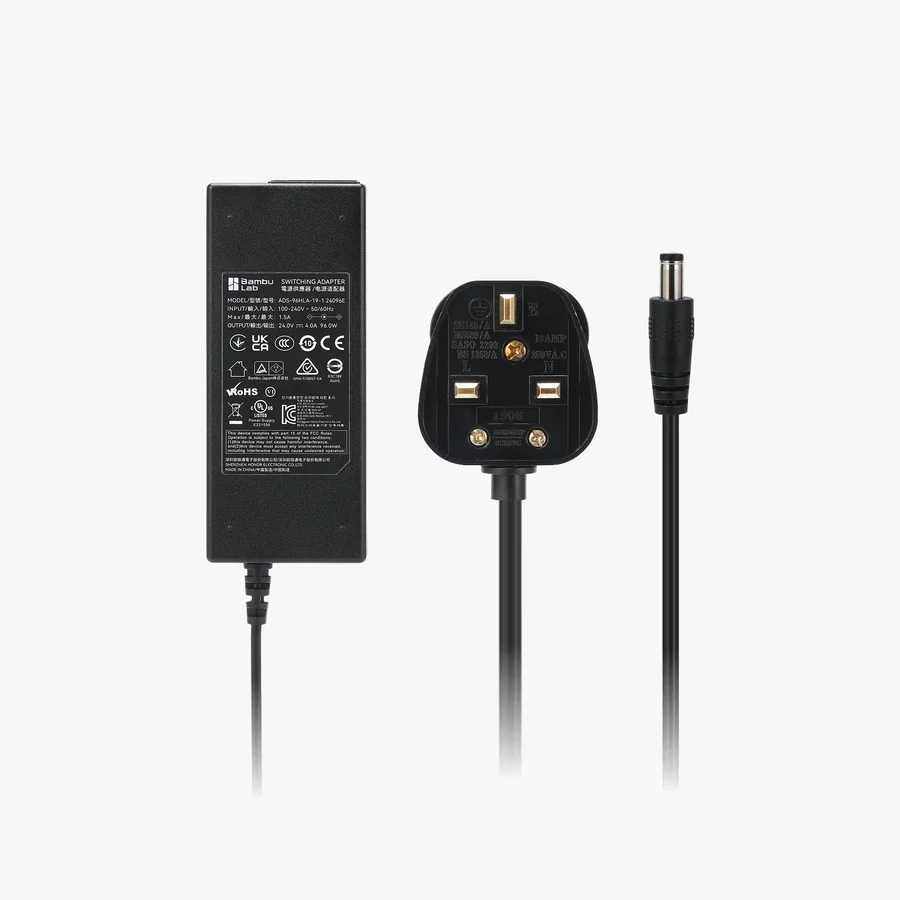
AMS 2 Pro Switching AdapterS$59
24V 4A power for an AMS 2 Pro that the printer itself can't power for drying, typically a second or later unit in a chain.
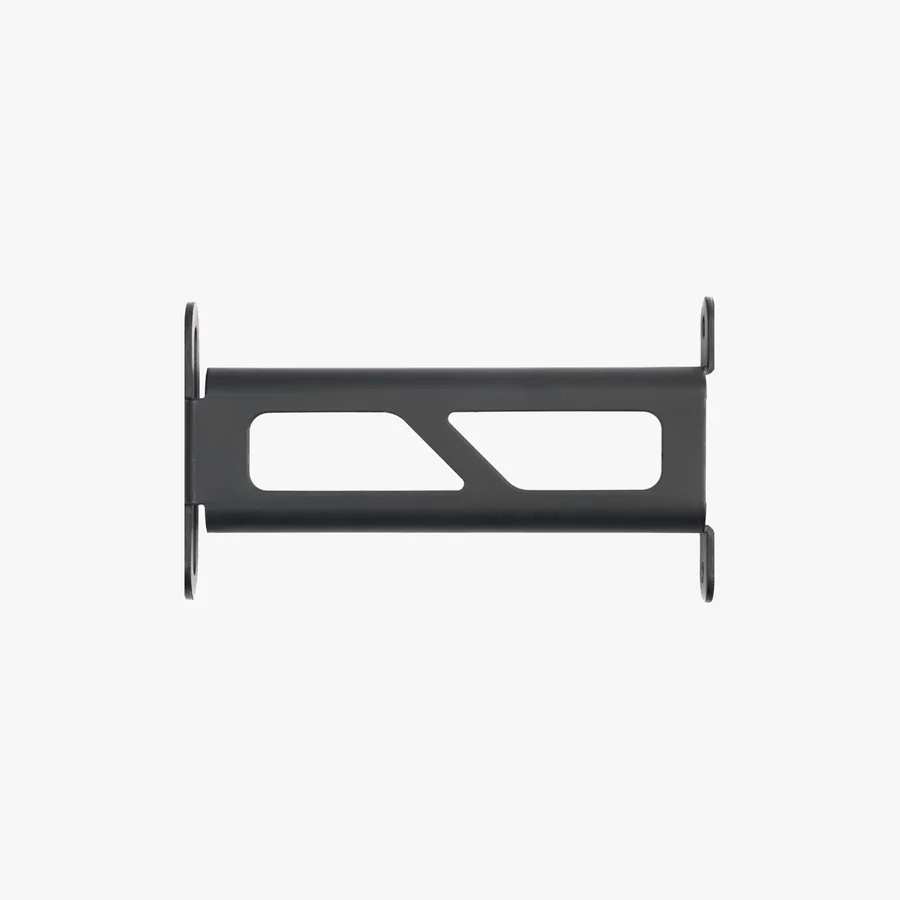
Spool HolderFrom S$6
The holder that mounts a spool directly to the printer. A different shape for the X1/P1 series, the A1 mini and the full-size A1.
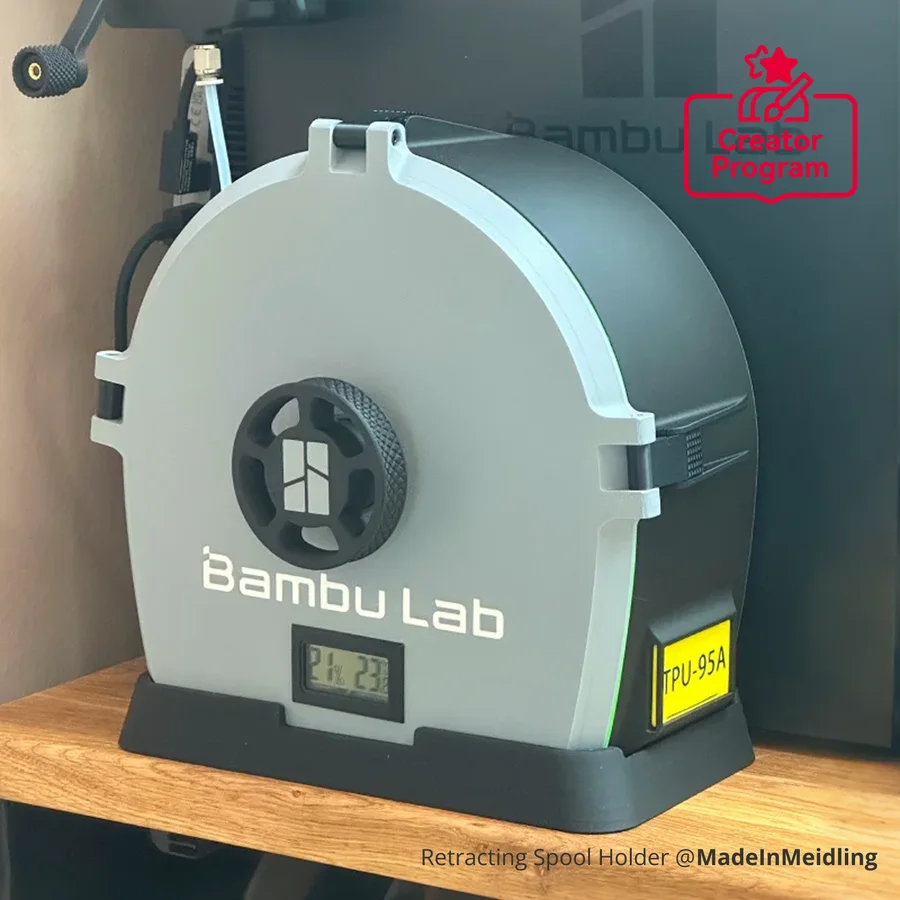
Retracting Spool HolderS$22
A Creator Program hardware kit, not a finished part. You get five pneumatic connectors, bearings, screws and a digital thermometer/hygrometer, and you print the body yourself from the MakerWorld model.
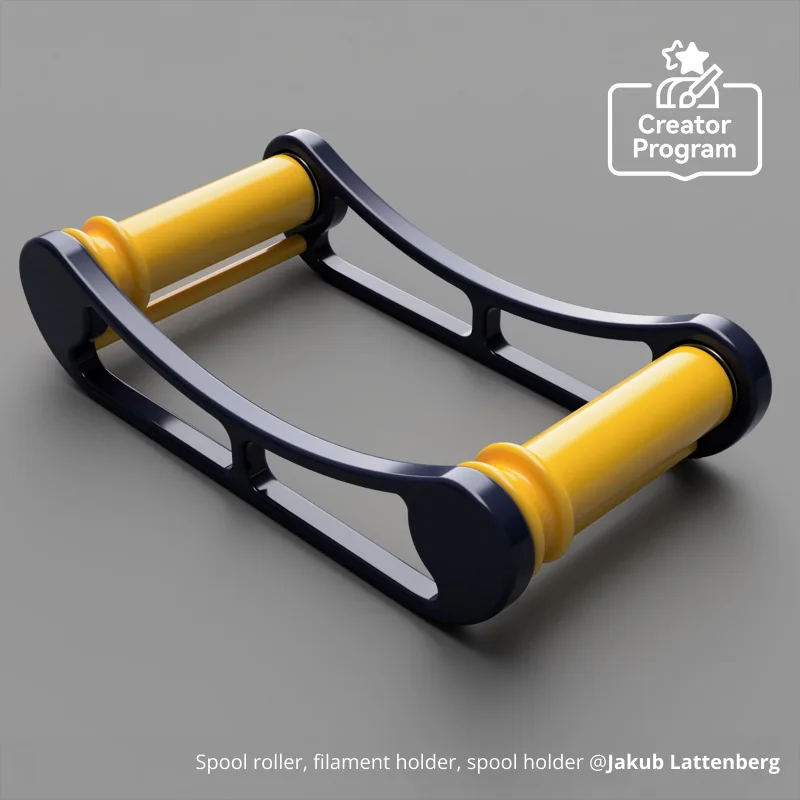
Filament Spool RollerS$8
The other Creator Program kit. You're buying the bearings; the stand they turn in is a model you print yourself.
The path, end to end
Every part on this page is a link in one chain. Read it in order and you'll usually spot the link you're missing.
The reel
A Spool Holder mounts the reel to the printer and carries the PTFE connector the path starts at. The Retracting Spool Holder and Filament Spool Roller are Creator Program hardware kits: bearings, connectors and screws, with the body printed from a MakerWorld model.
The changer
An AMS takes over from the holder once you want more than one colour. The Feeding Funnel is the sensor stage that reads a filament as you push it in. The AMS lite Hub is the toolhead junction its four tubes land in.
The signal
One AMS port per printer. An AMS Hub fans it out to four so several units can chain, and a Switching Adapter gives a unit its own 24V supply when the printer can't power its drying.
The junction
Several AMS units mean several feed lines and one toolhead. The 4-in-1 PTFE Adapter is where they merge, and you need it past two chained units.
The smoothing
A Filament Buffer takes up the short jerky tugs the extruder makes, so the line arriving at the toolhead stays even. One per external AMS, matched to the printer series.
The line itself
PTFE tube carries the filament the whole way and cuts friction along it. Every other part on this list is something that line runs into, out of, or through.
One AMS becomes four
One hub per printer, not one per AMS, and it has to match the printer's series.
An X1 or P1 series printer talks to one AMS port. The AMS Hub splits that single connection out to four, so up to four AMS units chain onto one printer, up to 16 colours in a single job.
It's two modules in one shell, which is why it replaces the buffer rather than joining it. A filament selection module carries four inlets, one per AMS, each with a Hall sensor watching for filament. Behind it sits a buffer module that's functionally the same slider, spring and Hall sensor as the standalone Filament Buffer. So it selects and it buffers, and the buffer you took off has nowhere left to go.
Specs: 140 × 60 × 22 mm, 84 g, plastic, metal and PCBA, 24 V 3 A in. The box holds the hub, two 1.5 m 6-pin bus cables, a PTFE tube and two M3×28 screws. You still need a 4-pin cable to reach the printer, and a four-unit build needs two more 6-pin cables and two more 2 m PTFE tubes on top.
The A1 series takes a different, smaller hub, and this is one to get right: Bambu says using the AMS buffer or the X1/P1 AMS Hub on an A series printer may damage the part and voids its warranty cover. The A1 hub is also what lets an A1 run a full AMS 2 Pro instead of being stuck with the AMS lite, which can't chain or dry filament. See the AMS page for what each unit does.
The hub that lives on the toolhead
Not a printer hub. It's the junction on top of the extruder where the AMS lite's four tubes land.
An AMS lite doesn't feed through a buffer, because it's single-stage: each of its four holders pushes filament down its own PTFE tube straight to the toolhead. All four tubes end at this small part, which clips to the top of the extruder. Four in one end, the extruder inlet at the other.
It's also half of the tangle detector. There's a magnet under the hub and a spring-loaded feed bracket carrying a Hall sensor. When feed resistance climbs, the hub is pushed down, the magnet approaches the sensor and the printer raises the alarm. A worn hub doesn't just drop tubes, it costs you the warning that something is snagging.
In the box: the hub plus two buckles that secure it on the toolhead. Plastic and metal, 30 g packed. The failure that sends people here is exactly one thing: it stops holding a PTFE tube, and the tube pops out under feed pressure.
The shock absorber between AMS and toolhead
A buffer is mandatory between the printer and any AMS, AMS 2 Pro or AMS HT. It's not an optional extra.
Those three units all feed in two stages: an internal feeder pushes filament into an assist motor, which pushes it on toward the toolhead. The toolhead extruder and that assist motor are never perfectly speed-matched, and the buffer is what absorbs the difference. Inside it there's a slider, a spring and a Hall sensor: filament pressure moves the slider, the sensor reads its position and reports back to both the AMS and the printer, and the AMS trims its feed speed so tension stays in a controlled band. The slider's travel is literally a reservoir of slack.
The X1/P1 version runs at 24 V and under 10 mA, with a 4-pin 3 mm-pitch snap terminal in and a 6-pin out. On the H2 series, P2S and X2D the buffer does more than buffer: it also carries a filament sensor, so the printer knows whether filament is still passing or has snapped inside, and the tangle detection for external spools.
Whether you buy one depends on the printer. The H2 series and X2D have one built in, so there's nothing to add. A P2S Combo includes one; a standalone P2S plus a standalone AMS needs one bought. On the X1 and P1 series you need one for a single AMS, and you swap to the AMS Hub the moment you add a second. An AMS lite is the exception to all of it: single-stage feed, no buffer at any point.
The H2S version of this part is currently out of stock at Bambu. Message us if you need one and we'll flag you when it's back.
Routing more than one AMS into a single line
Four tubes in, one out, no electronics. What matters is which end and which side.
Chain several AMS units onto one printer and you've got several PTFE lines that have to merge into the single feed path the toolhead uses. The adapter is that junction: four inlets, one outlet, a passive part with nothing to fail electrically. It also works with no AMS at all, giving the printer up to four direct spool inputs, or one AMS plus three direct inputs for seven filaments, which is how people feed TPU 95A and carbon-fibre filament that an AMS won't take.
Direction is not a detail. The tube from the toolhead goes on the OUT end; the buffer output or your direct spools go on the IN end. Bambu's line is blunt: reversing the connections may cause filament blockage. And the adapter sits between the AMS units and the buffer, on the buffer's left, never after it. A filament path that bypasses the buffer jams. Keep the adapter-to-buffer tube around 10 cm, because a long or sharply bent one adds friction right where you least want it.
There are two versions and they aren't interchangeable. The standard adapter (FAZ013-N) covers the X2D, P2S, P1 series, X1 series and A2L. The H2 version (SA014) has an internal filament cleaning pad that traps debris before it reaches the toolhead, and an H2C requires it: without the pad, debris settles on the Vortek induction hotends and interferes with them. The standard one is therefore not compatible with an H2C's right hotend. Other models can use either.
In the box: the standard version is the adapter alone; the H2 version ships with five spare cleaning pads. Plastic and metal, 0.03 kg, 60 × 60 × 30 mm packed. You need one once you're past two AMS units on most machines, or past one on an H2S or A2L.
A worn or kinked feed tube
2.5 mm inner, 4 mm outer, and Bambu counts it as a consumable rather than a fitting.
PTFE lines the path between the AMS and the toolhead. Its job is to guide the filament and keep feeding resistance low, which is entirely down to PTFE's low friction coefficient. The tube we sell is Bambu's own, 2.5 mm inner diameter and 4 mm outer, which is the size of every external run: AMS to buffer, buffer to toolhead, spool holder to buffer. Bore is worth a second look before you cut, though. Bambu's own reference table lists 2.0 mm inner for the tubes inside an AMS and for the X1 and P1 external runs, so if you're replacing one of those, tell us the run and we'll confirm the part rather than guess.
One roll covers a full re-tube on most single-AMS setups. Lengths differ per run and per printer, and the table further down this sheet lists Bambu's own figure for each one.
It wears because filament rubs on it every load and unload, so Bambu treats it as a consumable and the printer prompts a check every 2 months. Replace it every 2 months in normal use, and monthly if you run abrasive filament like carbon fibre blends or glow-in-the-dark, or sooner if the wear is visible. Left too long, a worn tube gives you feeding failures and filament piling up inside the AMS.
Replace a run early if it kinks, if filament binds partway through a print with no other explanation, or if you can see scoring inside the bore or a bell-mouthed end. Cut it square when you fit the new one: the cross-section should be a perfect circle. And as long as feeding resistance stays fine, shorter is better, because a shorter tube actually reduces print time.
The funnel is where the AMS feels the filament
A funnel-shaped inlet and a sensor board. It's the part that notices you pushed filament in.
It's the inner component of the AMS first-stage feeder: the structural funnel plus a filament detection sensor board running at 6.6 V. When the board sees filament arrive, the feeder pulls it in on its own. When an insertion is abnormal, the same board tells the printer. Plastic and PCBA, 30 g packed, one funnel in the box.
Three symptoms send people to this part. The inlet is worn or grooved enough to drag on load and unload. You push 10 cm of filament in and the slot never registers it. Or the slot insists filament is present when it's empty.
Try clearing it first. Most of those are filament debris or a snapped end lodged in the funnel: push a length of filament in and out a few times and watch the slot's LED before you order anything. The AMS 2 Pro's funnels are ceramic and last much longer, so on those, replace only for persistent drag, deformation or a visible groove.
One warning from Bambu before you buy. The first-stage feeder's circuit board was revised, and the change affects units built on the earliest AMS mainboard. Check your AMS mainboard version on the wiki first, or tell us roughly how old the unit is and we'll check it with you.
Power for drying, never for feeding
24 V 4 A. If you never use the drying function, you never need one.
Moving filament costs an AMS very little power. Heating it is what needs real current, and that's the only reason this part exists. Feeding is unaffected either way.
Who needs one, precisely. On an X1, P1, A1 series or A2L printer, every AMS 2 Pro that dries needs its own adapter, always, because those printers never supply drying power. On an H2 series, P2S or X2D the printer powers one unit's drying for free, and every additional unit drying at the same time needs its own.
Even with a single unit on one of those newer machines, Bambu recommends the adapter anyway: if the printer is feeding or printing while it powers the dryer, drying power drops automatically to protect the print. On a P2S it's blunter. Without the adapter the printer can't heat or move while the AMS dries; with it, the P2S prints and dries at once.
The symptom is specific: the drying page reports insufficient power and the power icon at the bottom right stays grey instead of turning green. Use the official adapter rather than a third-party 24 V brick, which Bambu warns can damage the unit and affect warranty cover. And an AMS HT never uses this part, it ships with its own mains cord.
Keeping the reel under control
Three answers to a reel that won't stay where you put it, and only one of them arrives finished.
The plain spool holder is the arm that carries the reel, and it comes in three shapes. The X1 and P1 series one is metal and plastic, and takes two screws on the back of the printer. The A1 mini's is a grey plastic part that slides onto the Z-axis column, matching the slot orientation. The full-size A1's is a larger white plastic holder, and Bambu ships two versions of it at random, the newer of which needs no assembly.
It does more than carry weight. It also holds the PTFE tube connector that the whole filament path starts at, and on the A1 and the P2S that connector is a separate serviceable piece held by a round-head screw you undo with an H2.0 Allen key. A holder that has failed is very often a connector that stopped gripping the tube.
If a large spool won't sit flush, Bambu's own options are to take the filament buffer off, feed from an external holder or dry box, or print a holder sized for it. Tell us your machine and we'll say which applies.
Two of these you finish yourself
Creator Program parts are a bag of hardware plus a model you print. That's the whole product.
Bambu's Creator Program pairs a maker's design with a hardware kit. You buy the parts that can't be printed, download the model files from MakerWorld, and print the rest on the machine you already own. Neither of these two has a wiki page, because there's no factory assembly to service.
The Retracting Spool Holder kit is five M3×30 screws, twenty M3 brass heat-set nuts, four 608zz ball bearings, five M5×12 screws, five PC4-M6 pneumatic connectors for PTFE tube, and one embedded digital thermometer and hygrometer. Read that list back and what it describes is a printed dry box with five feed-throughs and a humidity readout, not a tension device.
The Filament Spool Roller kit is smaller: four 608ZZ ball bearings and twenty M3×8 screws. The bearings are the point. They're what lets a spool turn under almost no load, which is the difference between a reel that feeds and a reel that drags on the extruder.
Buy either if you enjoy the build and want the hardware to be the right hardware. If you want something that works out of the box, the plain spool holder for your printer is the answer instead.
Before you order
The parts are matched to the printer, not to the AMS. Tell us the model.
Every part here is genuine Bambu Lab. The AMS Hub, Filament Buffer and 4-in-1 Adapter are matched to a specific printer series, so they're not universal. Tell us your printer model and how many AMS units you're running, and we'll confirm exactly which parts the setup needs before you pay for the wrong one.
Prices exclude GST. We add 9% at checkout. PayNow is free; paying by card adds a flat 4% processing fee. Self-collect free at Bendemeer, or islandwide courier at $15 flat, free once the order passes $250 before GST.

Symptom and fix
What's actually going wrong points straight at the part that fixes it.
| If this is happening | What fixes it |
|---|---|
| A reel wobbles on the printer, or the tube won't stay in the holder's connector | A Spool Holder for your model. On the A1 and P2S the PTFE connector on it is a separate serviceable piece held by one round-head screw |
| You want a dry box or a free-turning stand and you don't mind printing the body | The Creator Program kits. You buy the bearings, connectors and screws; the model comes off MakerWorld |
| Extrusion looks uneven even though the AMS is feeding fine | A Filament Buffer, one per external AMS unit, smooths the pull before it reaches the toolhead |
| Feeding surges and stalls, or the tangle alarm keeps crying wolf | The buffer's slider or Hall sensor. Clean it first. On a P2S the pneumatic connector on the buffer is a separate part and is the usual reason a tube won't stay seated |
| A large-diameter spool fouls the buffer and won't clear it | Bambu's own answer is to take the buffer off and feed from an external holder or dry box instead |
| You want more than one AMS on an X1, P1 or A1 series printer | An AMS Hub fans the single AMS port out to four |
| Filament reaches the hub, retracts, and refuses to pass | The hub's internal spring is stuck or compressed. Clean it, and check the AMS is sitting to the left of the hub with the tube routed under the spool holder |
| A tube keeps popping out of the AMS lite's toolhead junction, or the tangle alarm has gone quiet | The AMS lite Filament Hub. It holds the four tubes and carries the magnet half of the tangle detector, so a worn one loses both jobs at once |
| Chaining more than two AMS units on one printer | A 4-in-1 PTFE Adapter merges the feed lines into one path. It goes between the AMS units and the buffer, never after the buffer |
| Debris is reaching the toolhead on an H2C | The cleaning pad inside the H2 version of the adapter is worn or torn. Dirty but intact: wipe it with a non-woven cloth and alcohol and refit it |
| A feed line is kinked, worn, or has run a lot of abrasive filament | A PTFE Tube, cut to length, replaces the run |
| Loads have got slow, filament stalls partway in, or debris is piling up inside the AMS | A worn PTFE tube. Look for scoring inside the bore, or an end that has gone bell-mouthed |
| The AMS doesn't register a spool you've just loaded | The AMS Feeding Funnel holds the sensor that reads the insertion. Clear debris from the funnel first, then replace it if the slot still can't see 10 cm of filament |
| A slot reports filament when it's empty, or the inlet has a visible groove worn into it | The same funnel. The sensor board is the reporting half, the funnel mouth is the wearing half, and they're one part |
| Drying reports insufficient power and the power icon stays grey | An AMS 2 Pro Switching Adapter gives that unit its own 24 V 4 A supply. This is a drying problem only: feeding is unaffected |
Which parts your printer needs, by AMS count
Find your printer, count the AMS units you'll be running, and buy the row. This is the connection side only: drying power is the note underneath.
| Printer | One AMS | Two AMS | Three or four AMS |
|---|---|---|---|
| X1 / P1 series | Filament Buffer, PTFE tube coupler and a 4-pin cable | AMS Hub instead of the buffer, plus the coupler and the 4-pin cable | AMS Hub, plus one 6-pin bus cable and one 2 m PTFE tube for every unit past the second |
| A1 and A1 mini | A1 Series AMS Hub, and it's mandatory | The same A1 Series AMS Hub | The same hub, up to 4 units. Firmware 01.07.00.00 or later |
| A2L | Nothing extra, the PTFE tube coupler is in the tool kit | 4-in-1 PTFE Adapter | 4-in-1 PTFE Adapter |
| H2D and H2C | Nothing extra, the buffer is built in | Nothing extra. The built-in buffer has two inlets, so two units or one unit plus an external spool go straight in | 4-in-1 PTFE Adapter. An H2C needs the H2 version, the one with the cleaning pad |
| H2S | Nothing extra, the buffer is built in | 4-in-1 PTFE Adapter | 4-in-1 PTFE Adapter |
| P2S | P2S Filament Buffer, unless you bought the Combo, which includes one | The same buffer | Buffer plus a 4-in-1 PTFE Adapter |
| X2D | Nothing extra, the buffer ships with the printer | Nothing extra | 4-in-1 PTFE Adapter, the standard version |
Swipe the table sideways for every column
Drying is a separate question from feeding. On an X1, P1, A1 series or A2L, every AMS 2 Pro that dries needs its own Switching Adapter, always. On an H2 series, P2S or X2D the printer powers one unit's drying for free and every extra drying unit needs its own adapter. An AMS HT never needs one, it ships with a mains cord. An AMS lite needs none of this at all: no buffer, no hub, no adapter, because it feeds in a single stage straight into the toolhead.
How many units each printer will take
The ceiling, once the parts above are in place.
| X1 / P1 series | 4 units in total, any mix of AMS, AMS 2 Pro and AMS HT. 16 colours, through the AMS Hub. |
|---|---|
| A1 and A1 mini | Up to 4 units, any mix of AMS, AMS 2 Pro and AMS HT. Or one AMS lite, which can't be combined with anything else. |
| A2L | Up to 4 AMS plus 1 AMS lite, 19 colours. |
| P2S | 4 AMS 2 Pro and 4 AMS HT, so 8 units and 20 slots. |
| H2 series and X2D | 4 AMS 2 Pro and 8 AMS HT, so 12 units and 24 slots. On the dual-nozzle H2D, H2C and X2D you can reach 25 colours with an external spool. The single-nozzle H2S tops out at 24. |
Two wiring rules that catch people out. Use the new 6-pin bus cable that shipped with your AMS 2 Pro or AMS HT: the first-generation AMS cable has a 1.1 mm step height against the new one's 2.5 mm and causes unstable communication. The new cable works fine on an old AMS, not the other way round. And on a P2S, daisy-chain off the AMS, not off the buffer's second 6-pin port, which is a spare for power and expansion rather than a second AMS port.
Every part, spec by spec
Bambu's own published figures for all ten. Your selection is highlighted; the rest stays on the page because half the job here is telling two similar parts apart.
| Part | Made of | Size and weight | Fitting or electrical | In the box |
|---|---|---|---|---|
| AMS Hub, X1 / P1 | Plastic, metal, PCBA. Grey | 140 × 60 × 22 mm, 84 g (321 g packed) | 24 V 3 A in. 4-pin cable to the printer, 6-pin to each AMS | Hub, 2 × 6-pin bus cable (1.5 m), PTFE tube, 2 × M3×28 screw. The 4-pin cable to the printer is not included |
| AMS Hub, A1 series | Plastic. White and black | 0.1 kg packed | 4-pin cable to the printer | Hub, 4-pin cable, PTFE tube about 600 mm, PTFE tube about 520 mm |
| AMS lite Filament Hub | Plastic and metal. Grey | 30 g packed | Passive. Four PTFE tubes in, clips to the top of the extruder | Hub × 1, 2 buckles to secure it on the toolhead |
| Filament Buffer, X1 / P1 | Plastic, PCBA. Grey | 50 g packed, 109 × 55 × 33 mm | 24 V, under 10 mA. 4-pin 3 mm-pitch snap terminal in, 6-pin out | Buffer, 2 × M3×21.5 screw |
| Filament Buffer, H2 series | Plastic and PCBA | 0.121 kg packed | Two PTFE inlets, so two AMS units or one plus an external spool connect without an adapter | Buffer, 4 × BT3-8 screw |
| Filament Buffer, P2S | Plastic and PCBA | 0.063 kg packed | Two 6-pin ports, but only one takes an AMS. The other is a spare for power and expansion | Buffer, 2 × ST3×24×7 screw |
| Filament Buffer, X2D | Plastic and PCBA | 0.084 kg packed | Two PTFE inlets | Buffer, 2 × ST3×23 shoulder screw |
| 4-in-1 PTFE Adapter | Plastic and metal. Black or white | 0.03 kg, 60 × 60 × 30 mm packed | Passive. Four IN ports, one OUT port, no electronics | Standard: adapter only. H2 version: adapter plus 5 cleaning pads |
| PTFE Tube | PTFE | 2.5 mm inner, 4 mm outer. 4 m roll | Push-fit into the pneumatic connector at each end | One length, cut to your run. White or grey |
| AMS Feeding Funnel | Plastic and PCBA | 30 g packed | 6.6 V sensor board | Funnel × 1 |
| AMS 2 Pro Switching Adapter | Plastic and metal. Black | 0.54 kg packed, 192 × 110 × 60 mm | 24 V 4 A out | Adapter × 1. Singapore 3-pin plug |
| Spool Holder, X1 / P1 | Metal and plastic | 0.95 kg packed | Two screws on the back of the printer | Holder × 1 |
| Spool Holder, A1 | Plastic. White | 0.35 kg packed | Bolts on. Two versions exist and ship at random; the newer needs no assembly | Holder × 1 |
| Spool Holder, A1 mini | Plastic. Grey | 100 g packed | Slides onto the Z-axis column, matching the slot orientation | Holder × 1 |
| Retracting Spool Holder kit | Steel, brass, plastic, plus the parts you print | Depends on the model you print | 5 × PC4-M6 pneumatic connectors for PTFE tube | 5 × M3×30 screw, 1 × embedded digital thermometer and hygrometer, 20 × M3×5×4 brass heat-set nut, 5 × PC4-M6 connector, 4 × 608zz bearing, 5 × M5×12 screw |
| Filament Spool Roller kit | Steel, plus the parts you print | Depends on the model you print | 608ZZ bearings carry the spool | 4 × 608ZZ bearing, 20 × M3×8 screw |
Swipe the table sideways for every column
Sizes marked packed are Bambu's shipping-carton figures, which is what the manufacturer publishes for most of these. Where a product size exists as well, both are listed.
PTFE tube lengths, run by run
Bambu's own figure for each run. Measure the old tube first if you still have it; use this when you don't.
| Run | Printer | Length |
|---|---|---|
| AMS to filament buffer | X1 / P1 | 550 mm |
| Printer pneumatic connector to buffer | X1 / P1 | 370 mm |
| Above the toolhead, internal | X1 / P1S | 550 mm (P1P 530 mm) |
| AMS to buffer | H2C / H2D / H2S | 900 mm recommended, never below 600 mm |
| External spool to buffer | H2C / H2D / H2S | 340 mm |
| Buffer to toolhead extruder | H2D / H2C | 610 mm white for the left nozzle, 590 mm black for the right |
| Buffer to toolhead extruder | H2S | 590 mm |
| Buffer to 4-in-1 adapter | H2C / H2D | 185 mm |
| AMS to buffer | P2S | 600 mm |
| External spool to buffer | P2S | 350 mm |
| Buffer to toolhead extruder | P2S | 555 mm |
| Buffer to PTFE tube coupler | P2S | 370 mm |
| AMS to buffer | X2D | 525 mm |
| External spool to buffer | X2D | 355 mm |
| PTFE coupler to main hotend | X2D | 555 mm grey |
| Auxiliary extruder to auxiliary hotend inlet | X2D | 525 mm white |
| AMS lite ports 1 and 2 to filament hub | A1 mini | 580 mm |
| AMS lite ports 3 and 4 to filament hub | A1 mini | 700 mm |
| AMS lite ports 1 and 2 to filament hub | A1 | 730 mm |
| AMS lite ports 3 and 4 to filament hub | A1 | 830 mm |
| External spool holder to AMS lite hub | A1 mini / A1 | 520 mm / 600 mm |
| External spool holder to toolhead hub | A2L | 975 mm |
Swipe the table sideways for every column
Two more rules that decide whether a long chain feeds properly. Keep the longest PTFE run in a multi-AMS setup within about 3.5 m, and keep the 4-in-1 adapter to buffer tube at roughly 10 cm. Past those, feed resistance starts costing you load time and reliability.
What wears out, and when
Only one part on this page has a published interval. Everything else is replaced on condition, so this is what to look at rather than when to look.
| PTFE tube | Every 2 months in normal use, every month on abrasive filament like carbon fibre blends or glow. The printer prompts a check every 2 months. Left too long you get feeding failures and filament piling up inside the AMS. |
|---|---|
| 4-in-1 cleaning pad, H2 version | No interval. Replace it when it's obviously worn or torn. |
| Filament buffer | No interval. Clean it before you replace it, and replace it only if cleaning doesn't settle the feeding. |
| Hubs | No interval. Service them when filament reaches the hub and retracts, when the internal spring stops moving freely, or when the hub can't hold a PTFE tube. The A1 hub fix calls for lubricant grease. |
| Feeding funnel | No interval. Clear debris first, then replace on persistent drag, deformation or a visible groove in the inlet. |
| Spool holders | No interval. Replace if the holder is cracked or bent, or if the PTFE tube connector on it stops gripping. |
| Switching adapter | No interval. It either supplies 24 V 4 A or it doesn't, and the drying page tells you which. |
Wiring a second AMS onto an X1 or P1
Half an hour with the printer off, and one step in the middle that you genuinely cannot get wrong.
Power off and unplug
Same rule as every other job inside the machine. You're about to handle mainboard connectors.
Take the buffer off, put the hub on
The AMS Hub replaces the filament buffer on the back of the printer, because it carries a buffer module of its own. Two M3×28 screws hold it.
4-pin to the printer, and check the direction twice
Bambu's own warning, word for word in spirit: insert the 4-pin cable the wrong way round and it may burn out the printer and AMS mainboards. There's no polite failure mode here, so look at the plug before you push it.
6-pin to the first AMS, then daisy-chain
Every AMS has two 6-pin ports on the back, so the second unit hangs off the first. Use the cable that came with your AMS 2 Pro or AMS HT: the first-generation AMS cable has a 1.1 mm step height against the new one's 2.5 mm and causes unstable communication. The new cable is fine on an old AMS, not the reverse. Bambu sells the 6-pin in 510 mm and 1500 mm, and 1500 mm is the usual hub-to-AMS length.
Route the PTFE
Hub to the printer's pneumatic connector, with the tube passing between the 4-pin plug and the spool holder to keep resistance down. Keep every tube as short as the layout allows and avoid winding it.
Put the AMS on the left
Bambu's placement rule: the AMS sits to the left of the hub. Put it on the right and filament jams in the PTFE tube. Route the tube under the spool holder, not over it.
Check the total run
Keep the longest PTFE run in the chain within about 3.5 m. Past that, feed resistance starts costing you load time and reliability, and the machine will tell you in failed loads rather than an error message.
Replacing a feed tube
Ten minutes. The cut is the part people rush and then pay for.
Work out which run you're replacing
Lengths differ per run and per printer, and so does the bore: external runs are 2.5 mm inner, while the tubes inside an AMS and the X1 and P1 runs are listed at 2.0 mm. Check the length table above before you cut anything.
Unload the filament first
Unload from the AMS or the extruder so nothing is sitting in the tube you're about to pull.
Pull the old tube and measure it
Press the collet on the pneumatic connector and draw the tube out. Lay the old length against the new roll and mark it. If the old one is missing or mangled, use the run length from the table.
Cut it square
Perpendicular, with a sharp blade or nippers. Bambu's own test: the cut cross-section should be a perfect circle and the side straight. A slanted cut leaves a lip for the filament tip to catch on, which is exactly the fault you're trying to fix.
Seat both ends fully
Push the tube all the way into the connector until it stops, then tug it gently to confirm the collet has bitten. A tube that looks seated and isn't will pop under feed pressure.
Keep it short
As long as feeding resistance stays acceptable, a shorter tube reduces print time. Don't leave a tidy loop of slack, and keep the 4-in-1 adapter to buffer run at about 10 cm.
Reload and watch the first load
Run a load and watch it go in. If the filament stalls partway, the cut is the first suspect and the routing is the second.